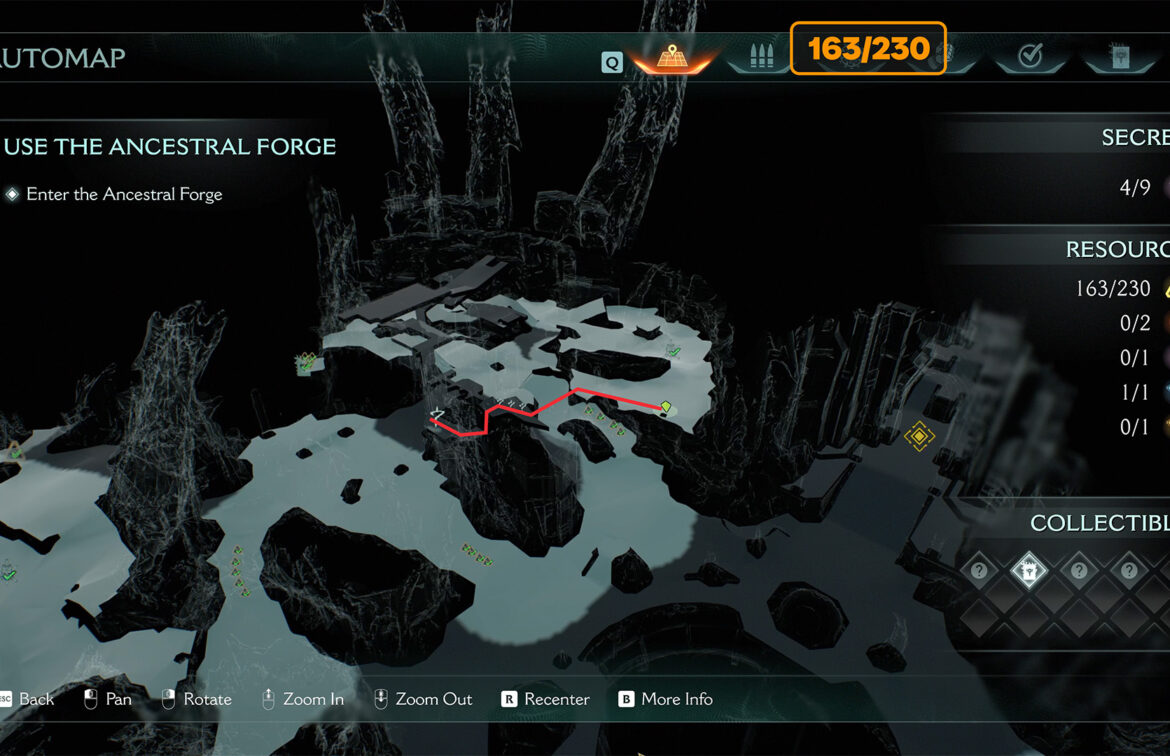
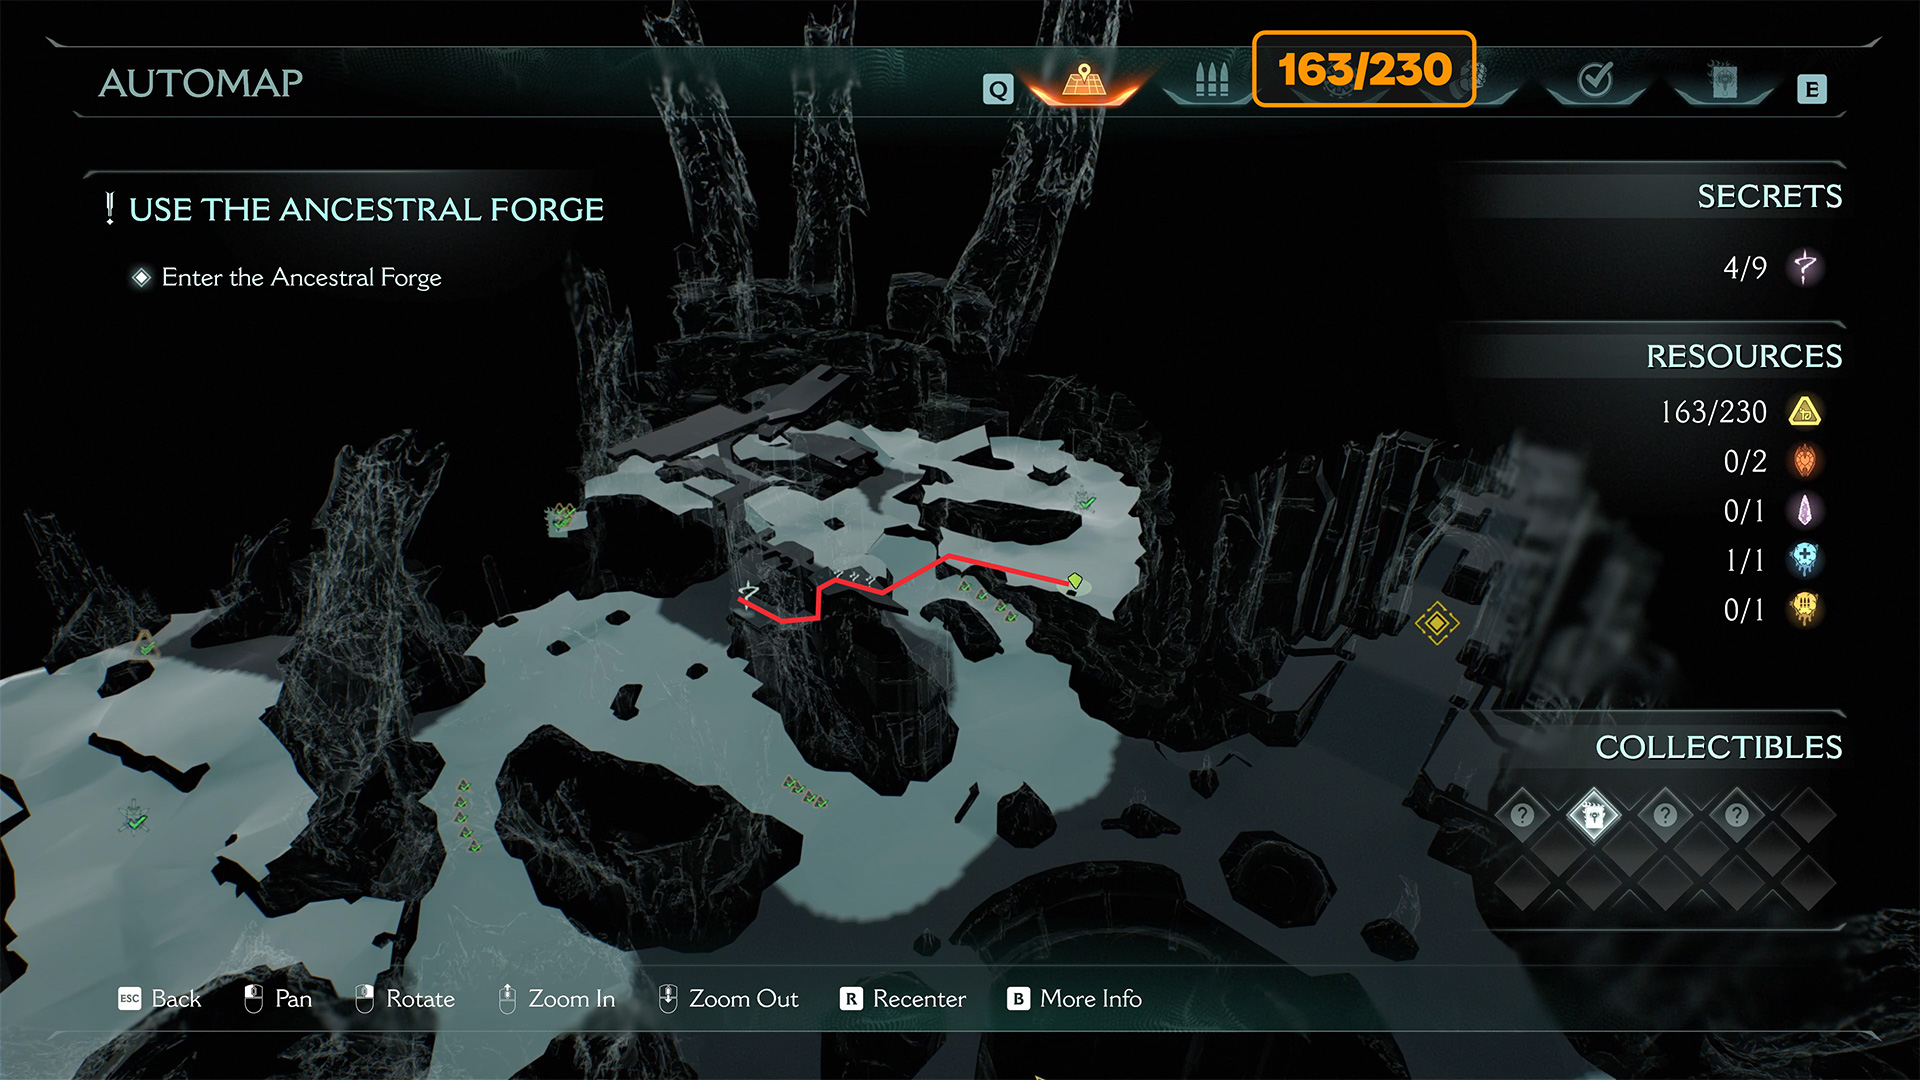
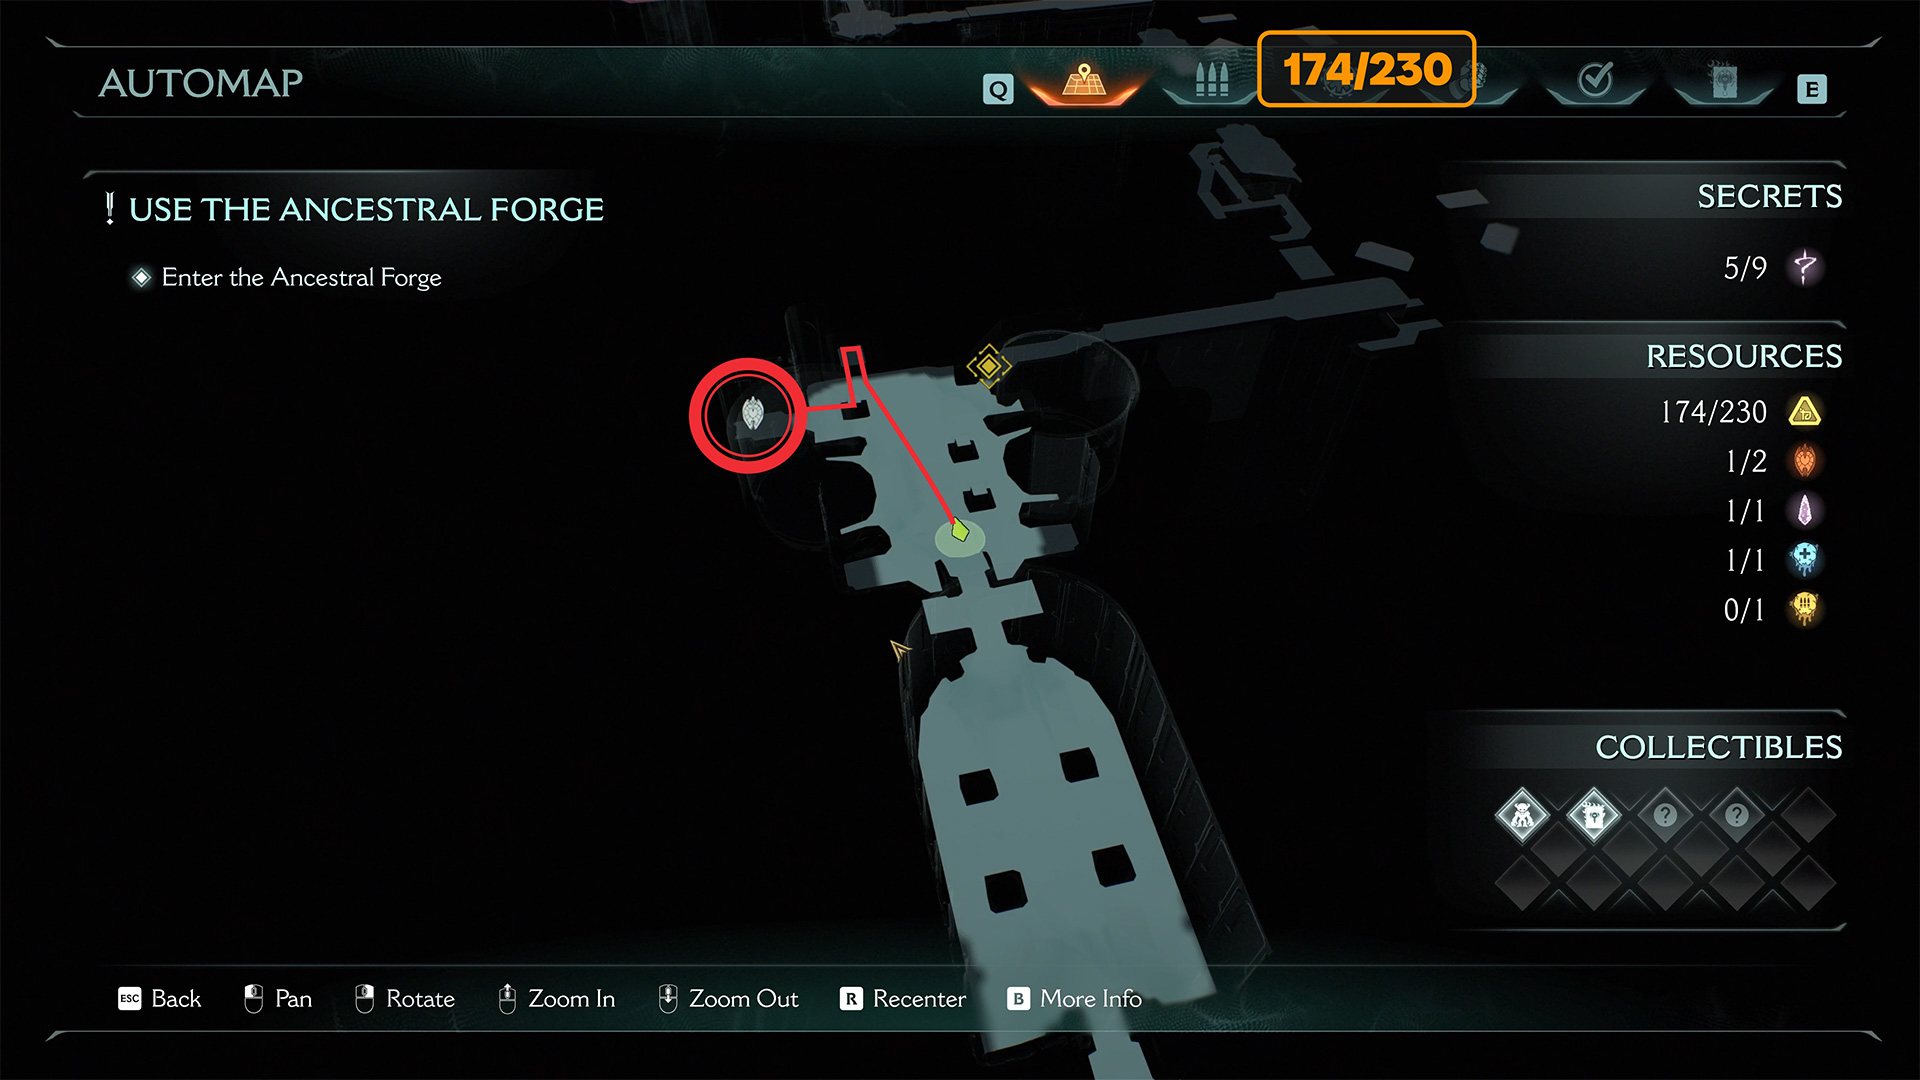
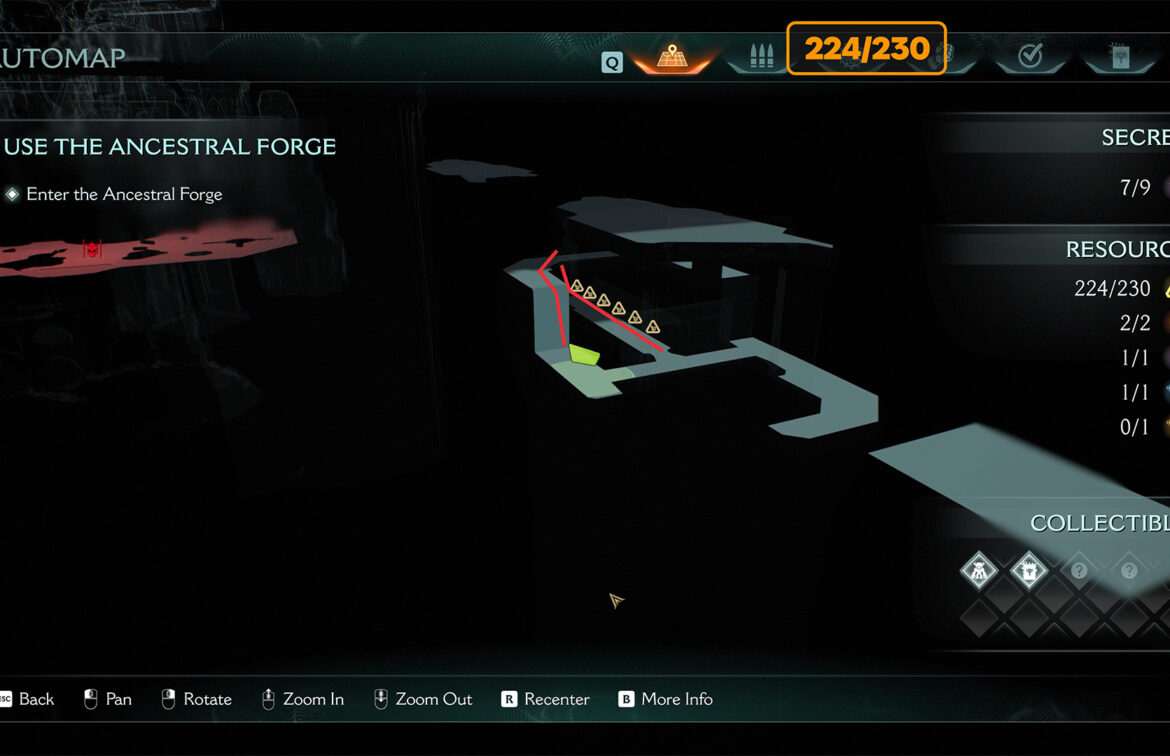
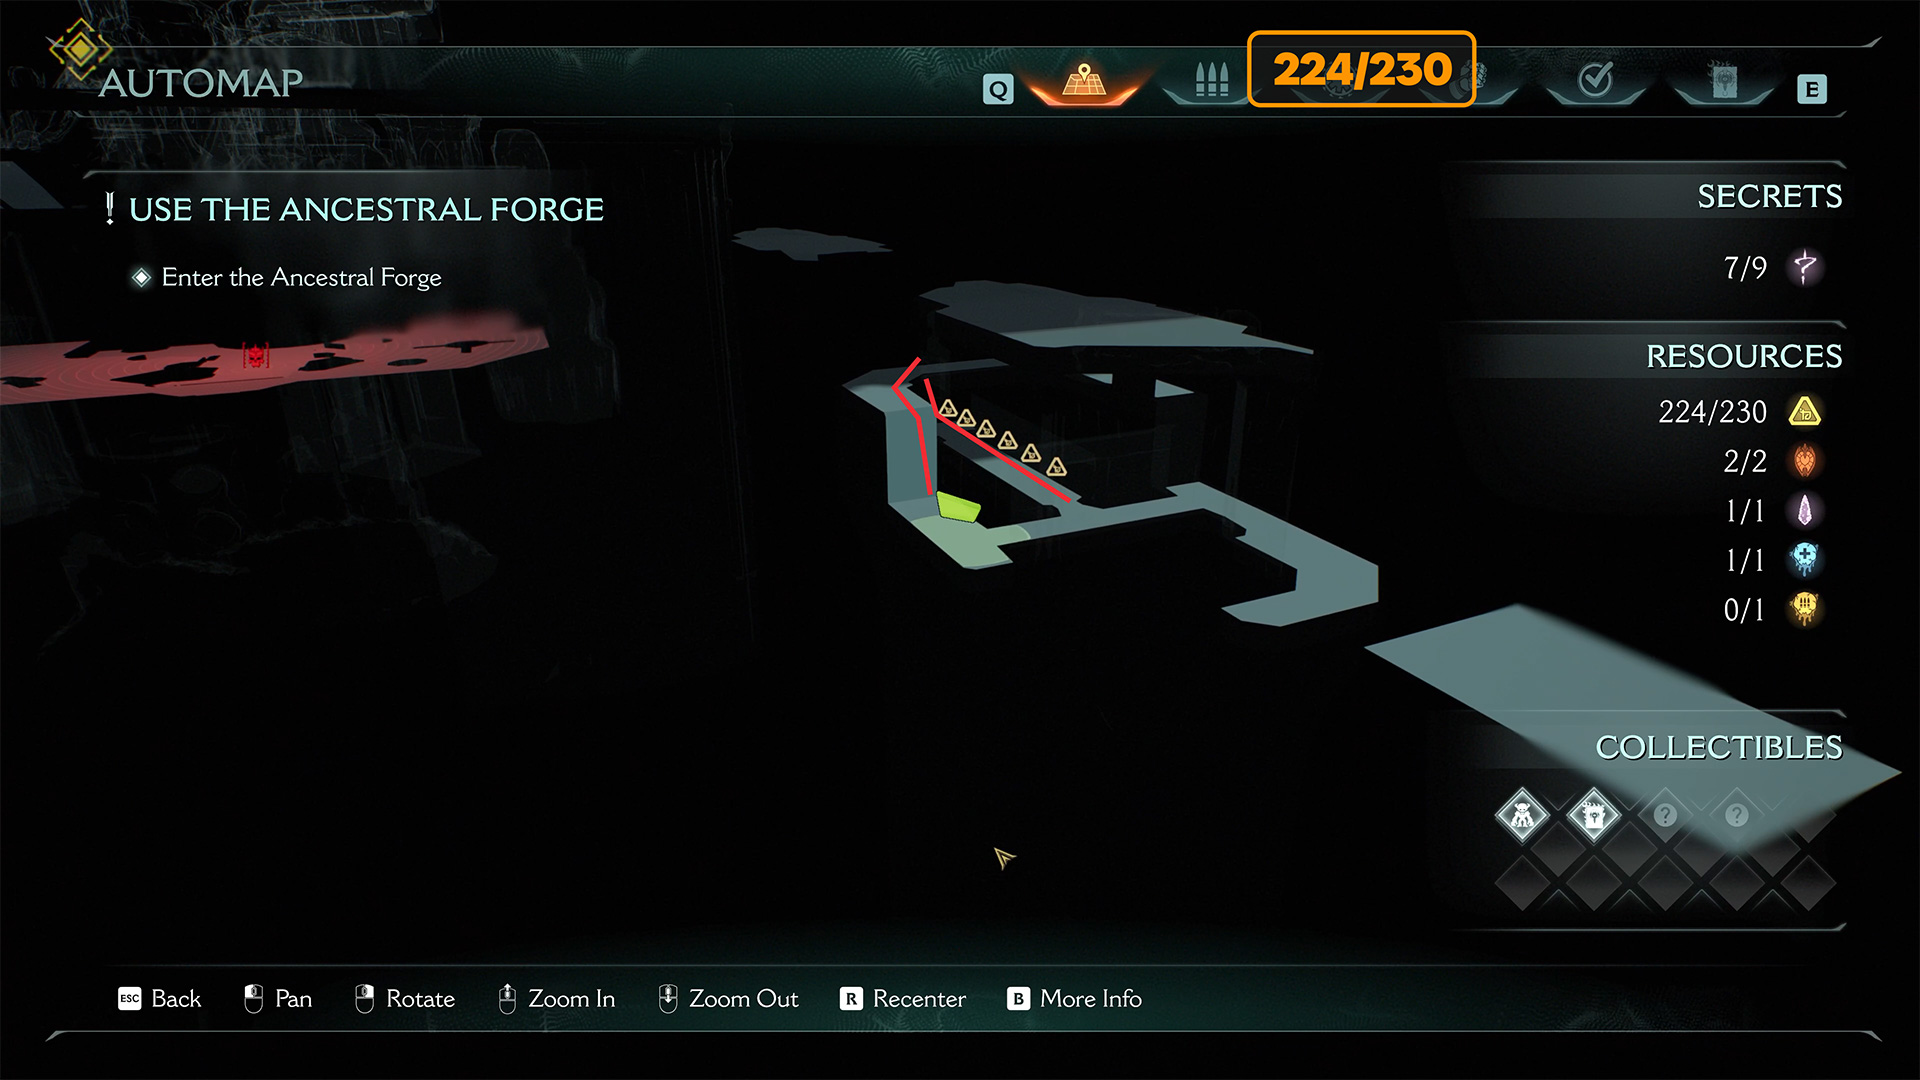
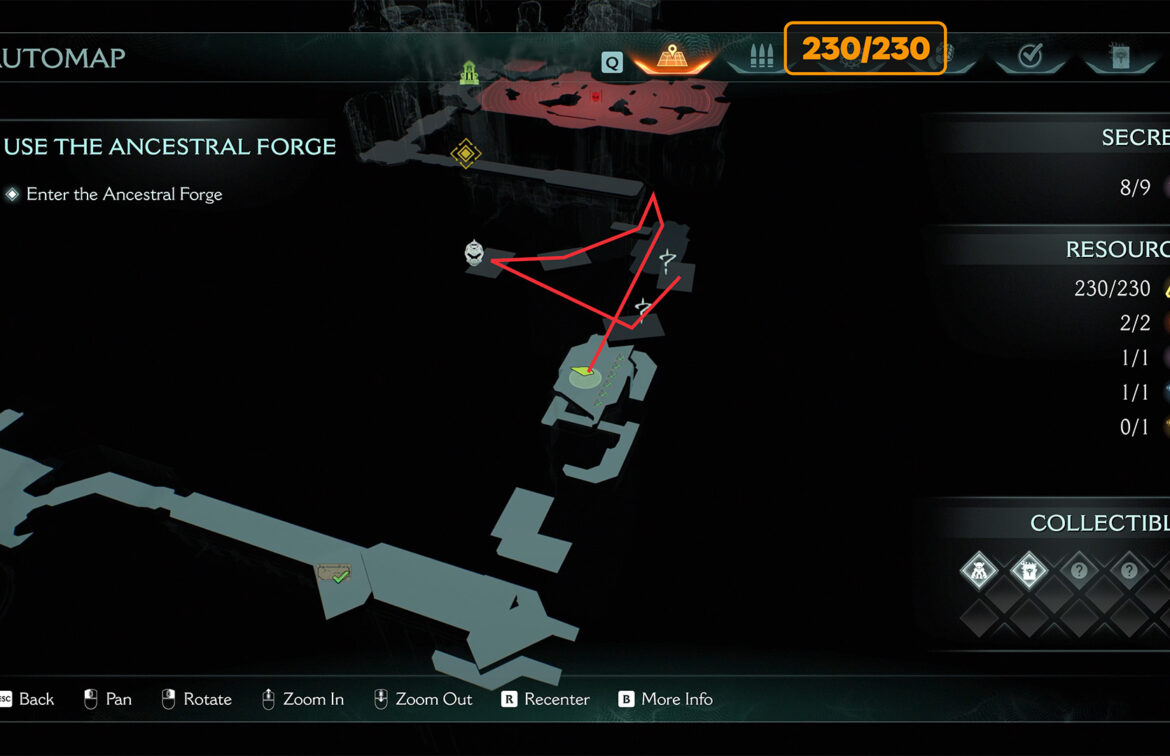
If you miss even one, you’ll have to go through the whole chapter again: here are all the collectibles from Chapter 9! We continue our journey through Doom: The Dark Ages. Today, we will review all the collectibles that you can find in Chapter 9 – Ancestral Forge. I also recommend reviewing Chapter 8 Abyssal Forest. All the hidden locations you need to complete the mission 100%.
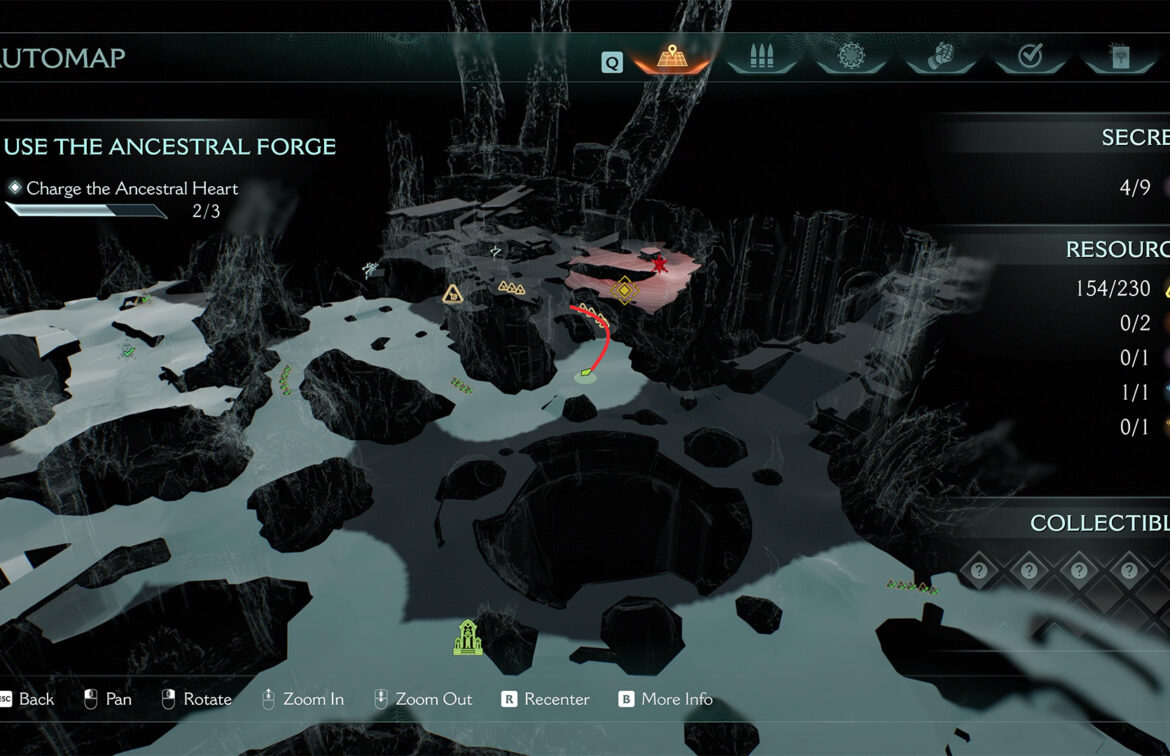
As a result of this guide, you will complete Chapter 9 – Ancestral Forge 100% and receive
- Gold: 230
- Ruby: 2
- Wraithstone: 1
- Demonic Essence – Health: 1
- Demonic Essence – Ammo: 1
- Secrets: 9
- Codex Entries: 2
- Collectible Toys: 1
- Weapon Skin: 1
- Quests: 3
I also recommend watching the video if you don’t want to search for all the collectibles mentioned in this article. The video shows everything briefly and clearly:
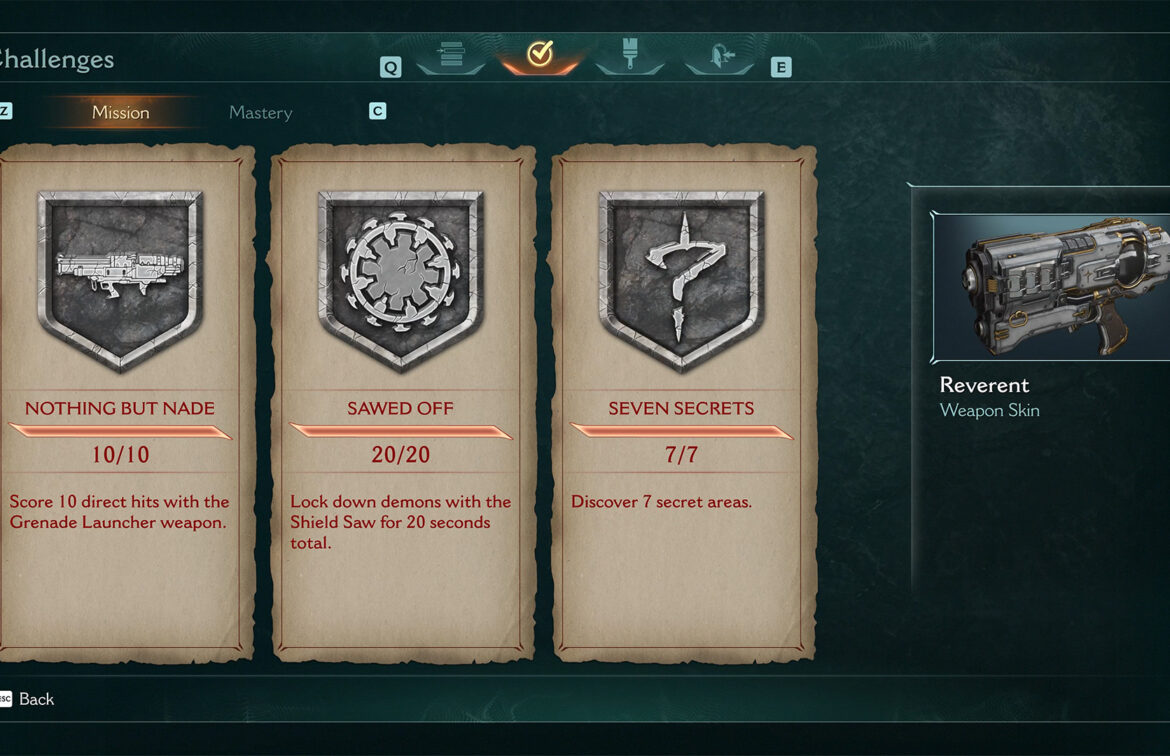
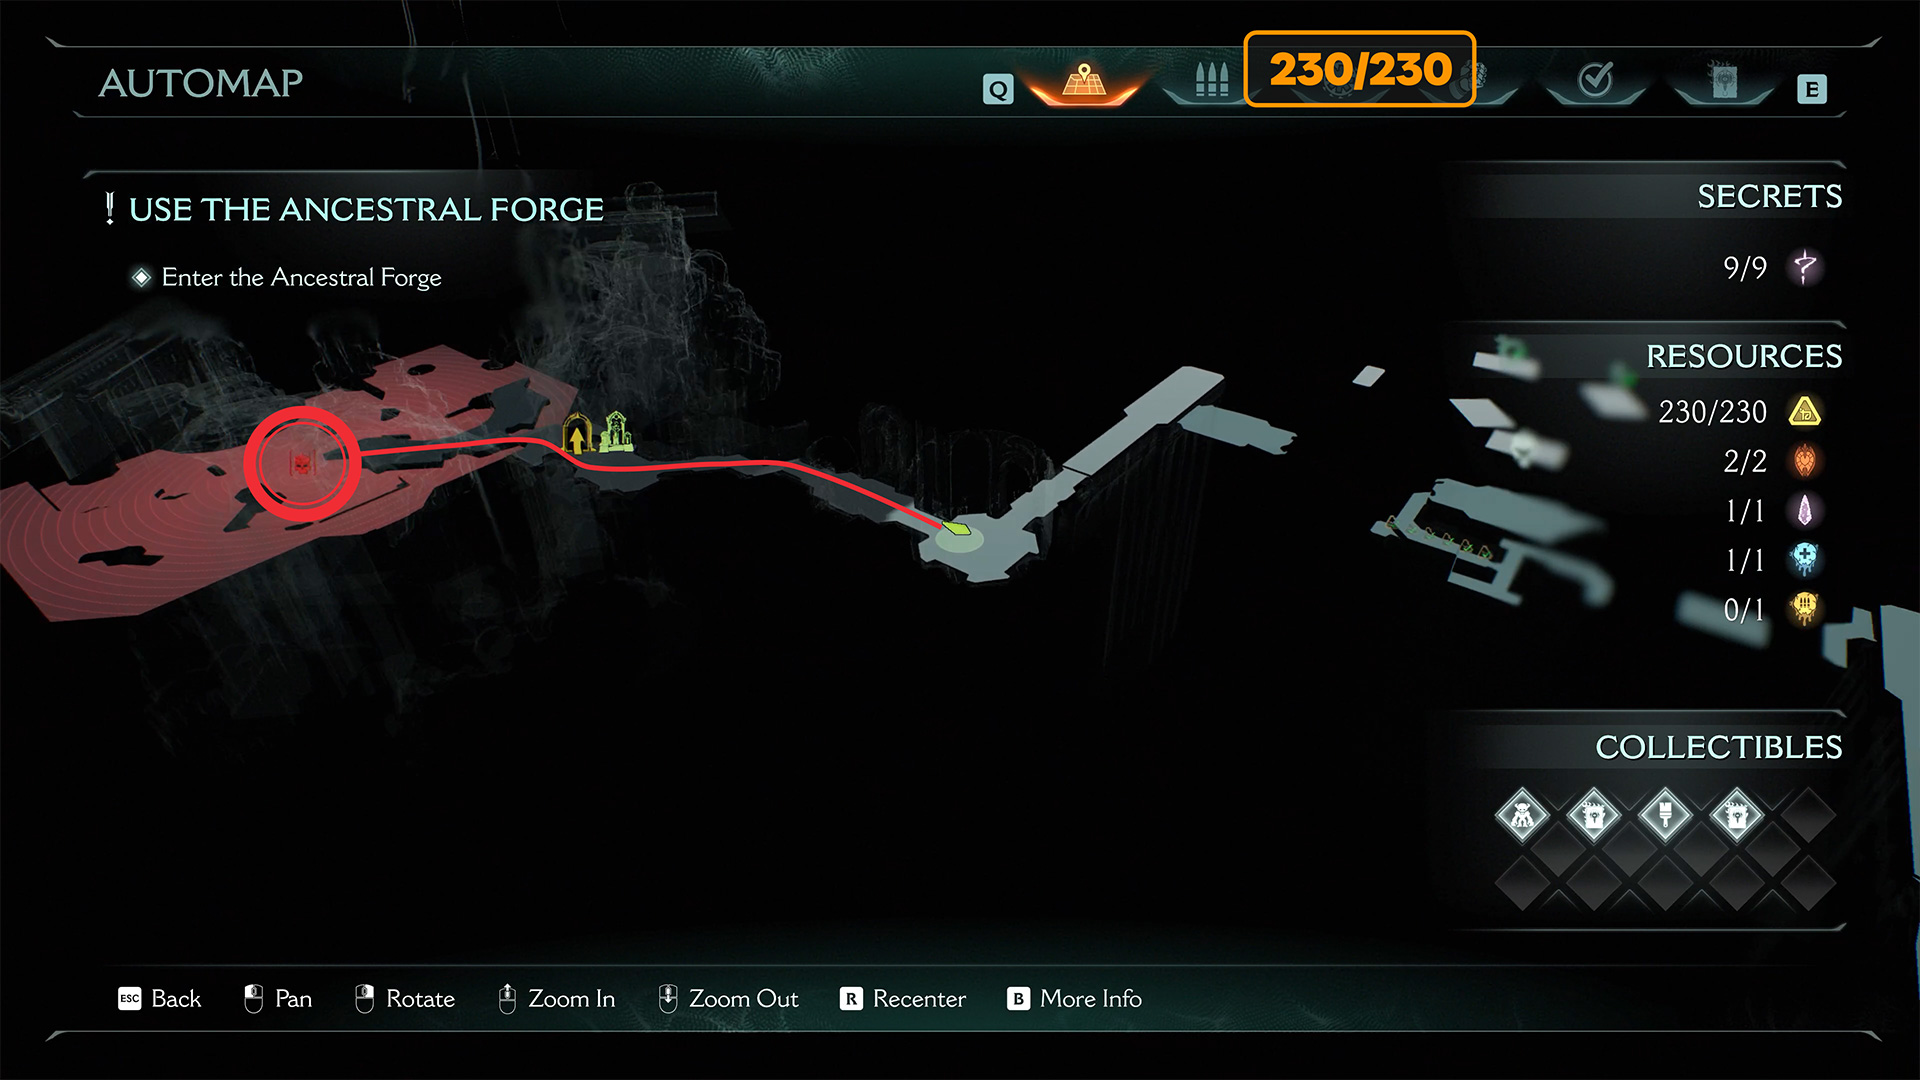
Ancestral Forge Challenges
All collectibles are in Chapter 9 of Doom The Dark Ages, called Ancestral Forge. First, I’ll tell you about the three available challenges. The first one is called Nothing but nade. It’s simple: you need to fire your grenade launcher 10 times. You got this weapon in the previous chapter.
The second challenge is called Sawed Off. Throw your shield at more powerful monsters, and while the shield is spinning in the monster, you will have a chance to attack. You need to accumulate 20 seconds of such stunning your opponent.
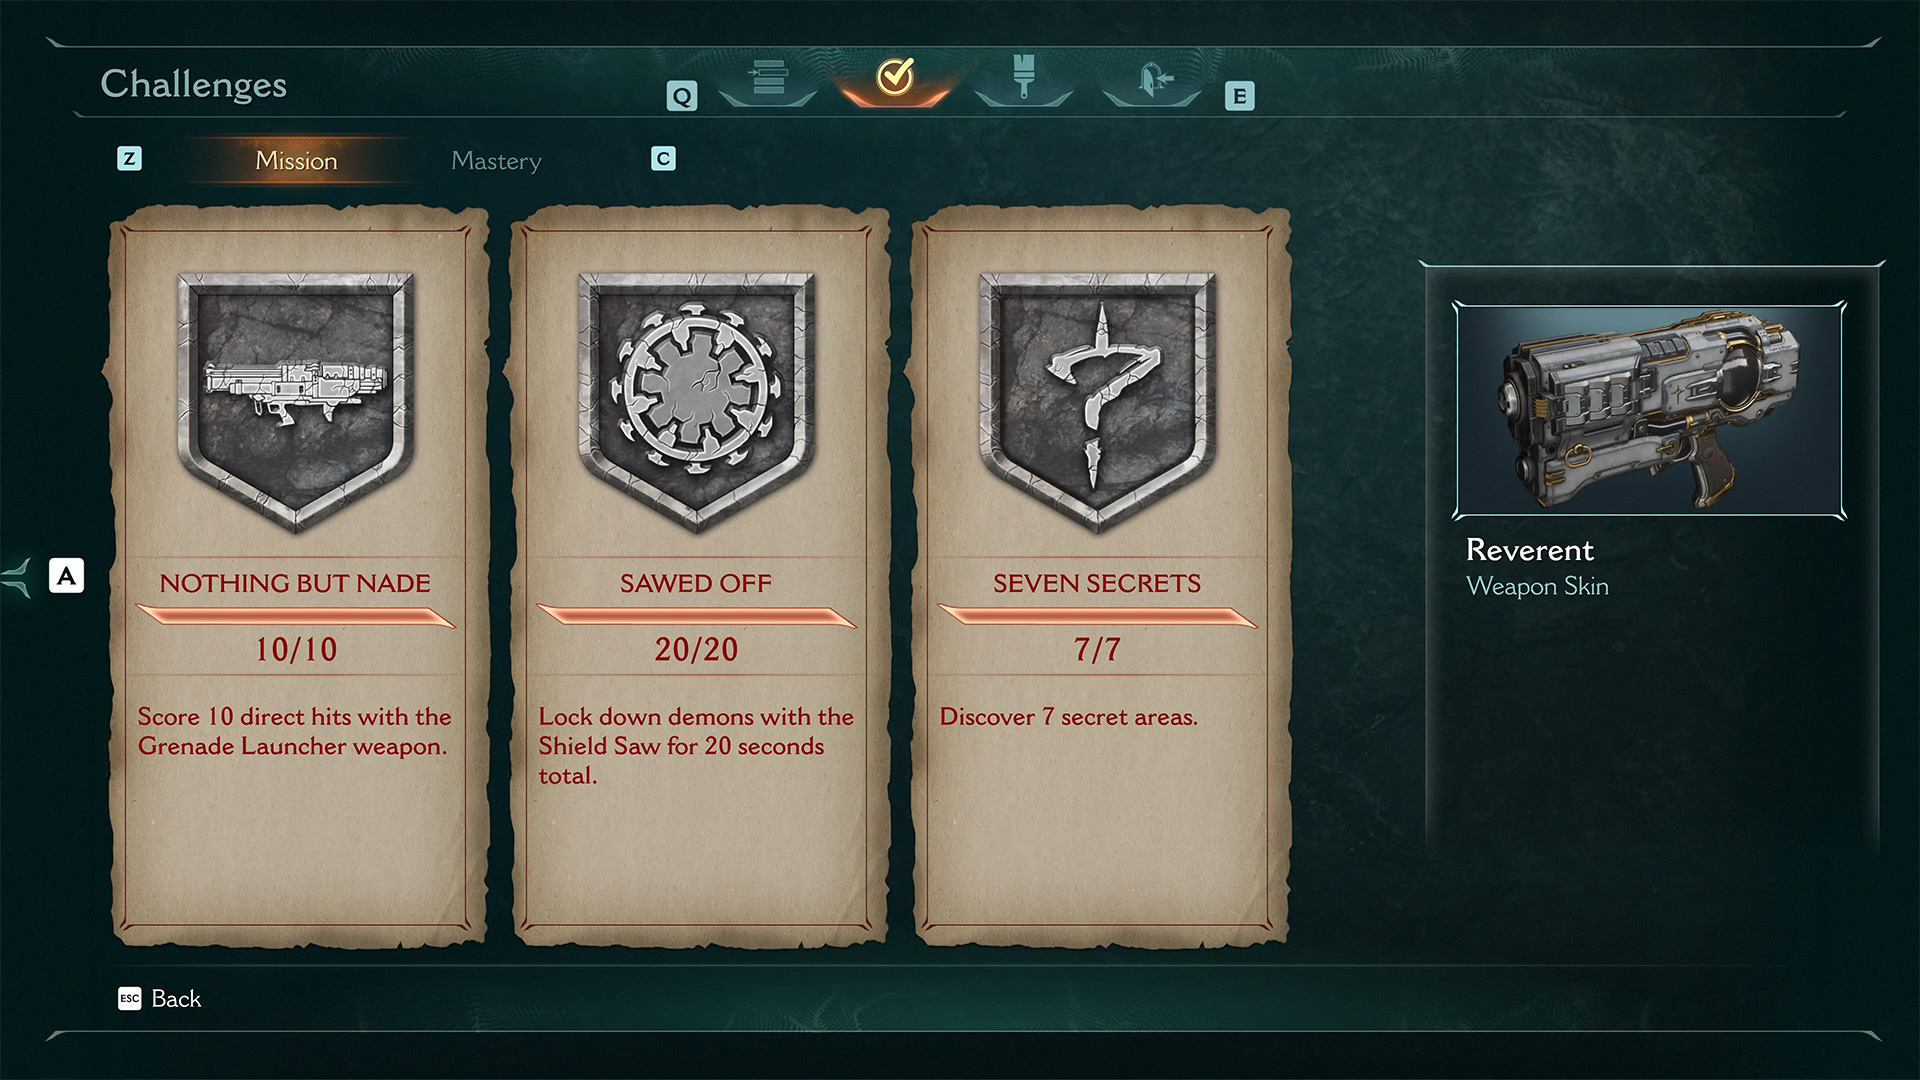
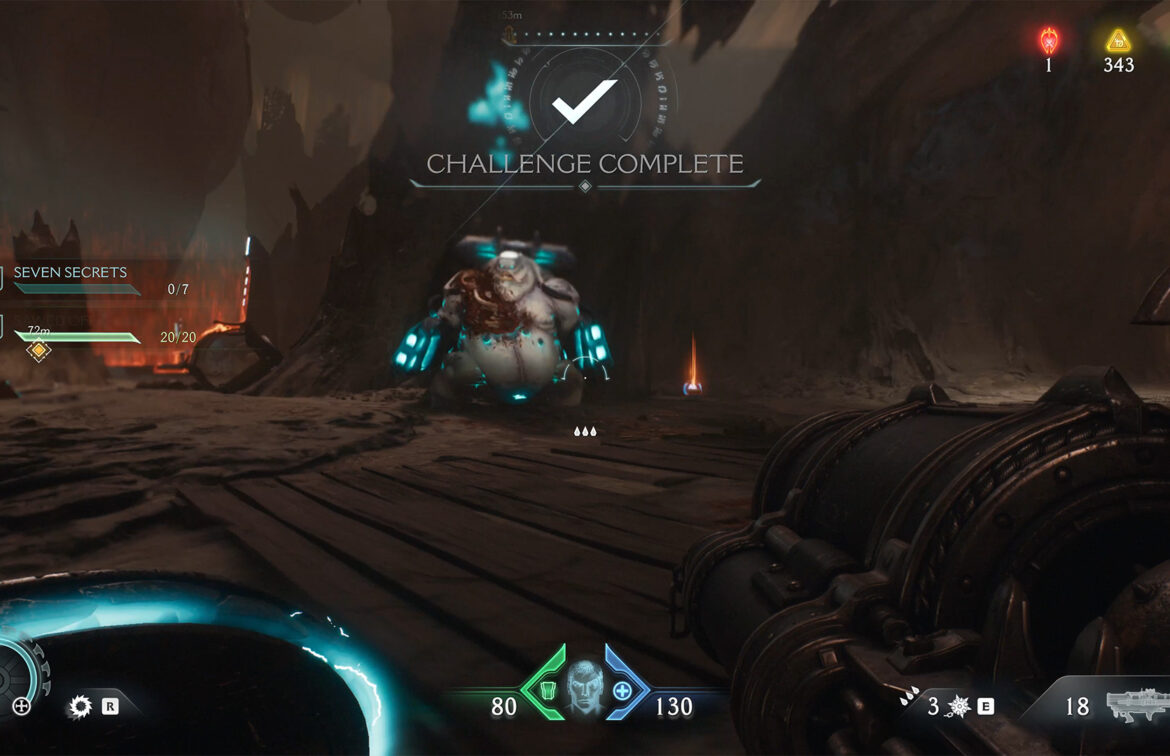
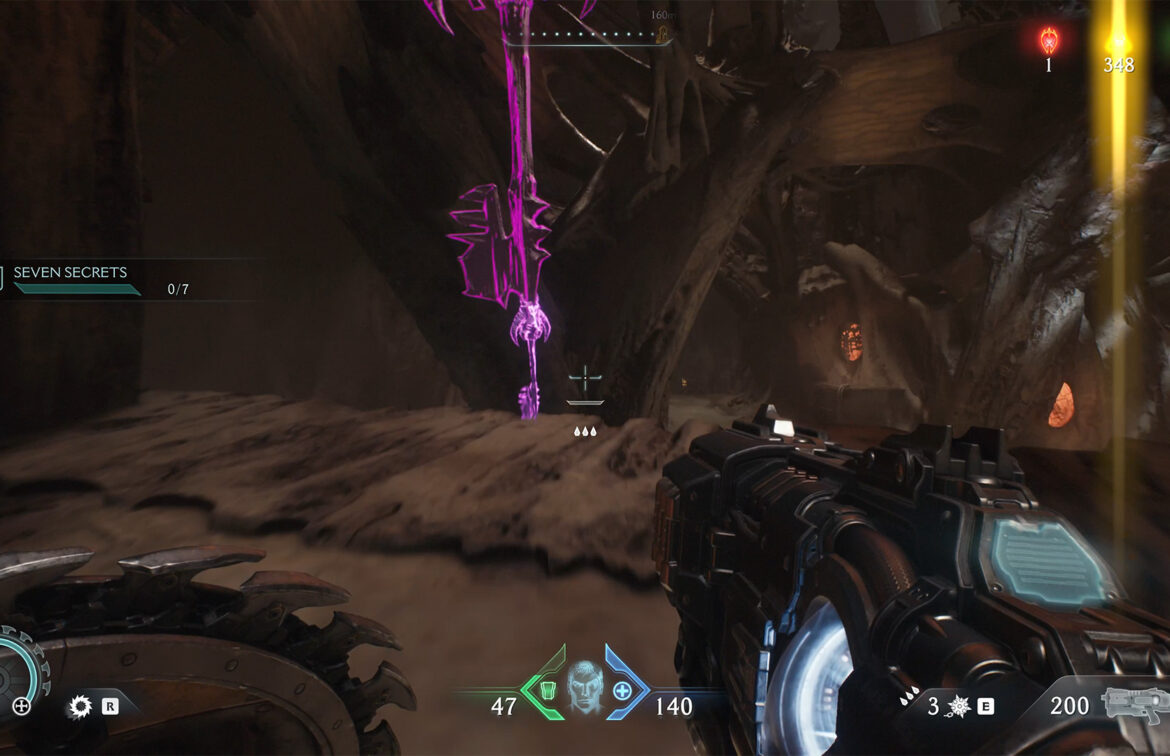
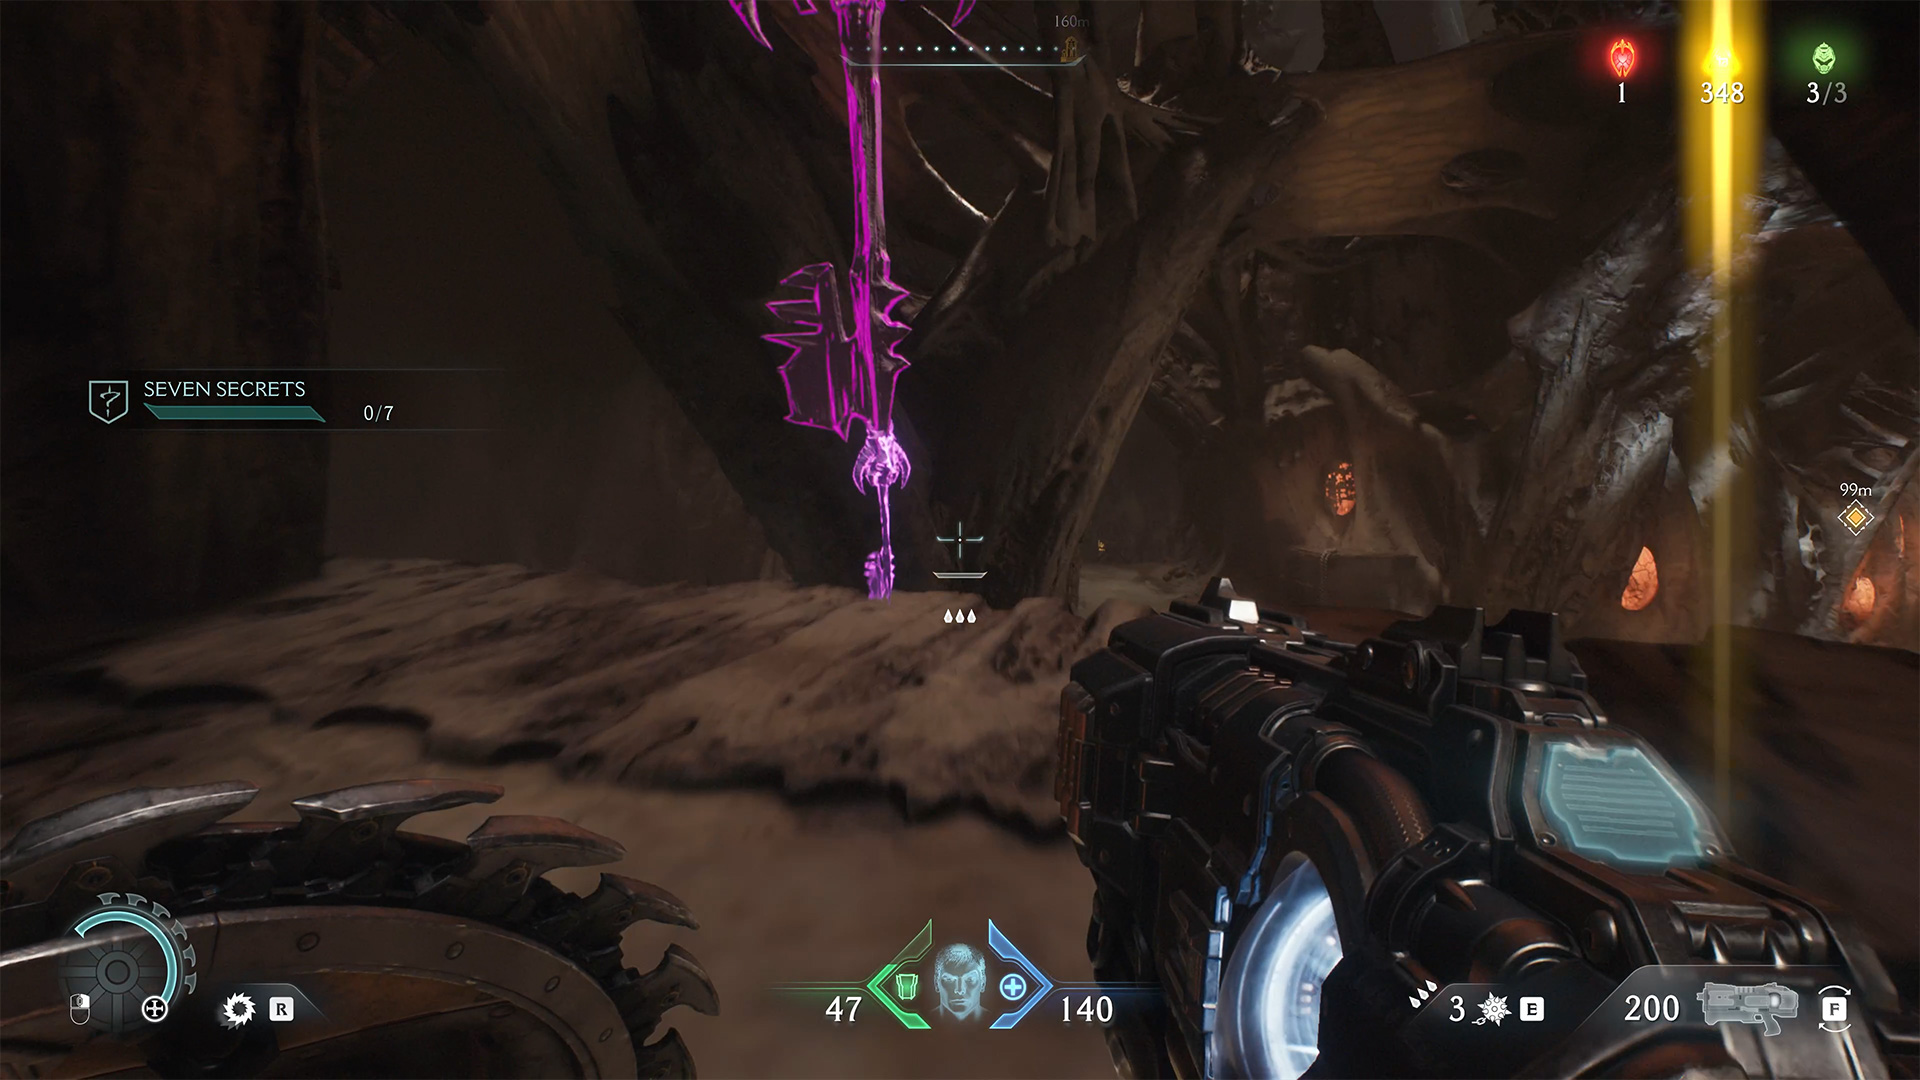
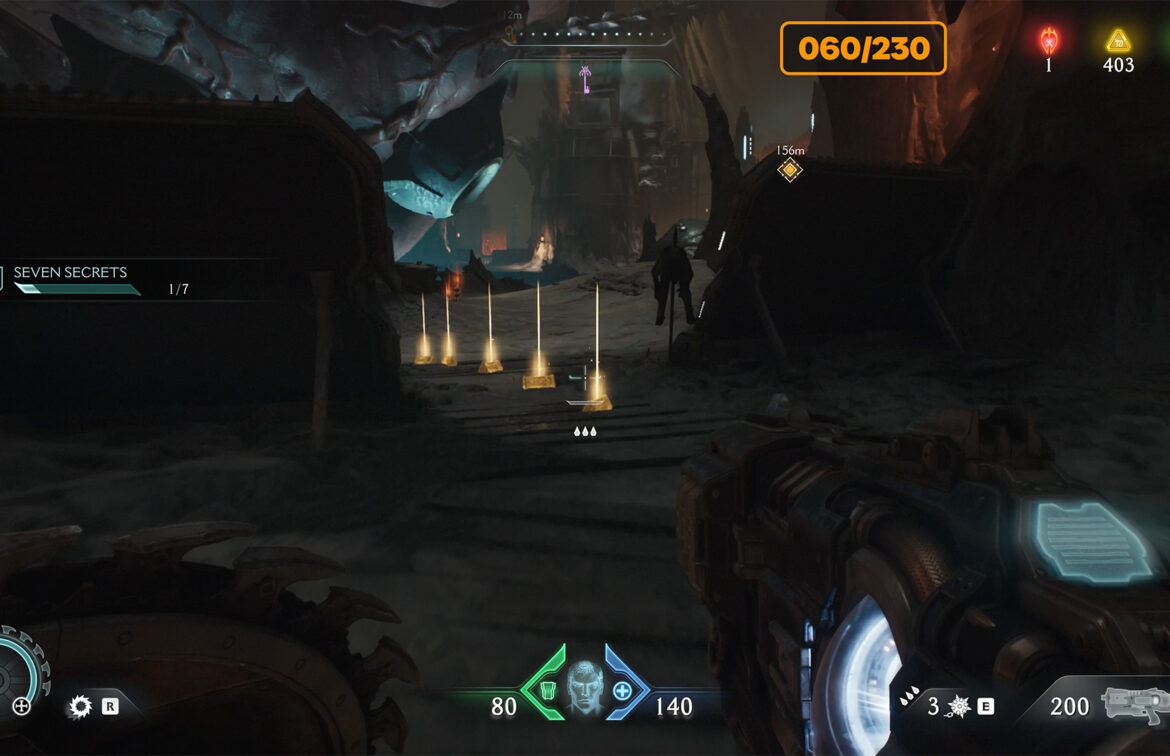
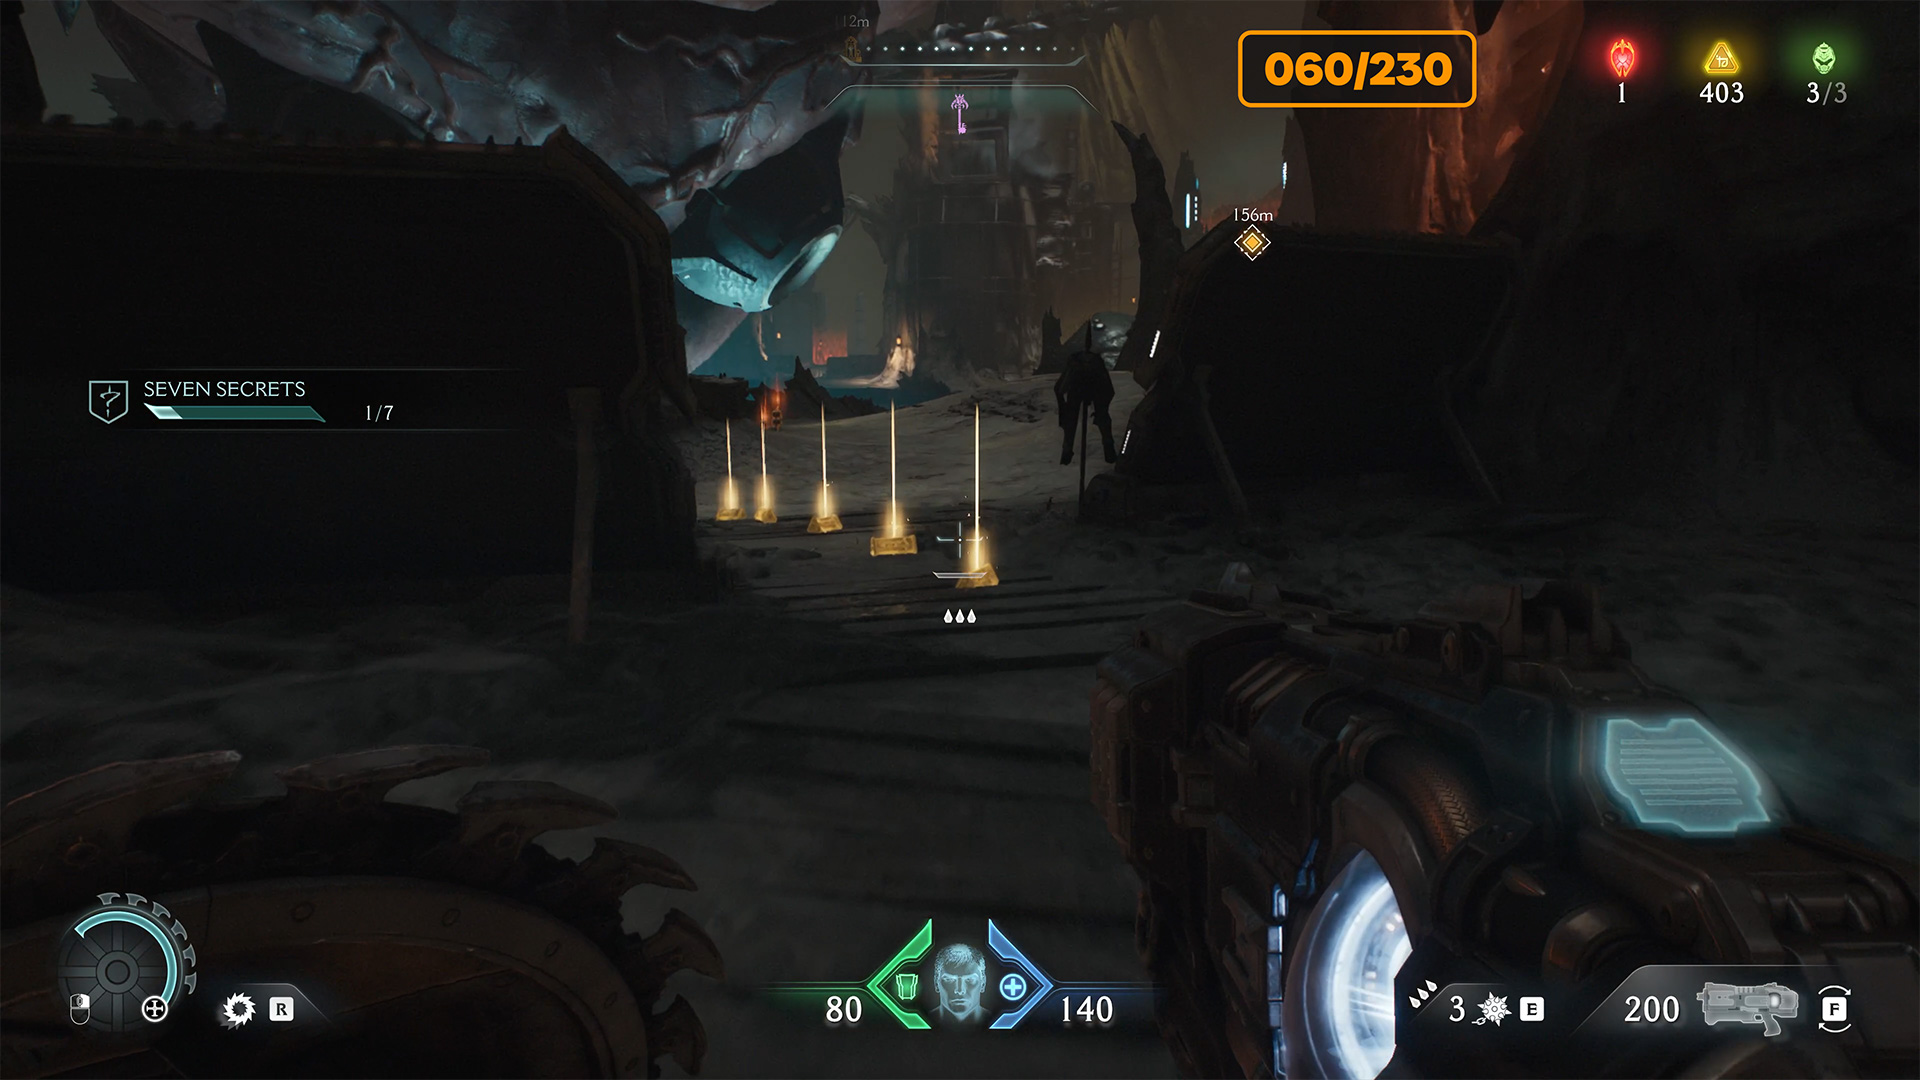
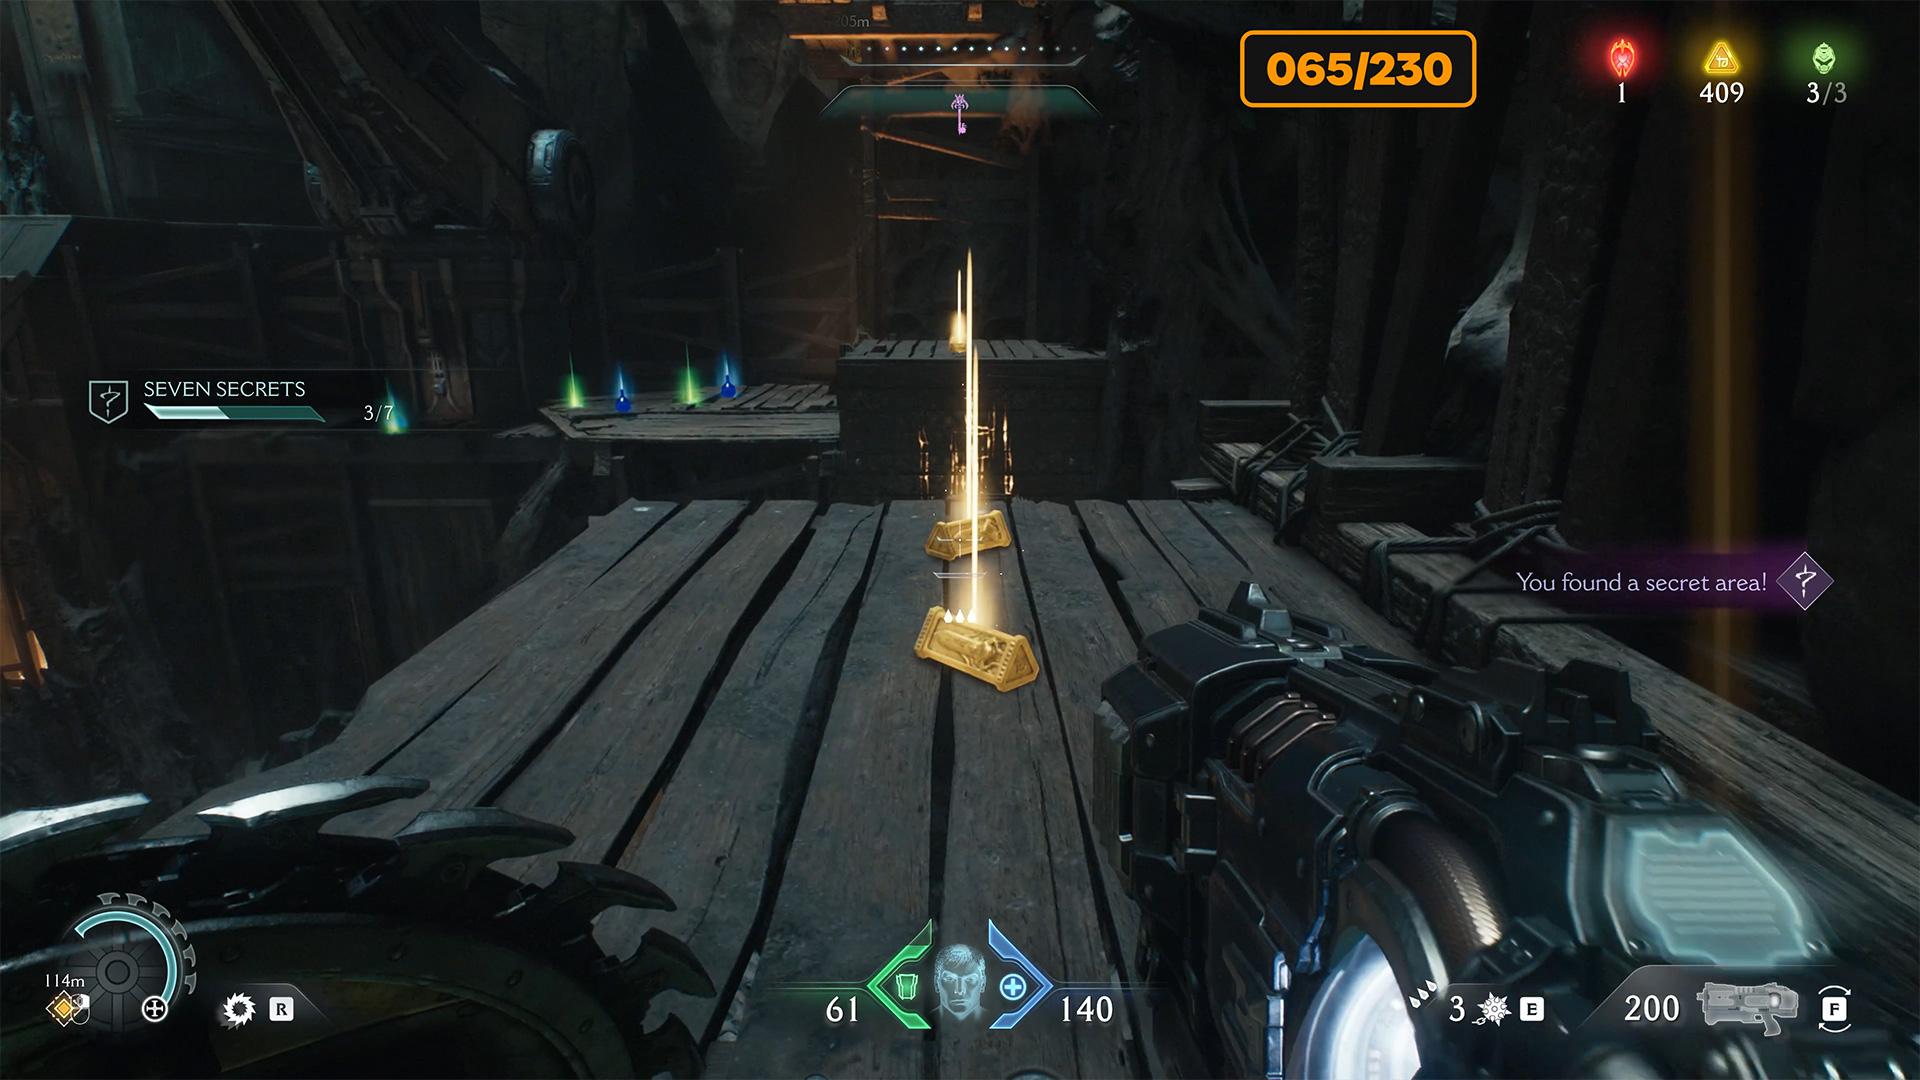
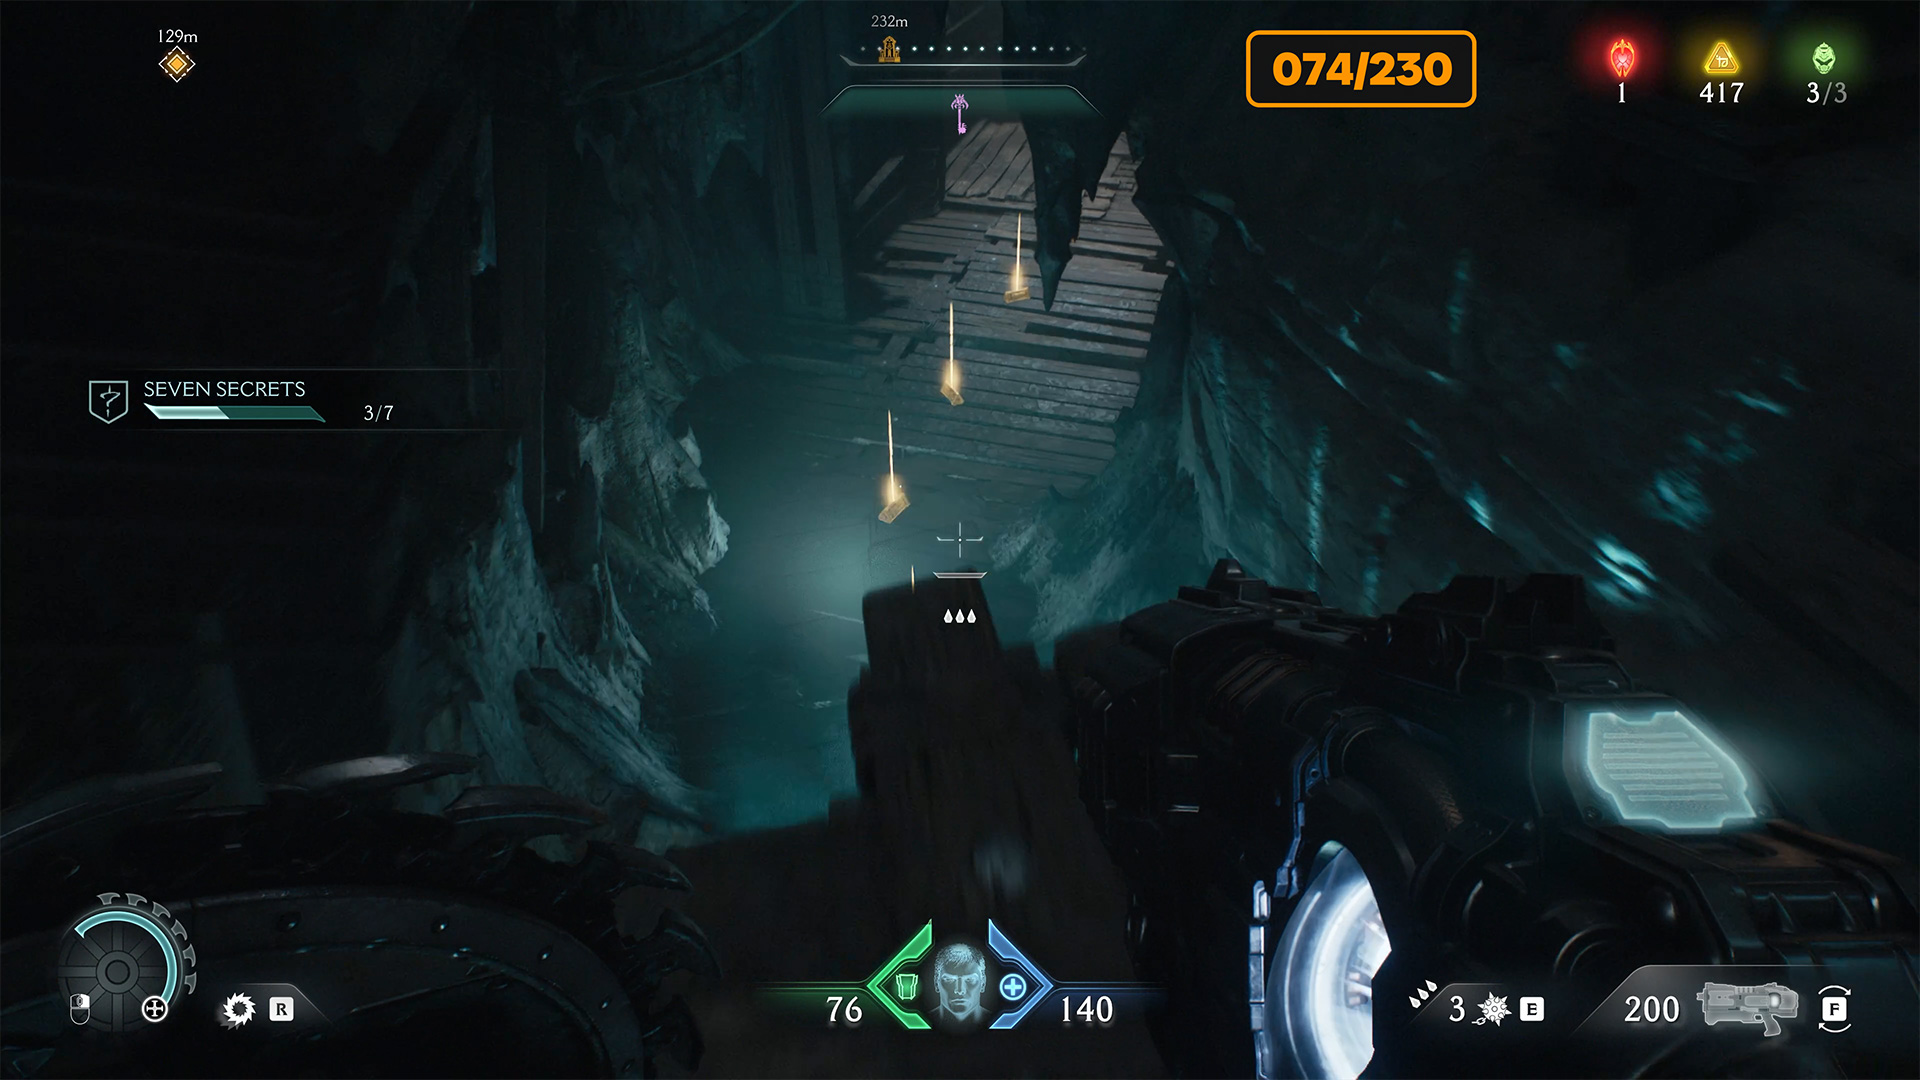
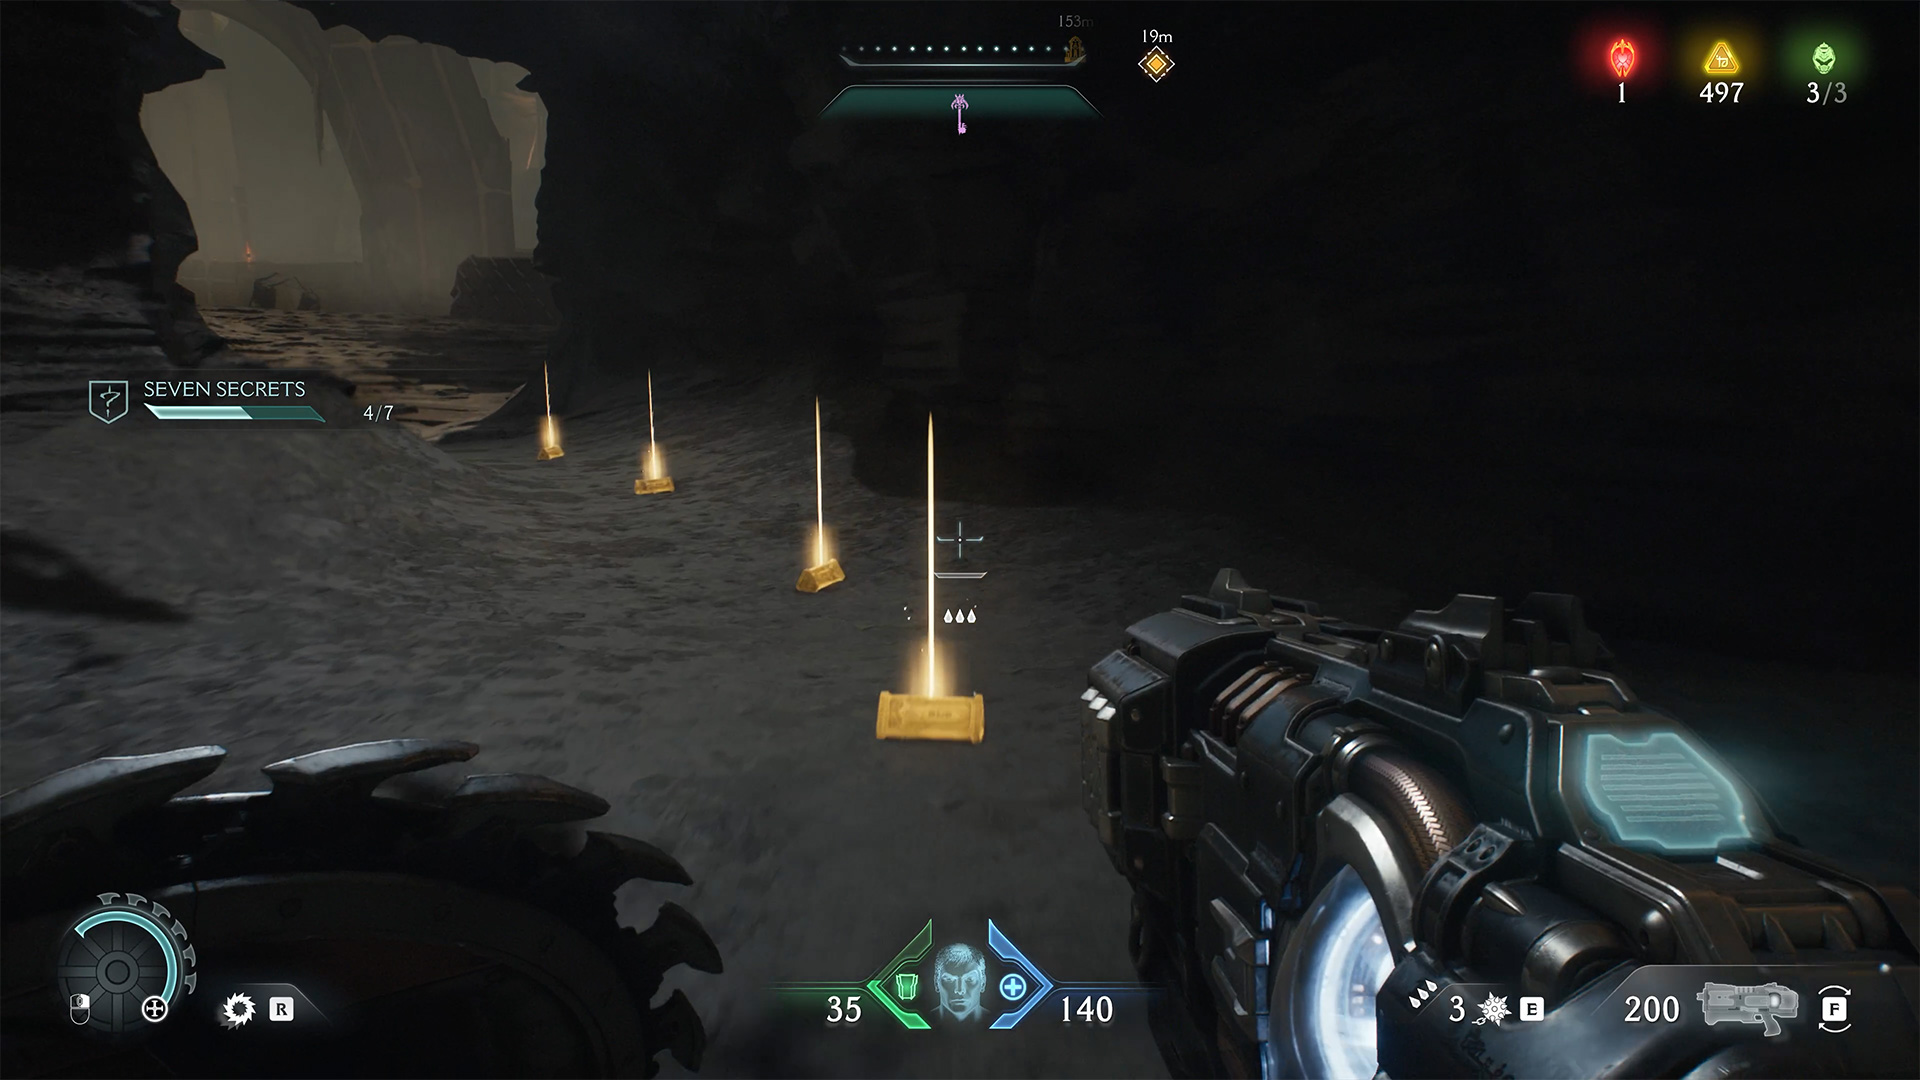
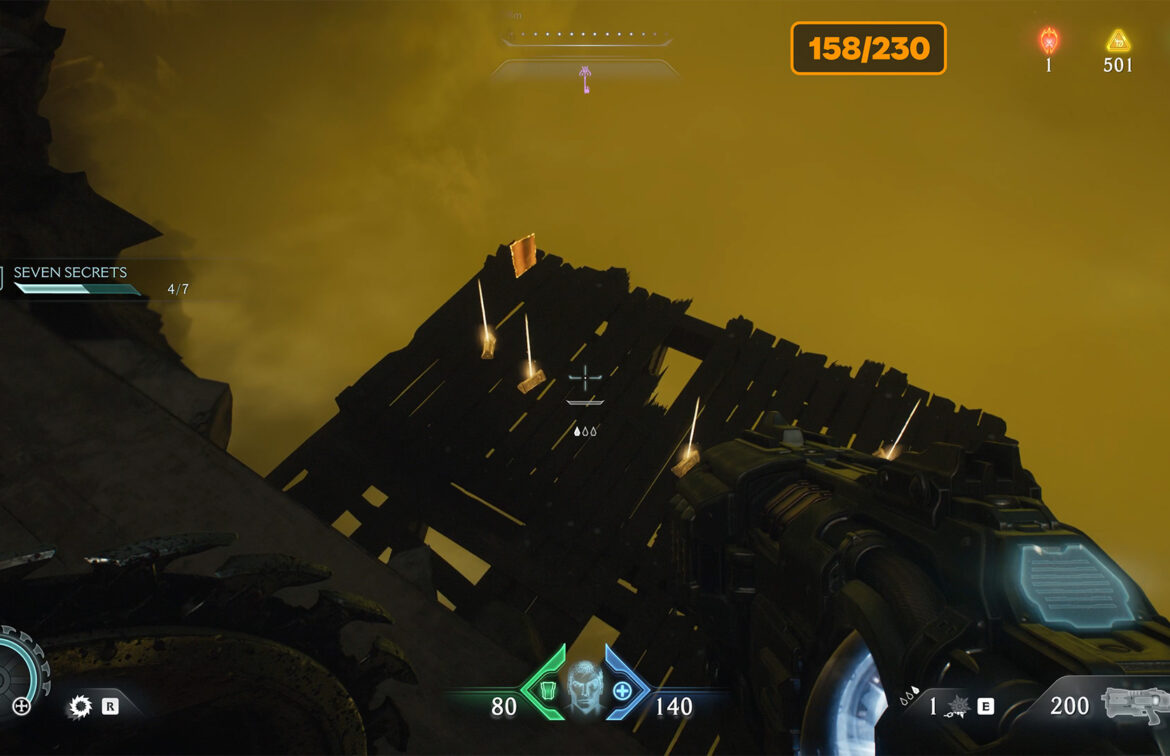
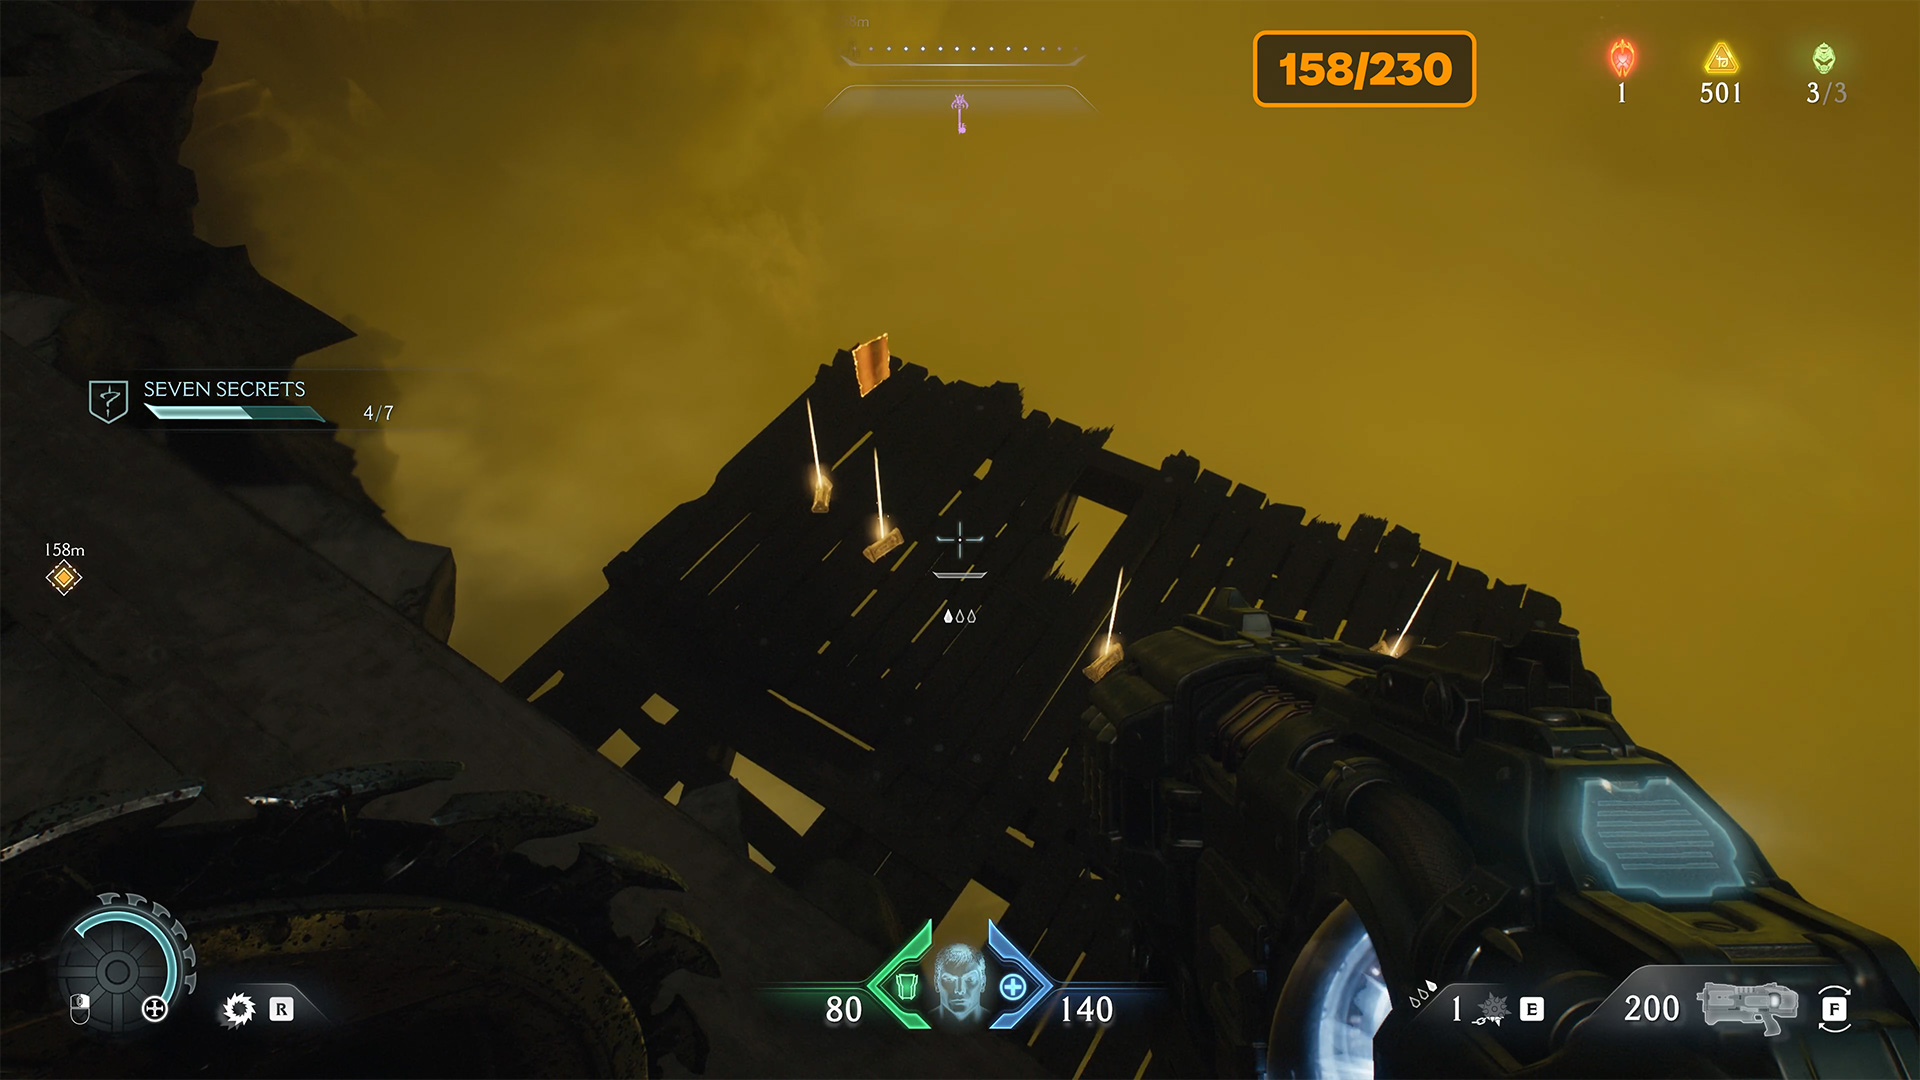
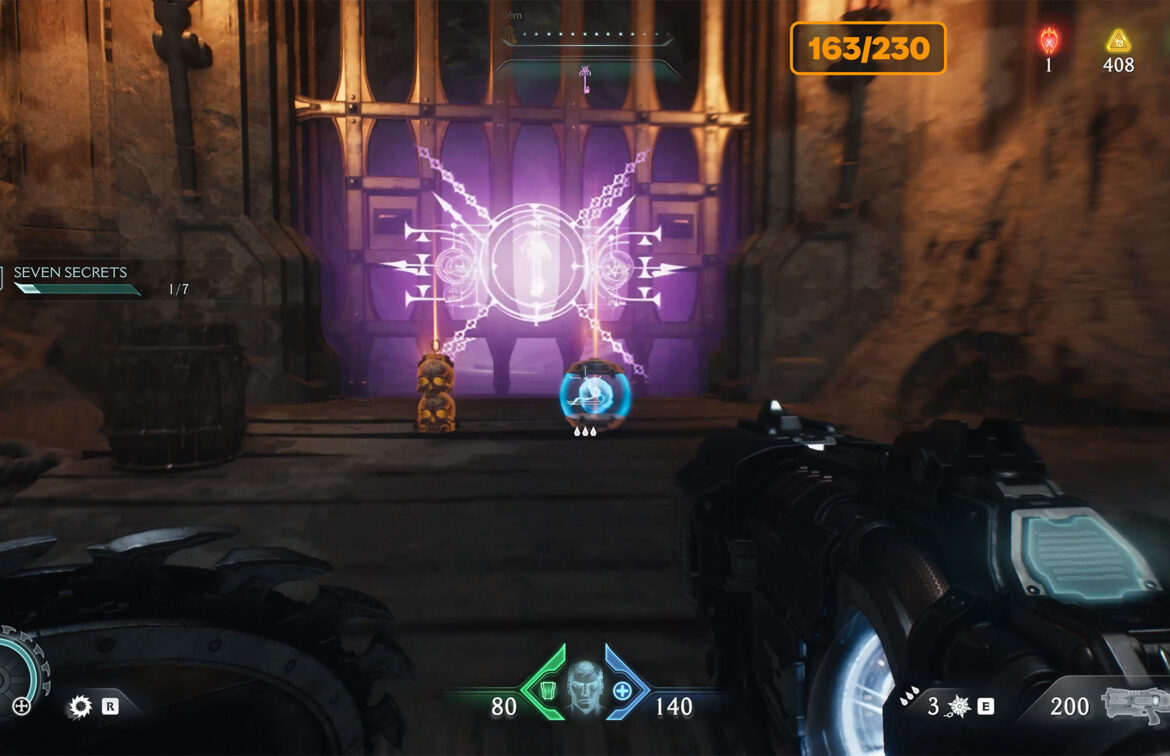
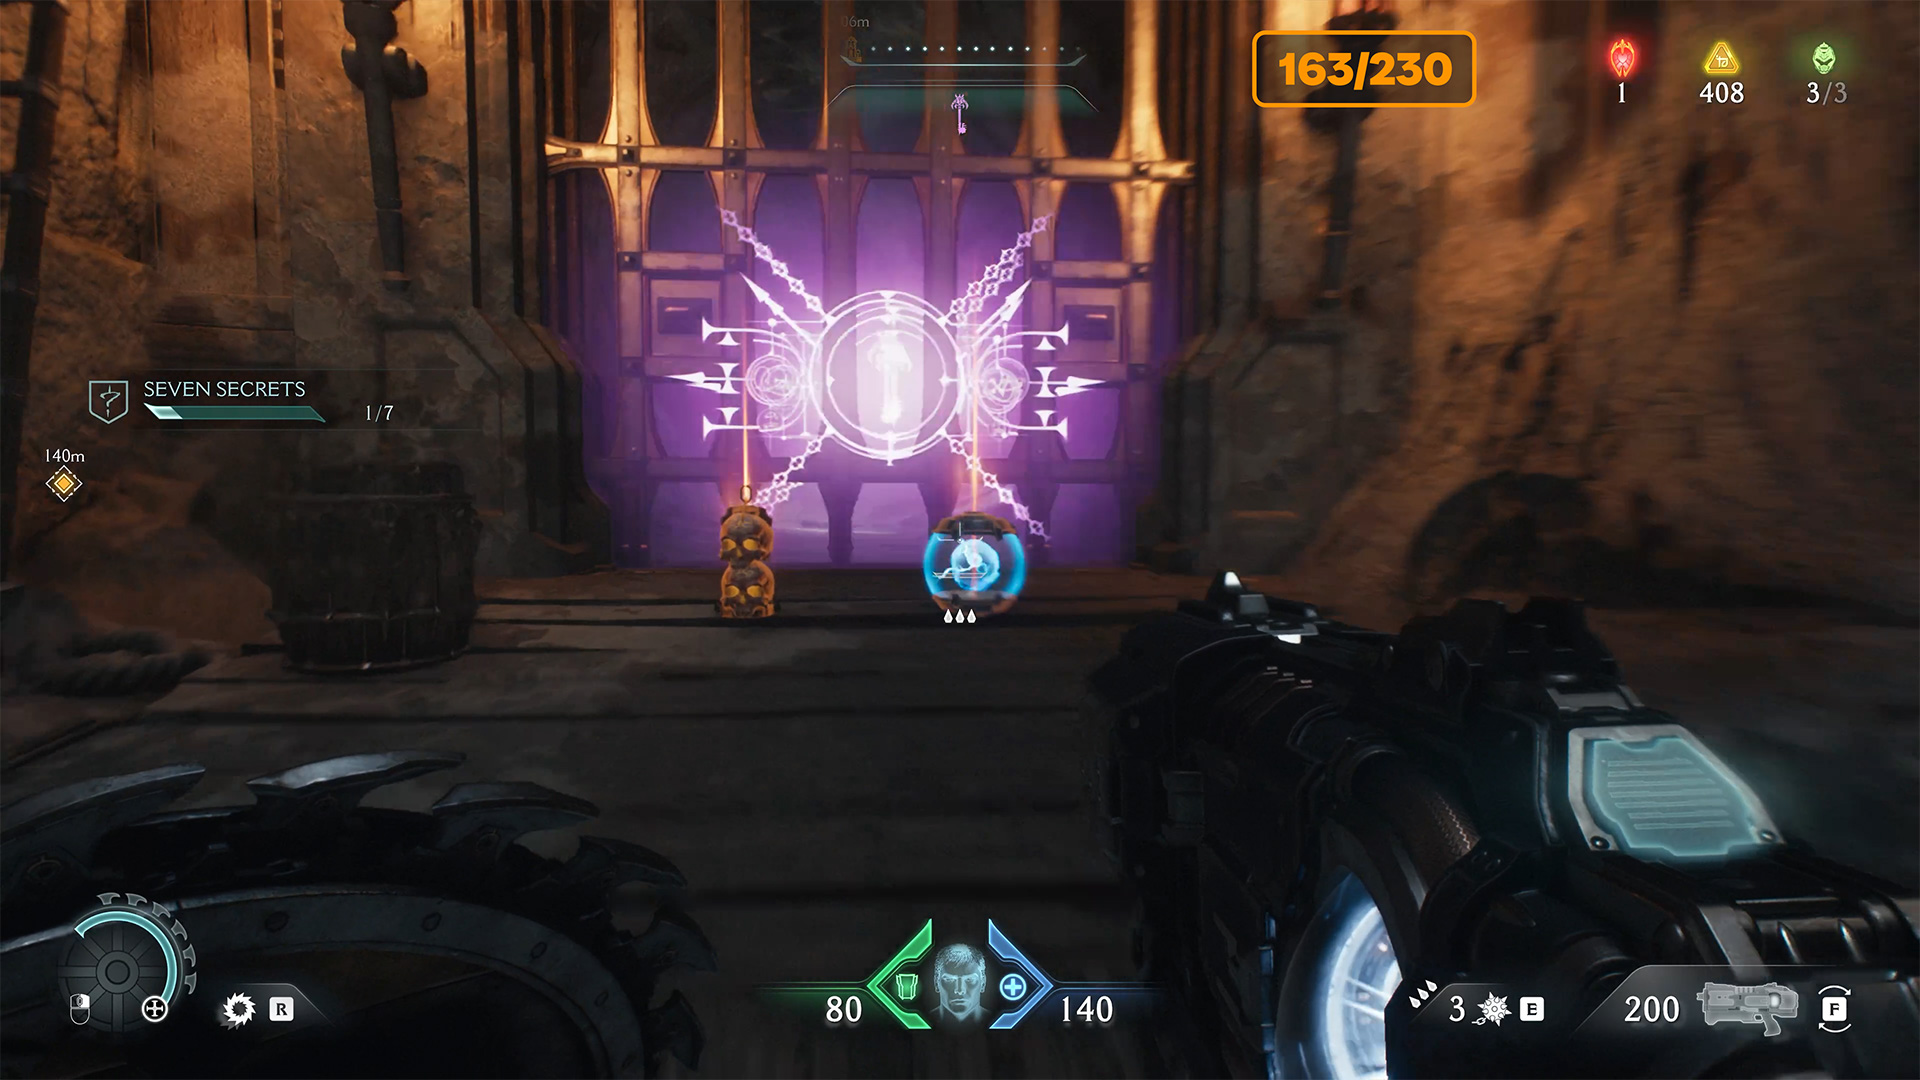
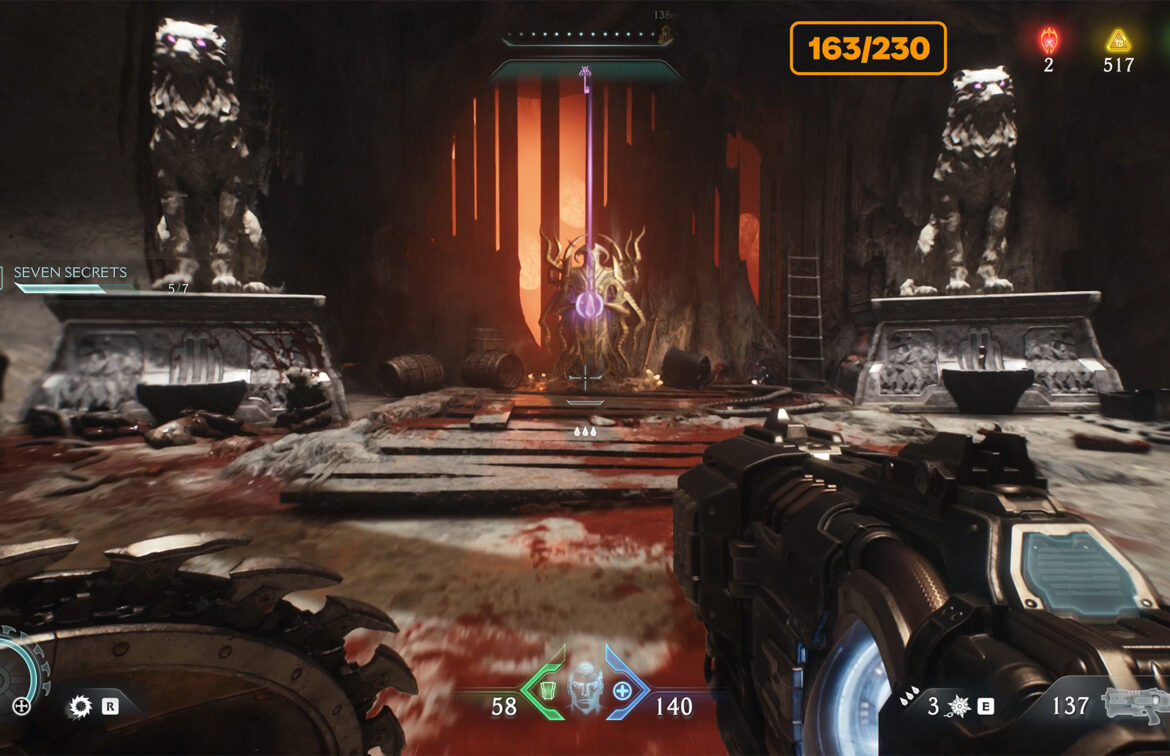
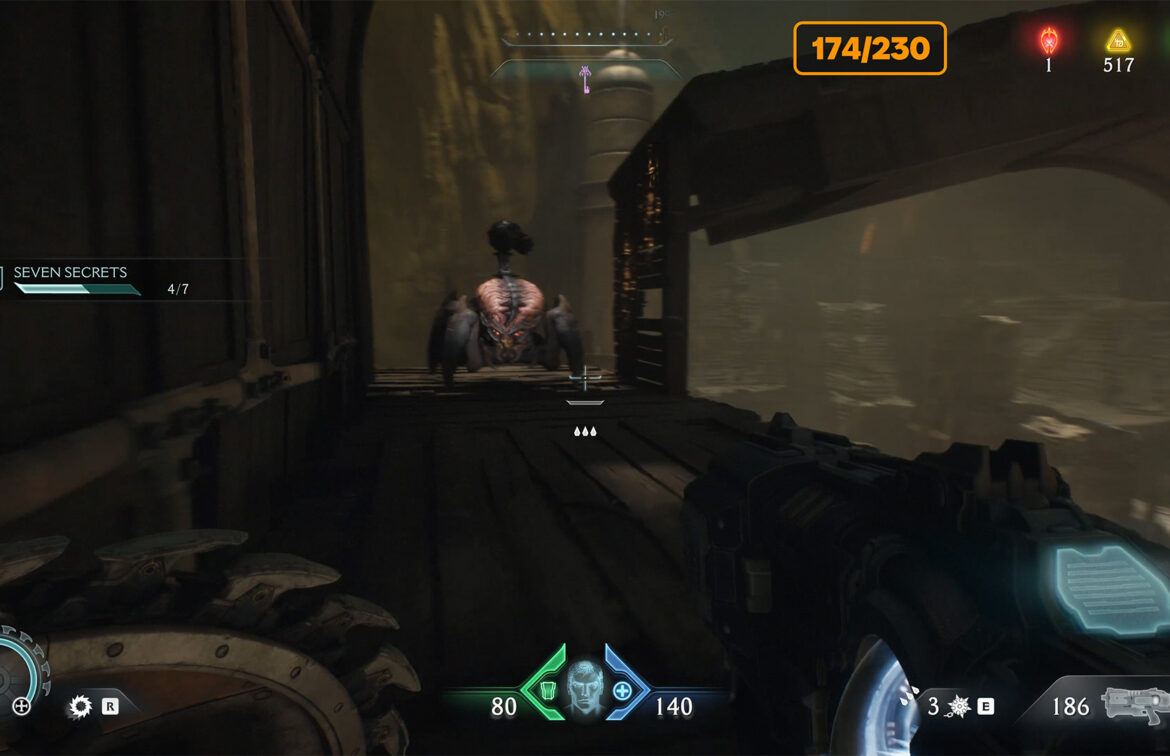
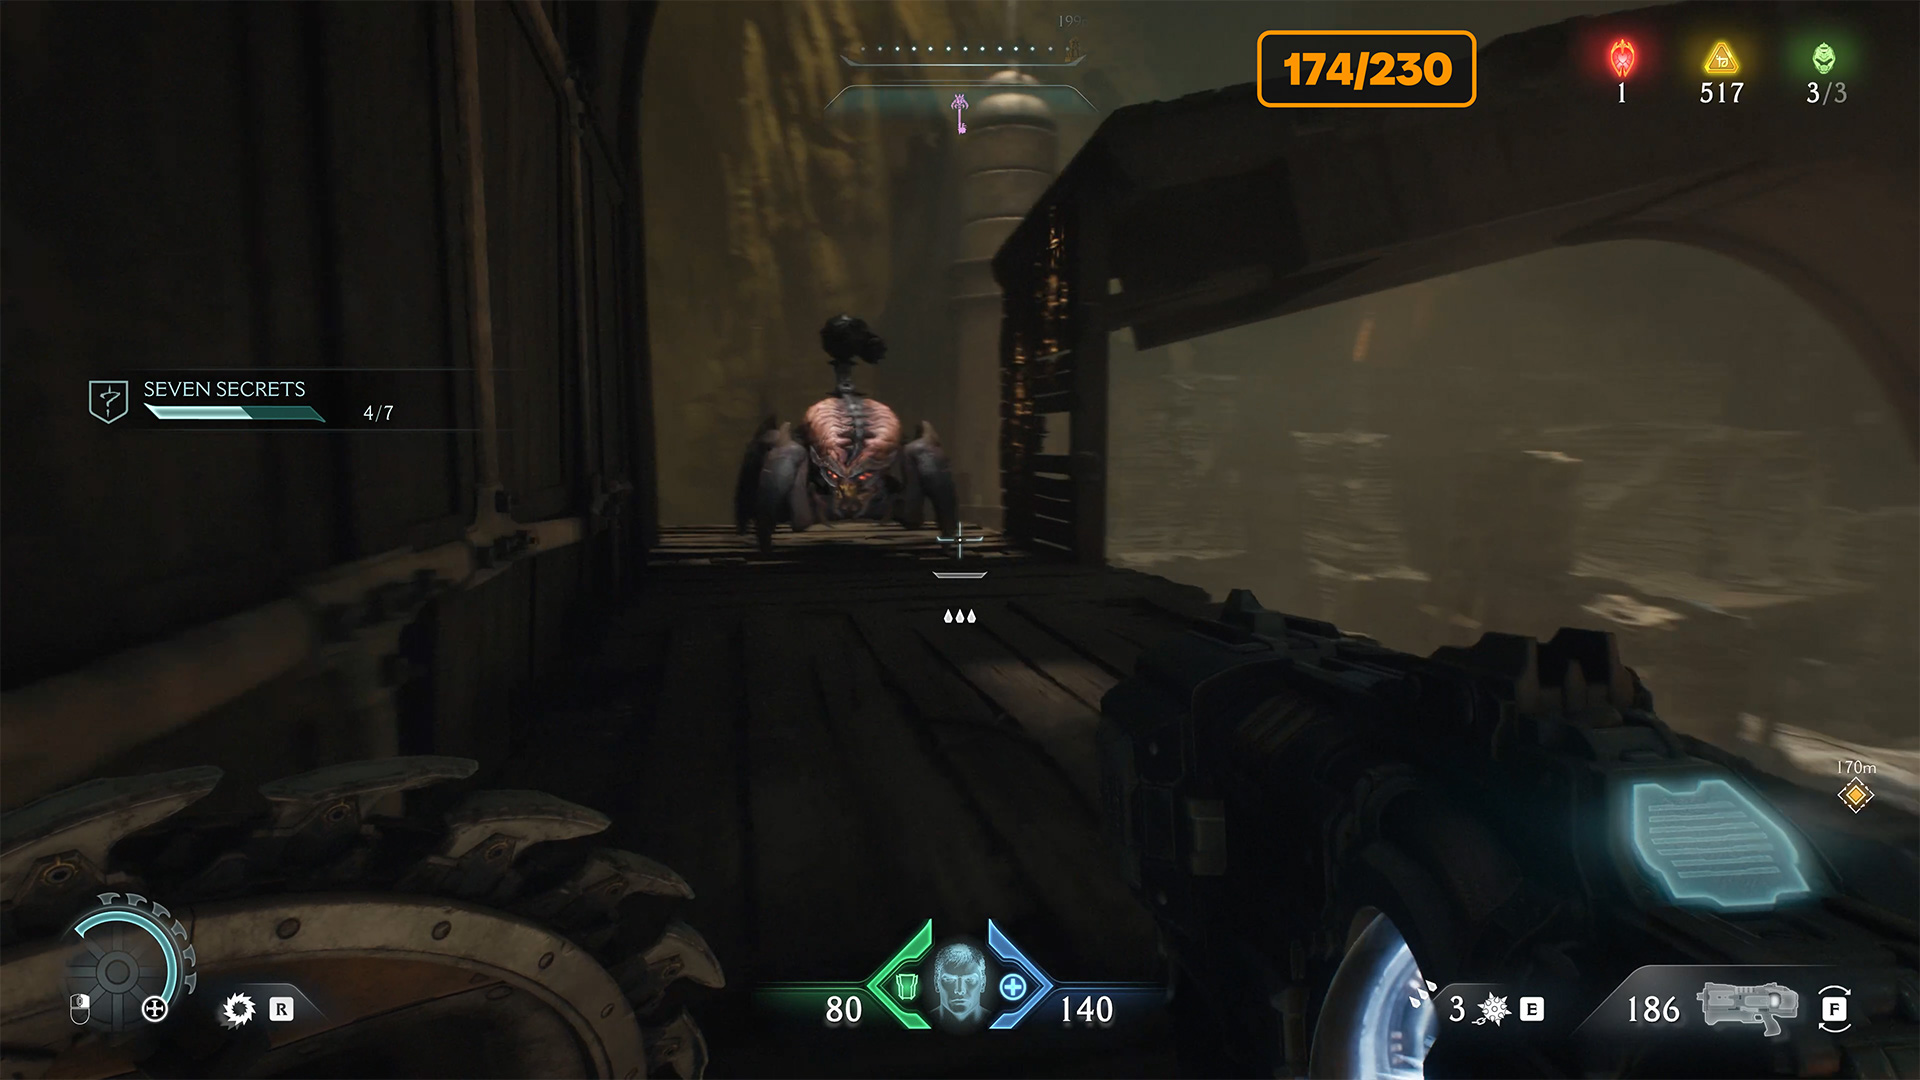
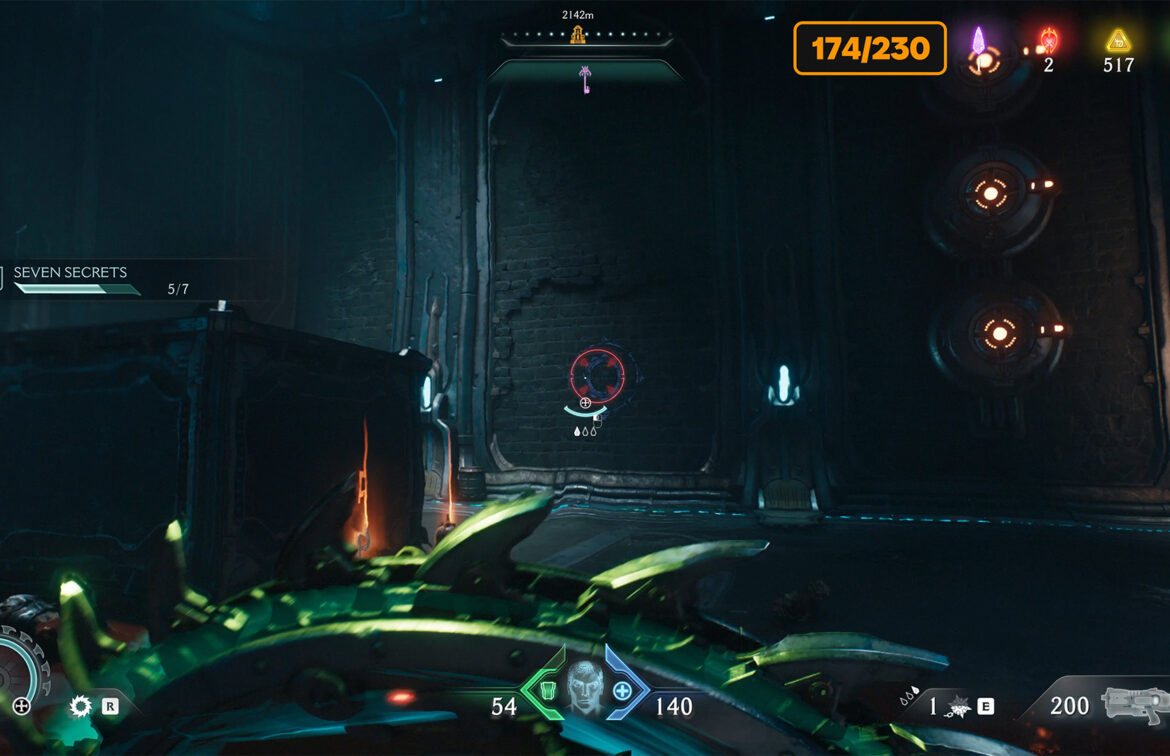
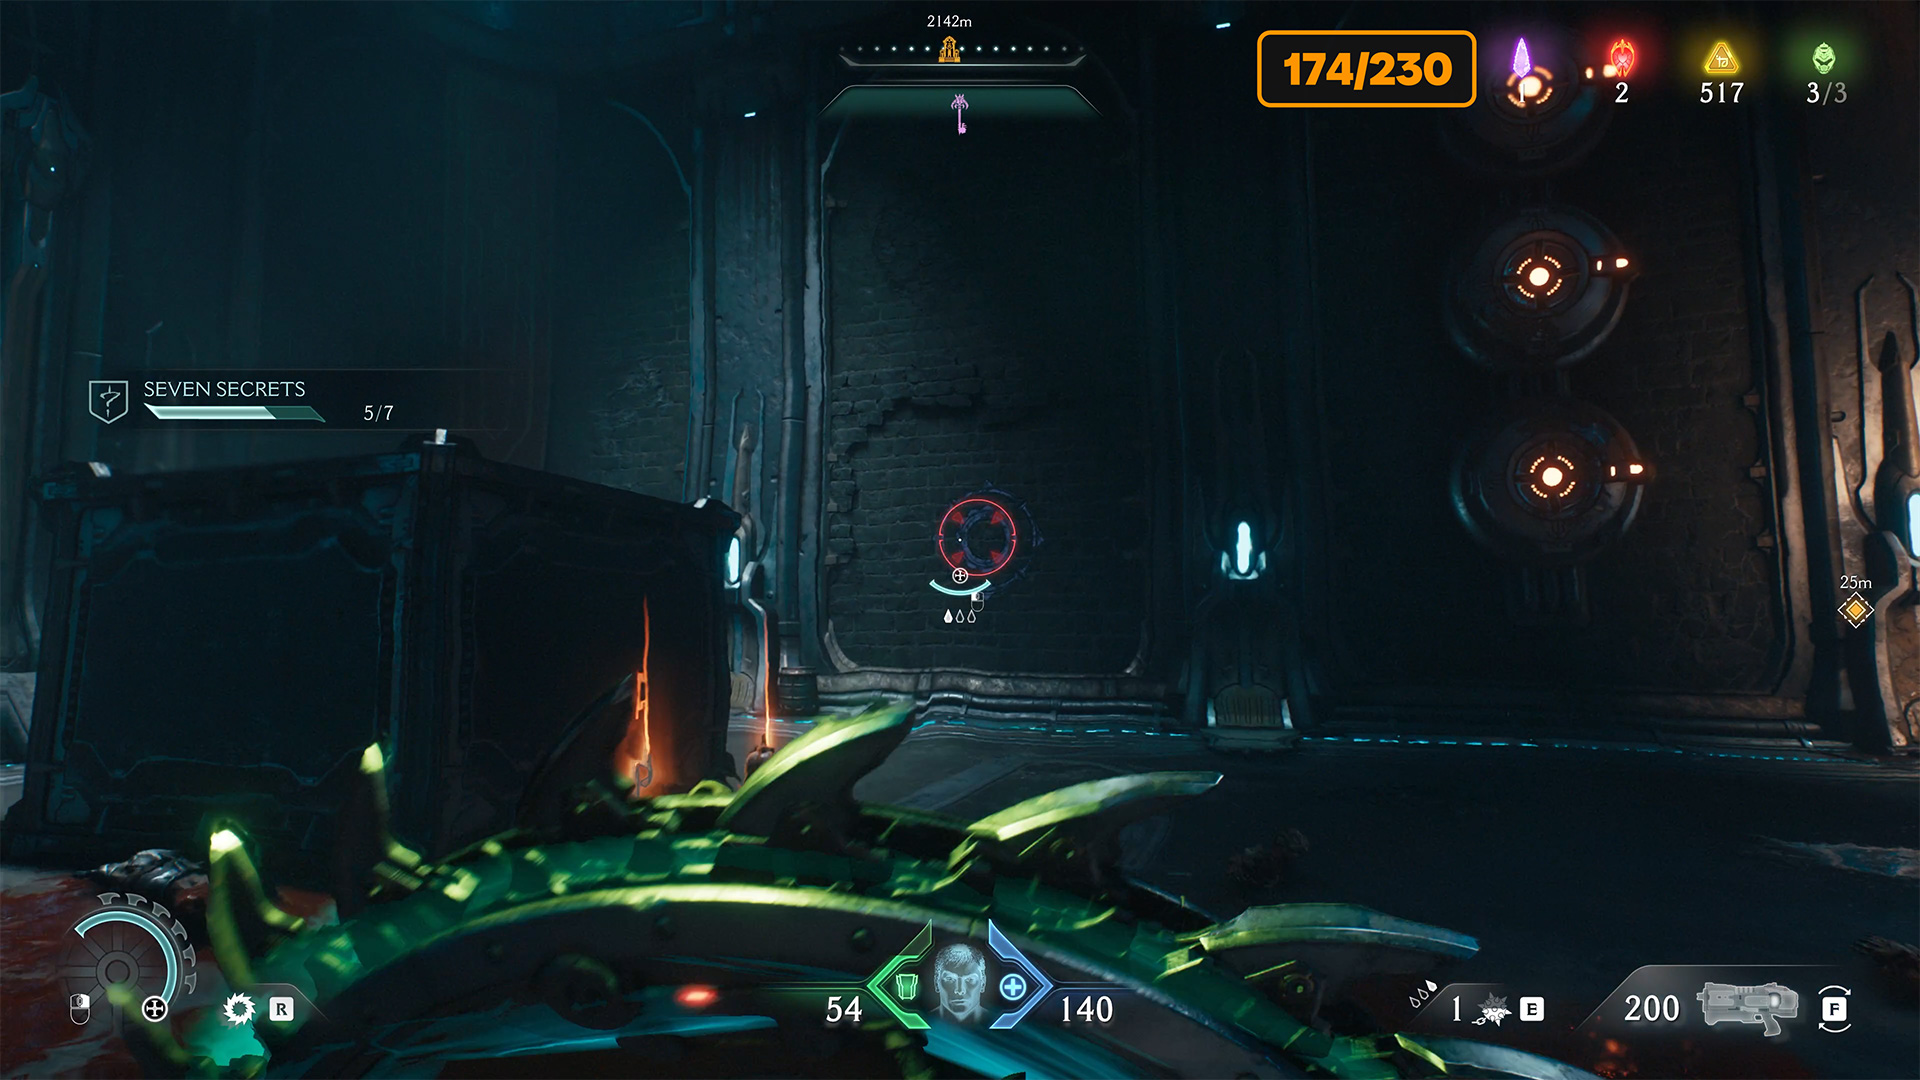
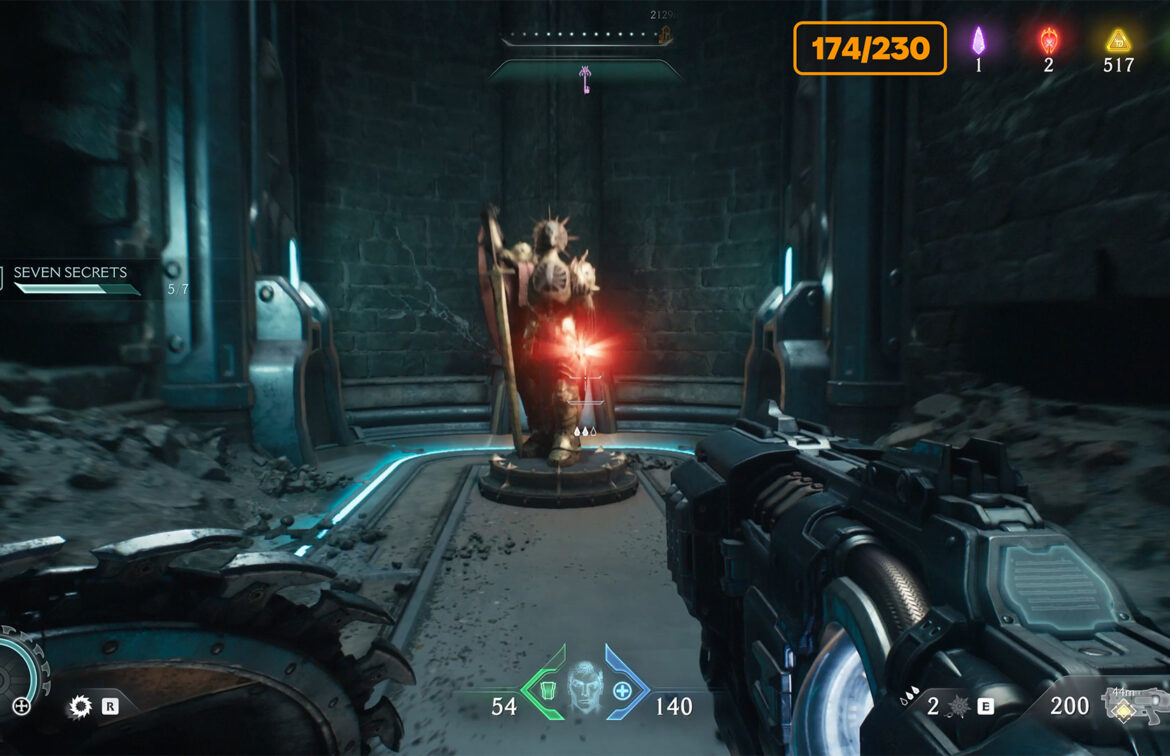
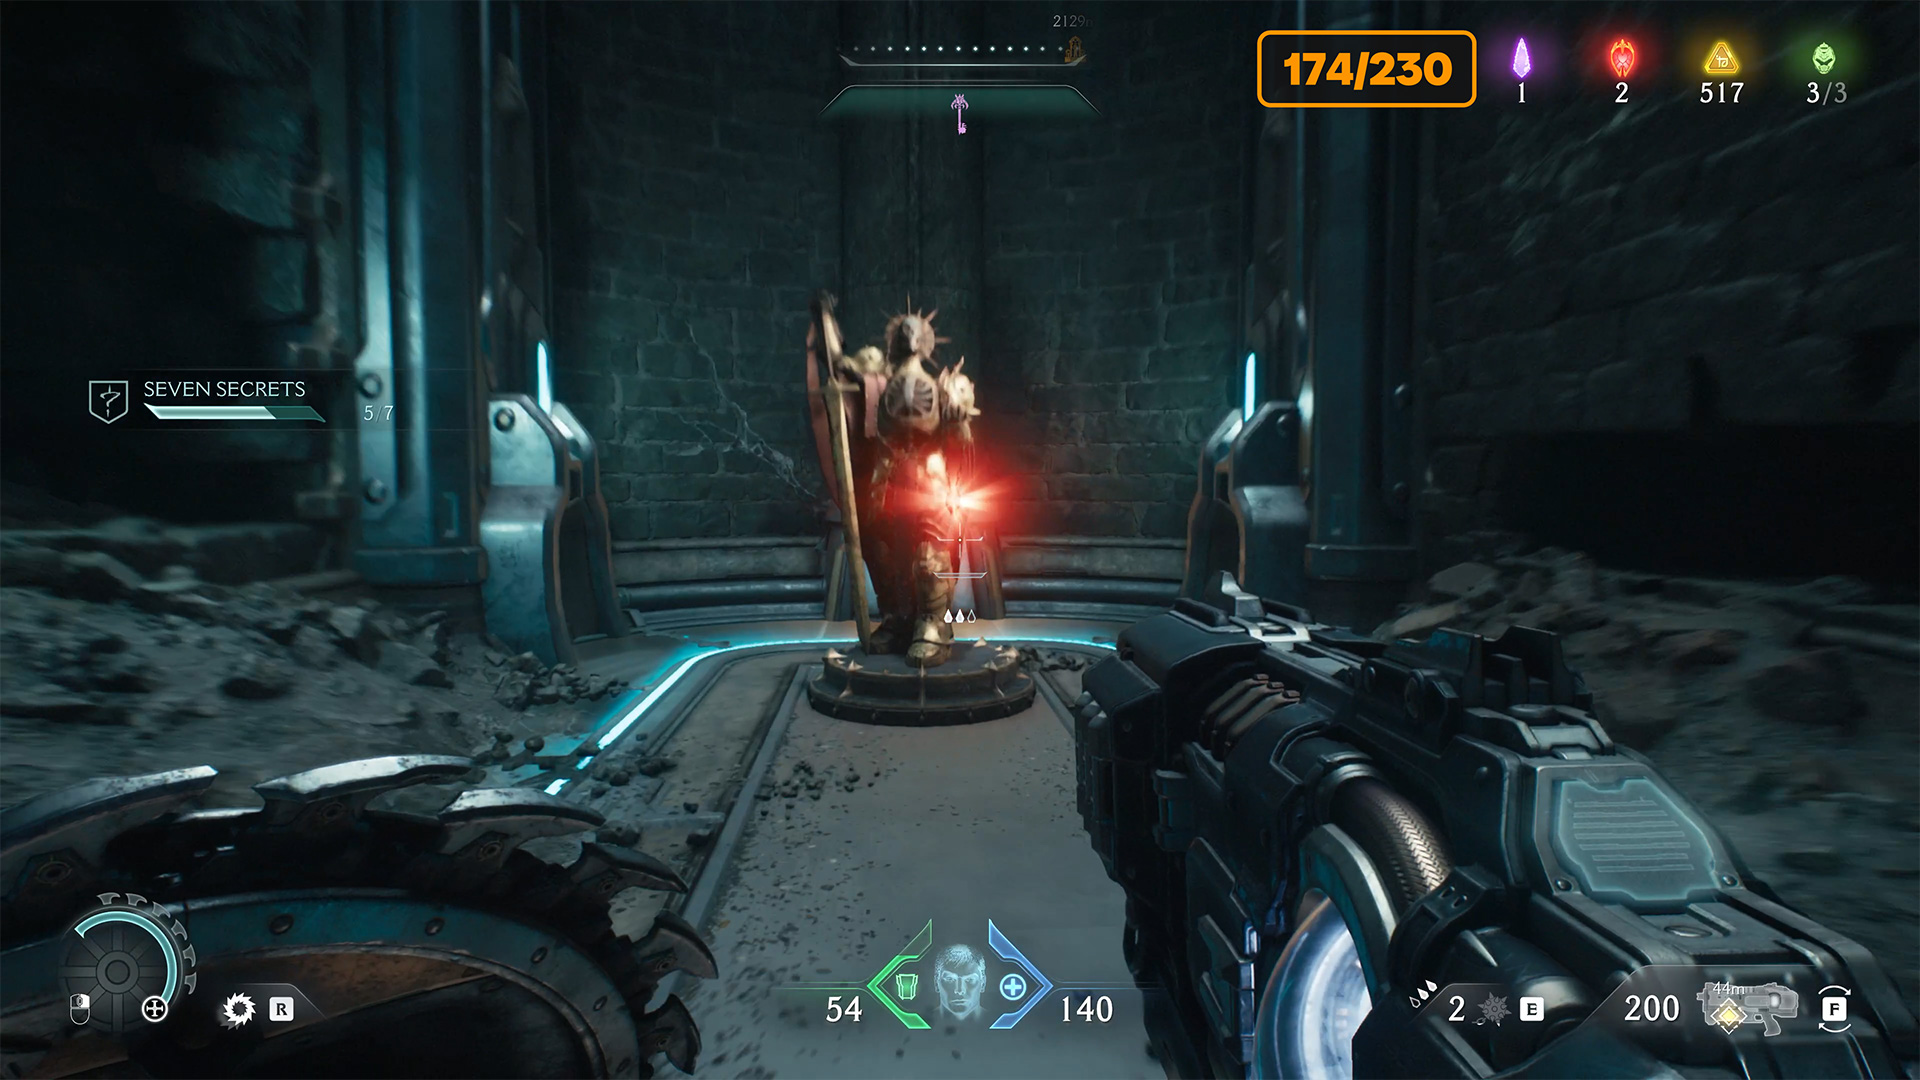
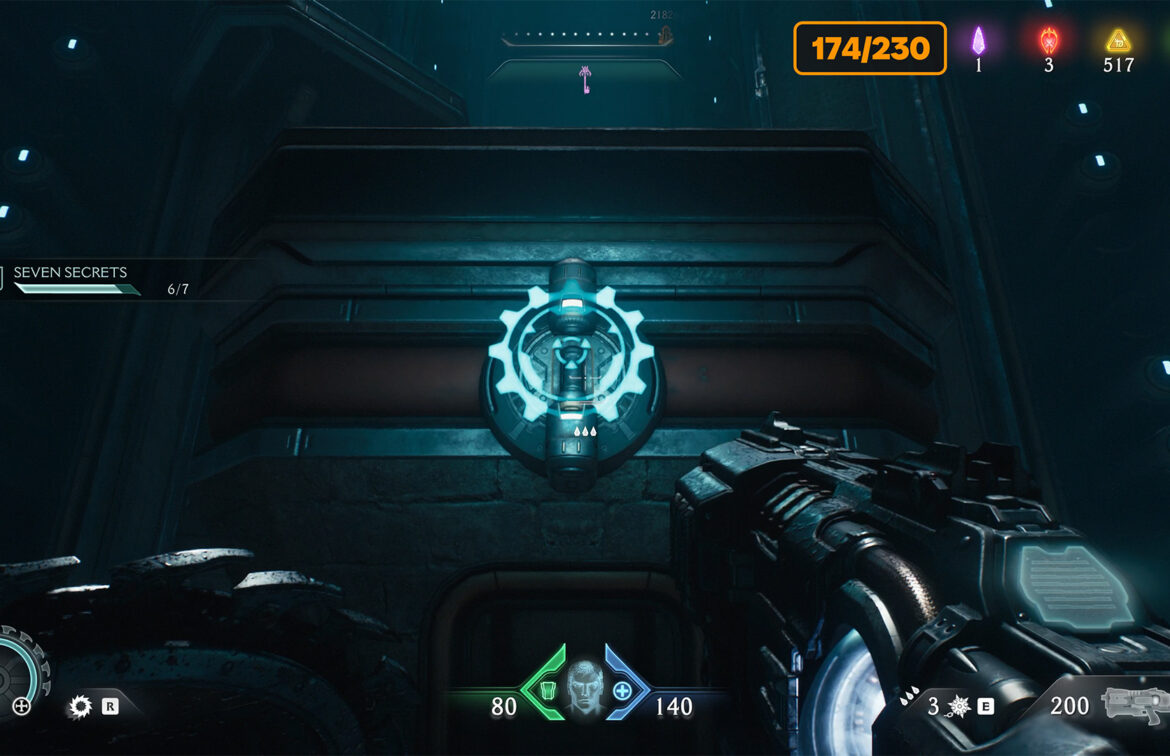
The third challenge is called Seven Secrets. Here, you don’t need to do anything at all. If you complete this chapter 100%, you will automatically complete this challenge.
-
- Ancestral Forge Challenges
-
- Challenge Sawed Off complete
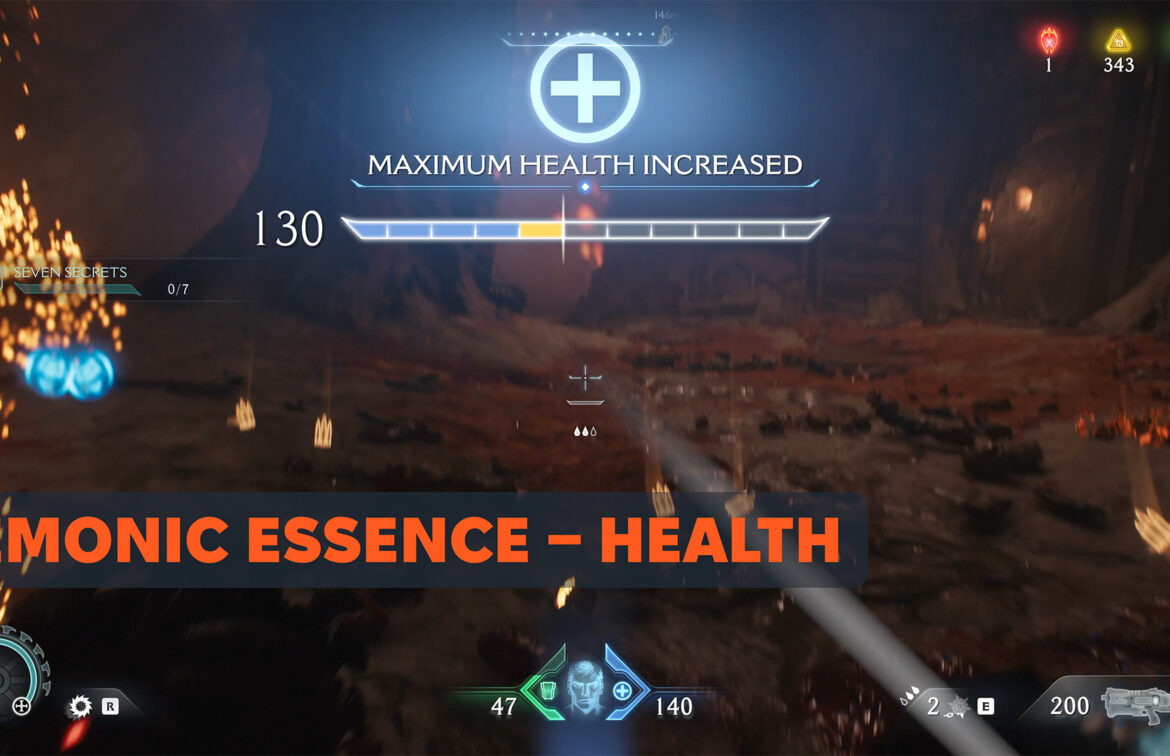
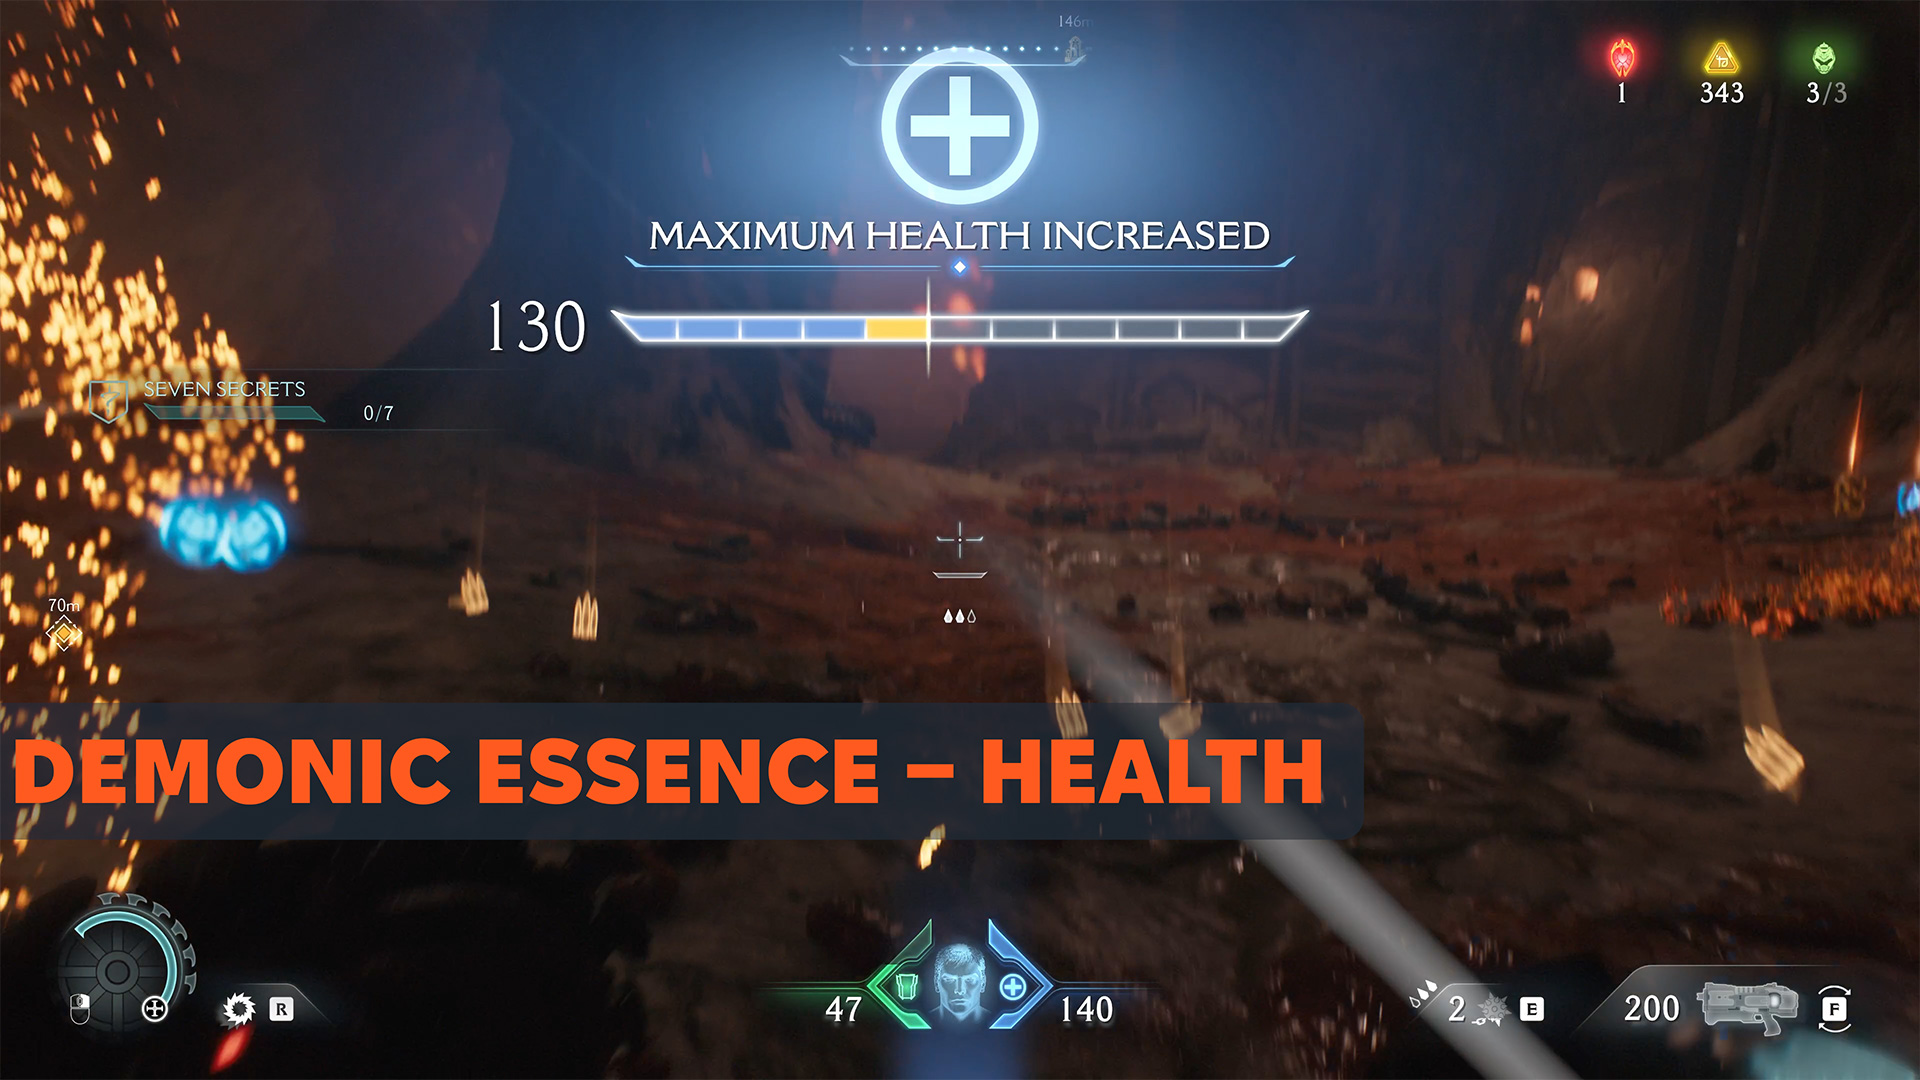
Ancestral Forge Demonic Essence Health
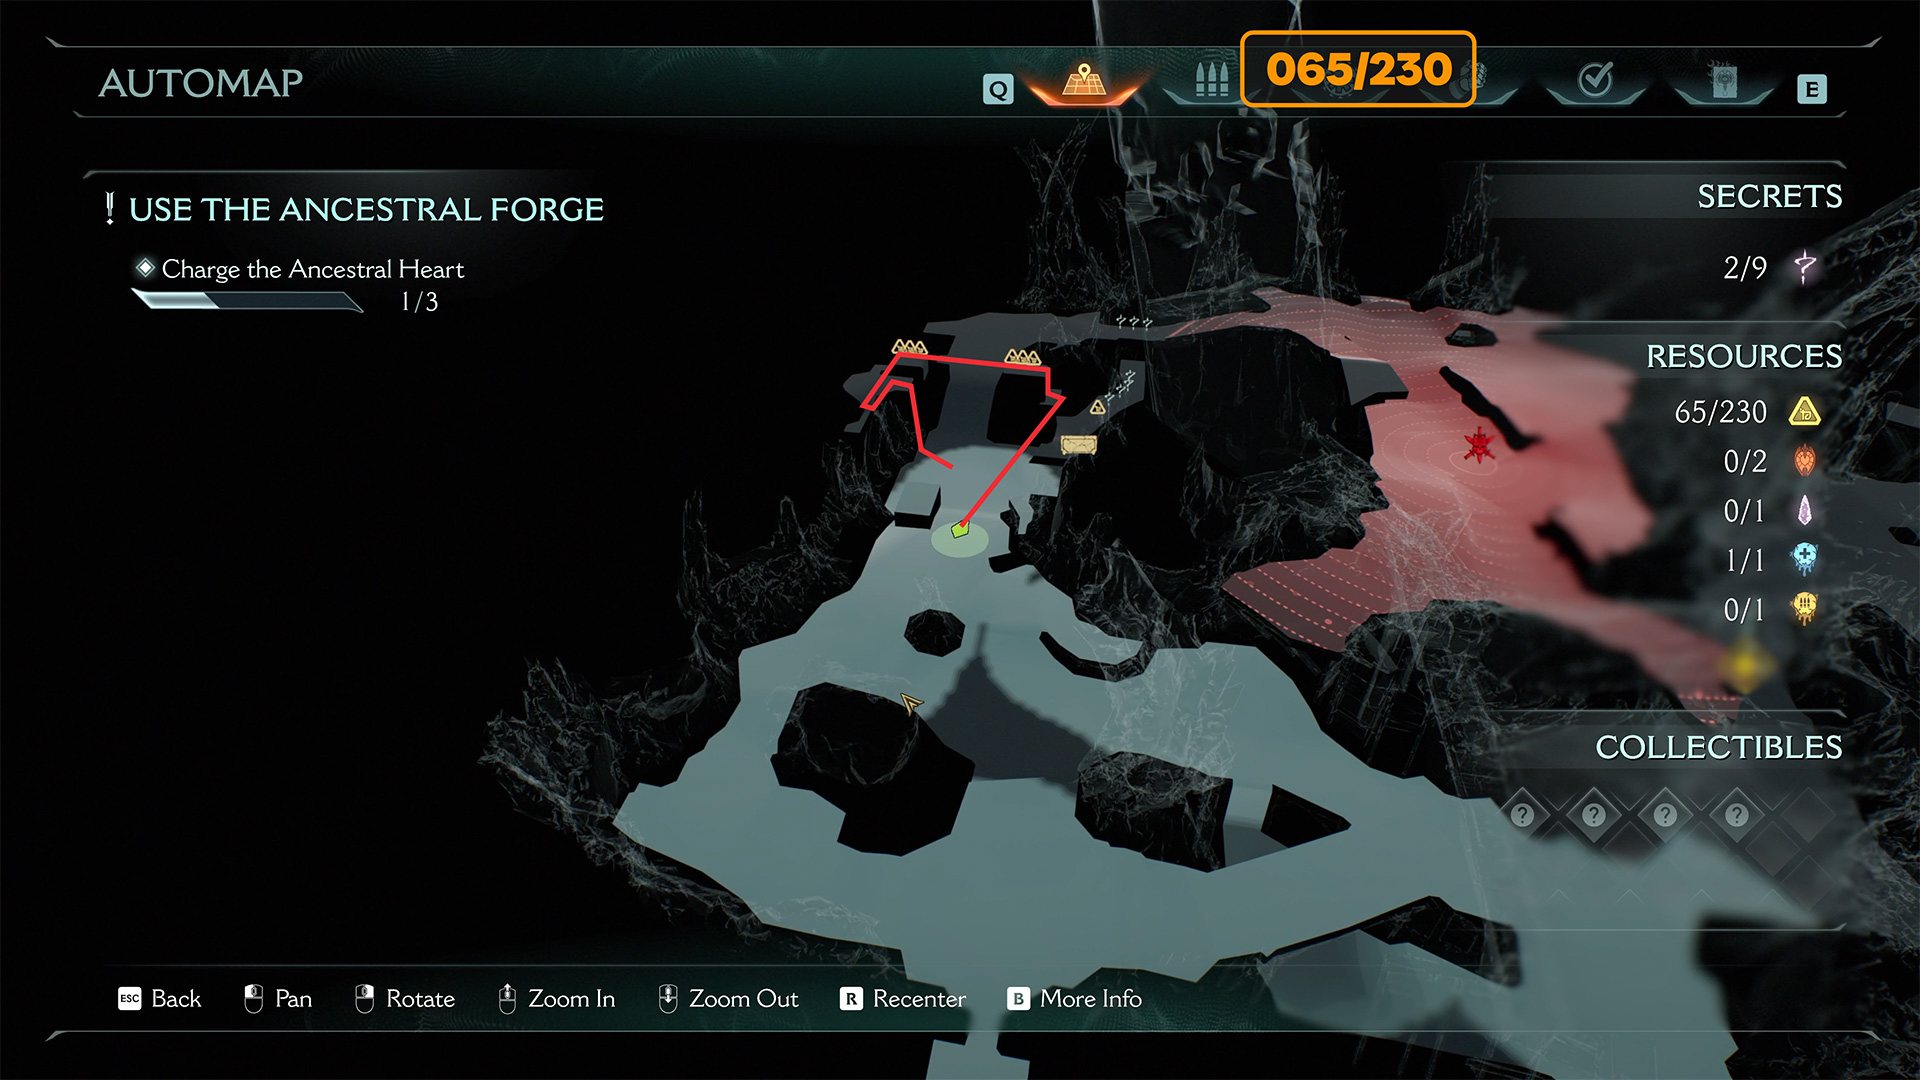
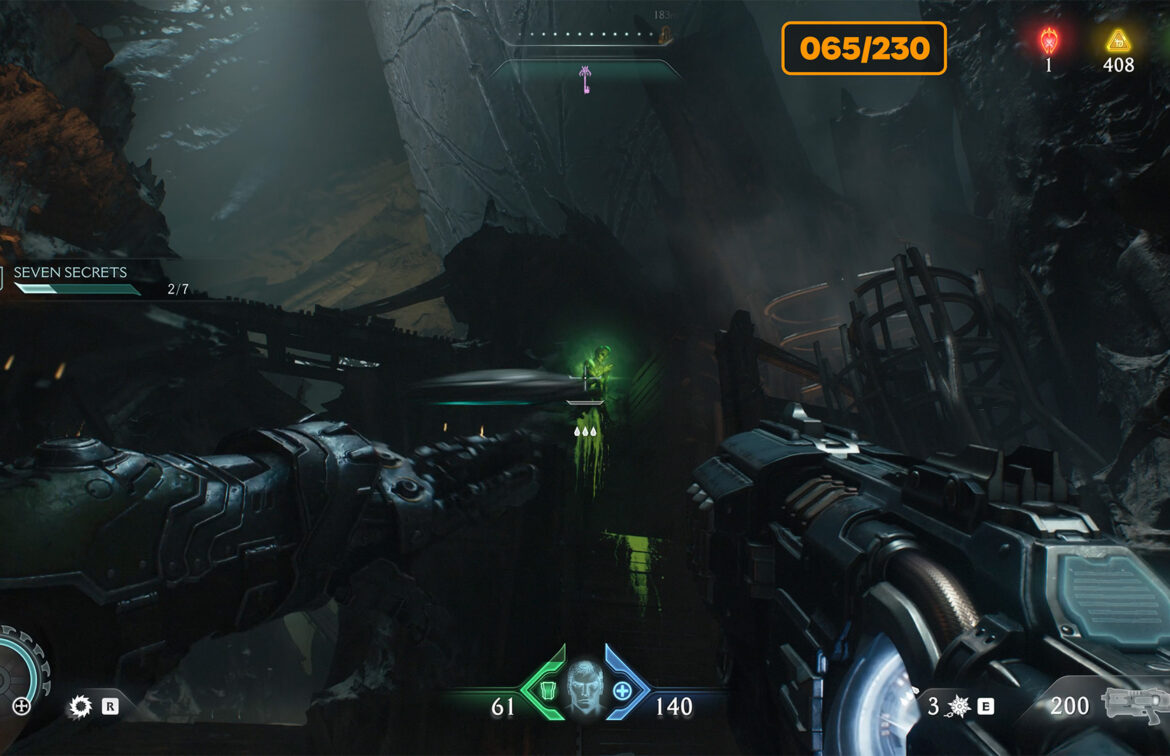
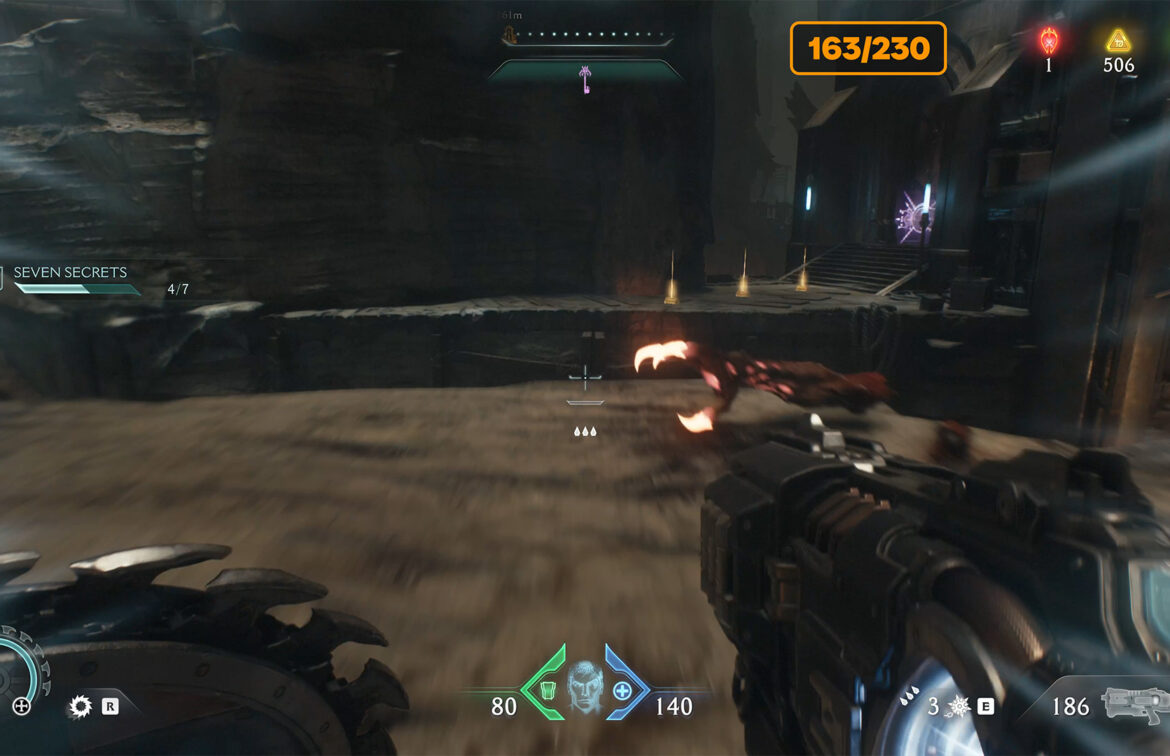
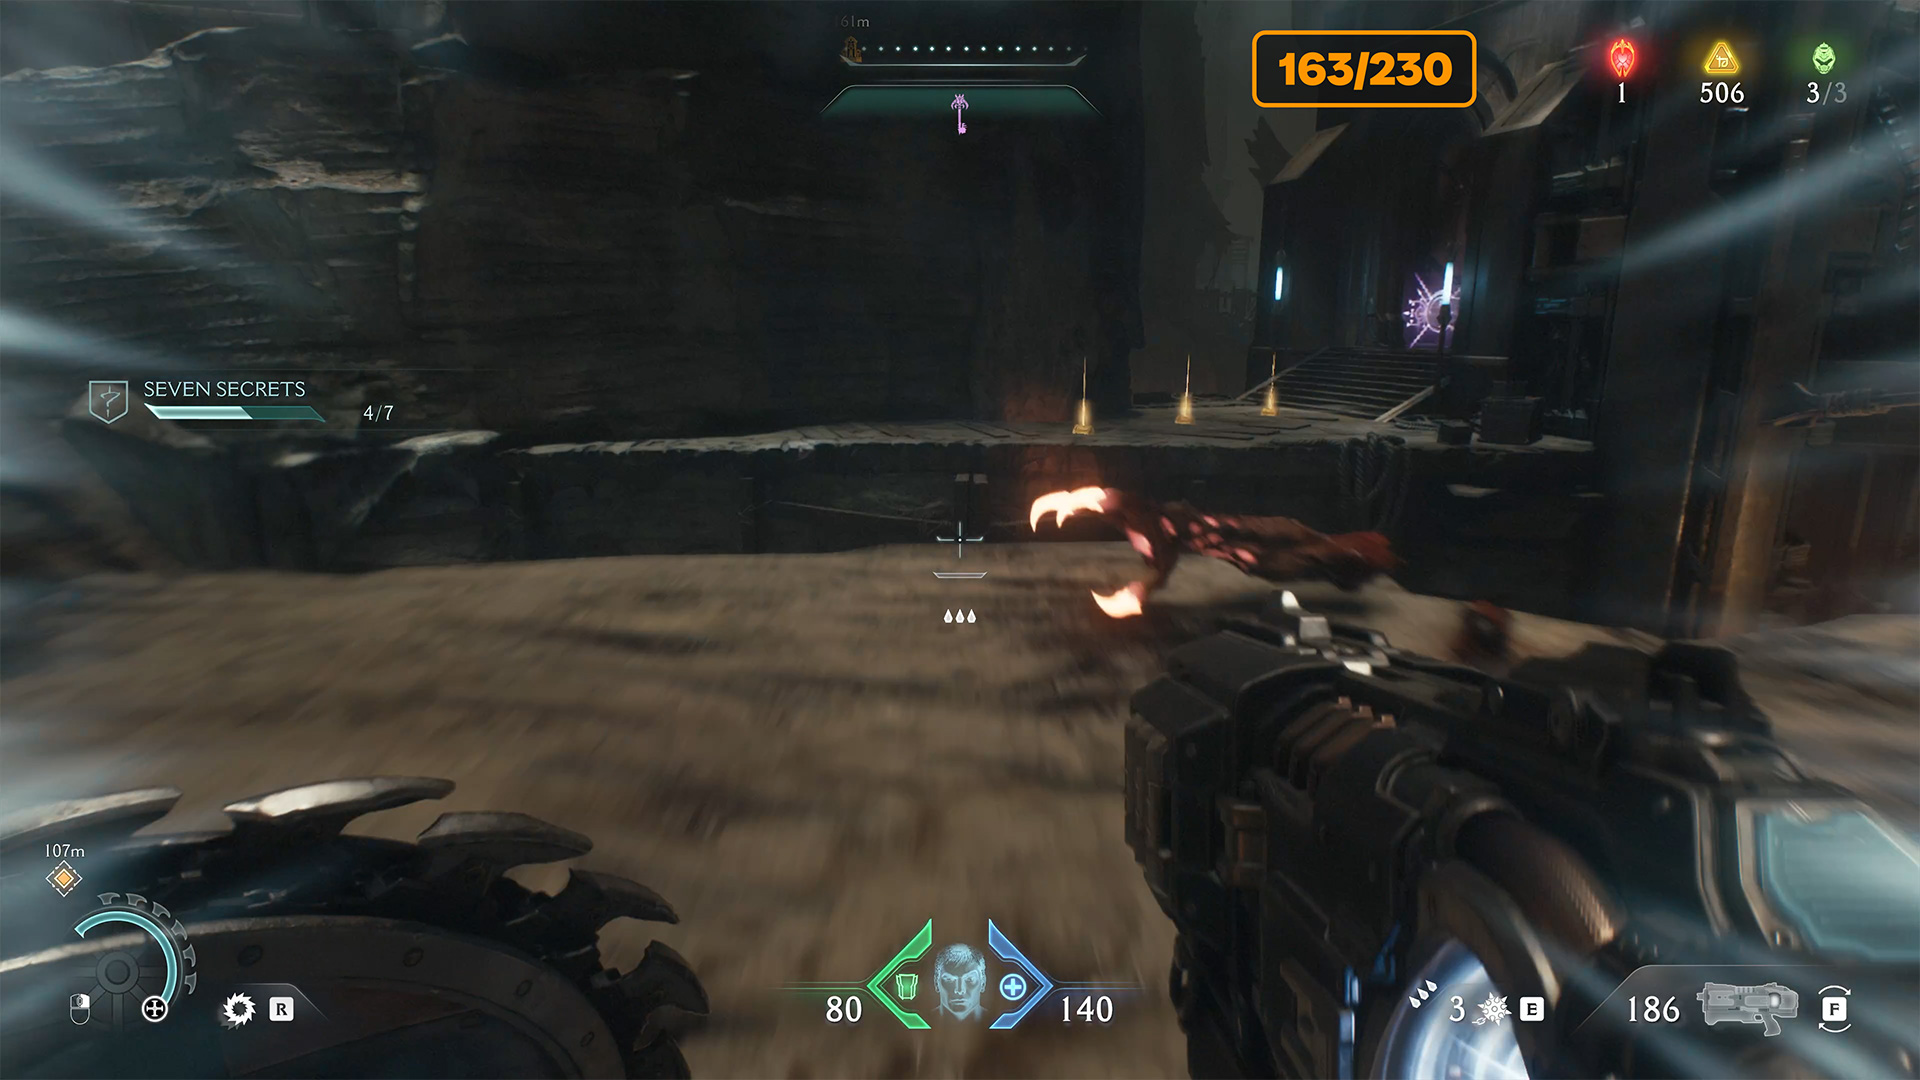
When you enter the location, you will find the Sentinel Shrine ahead of you. Move to the right from there. Here, in the red area, you will have your first big battle. At the end of the battle, an elite enemy will appear. After defeating him, you will automatically receive Demonic Essence – Health.
-
- Demonic Essence Health location
-
- Ancestral Forge Demonic Essence Health
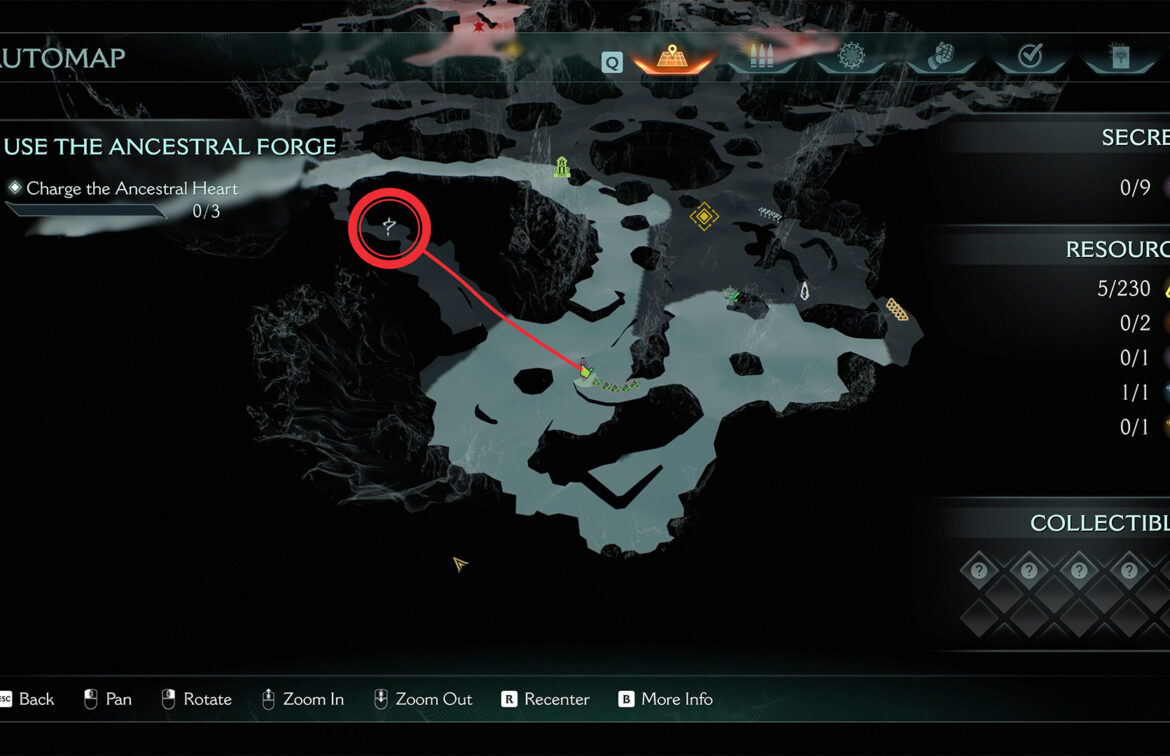
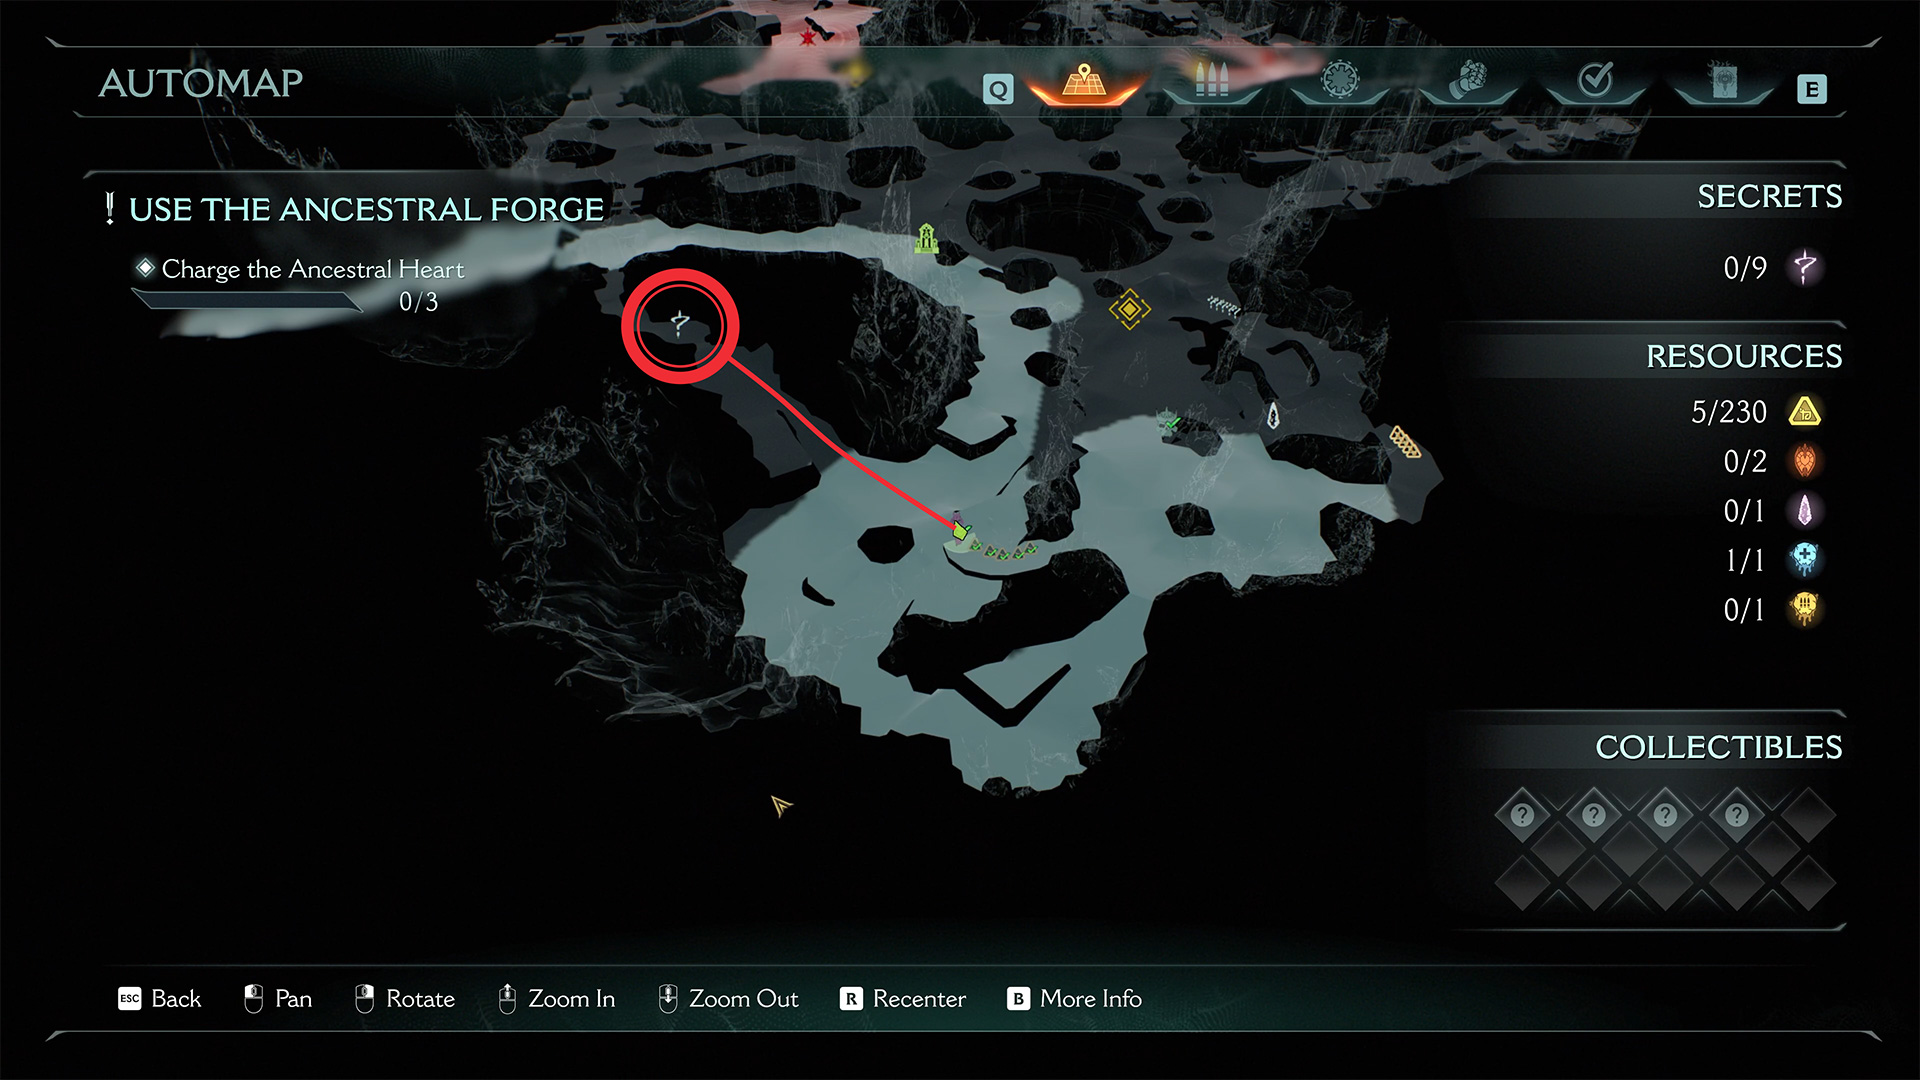
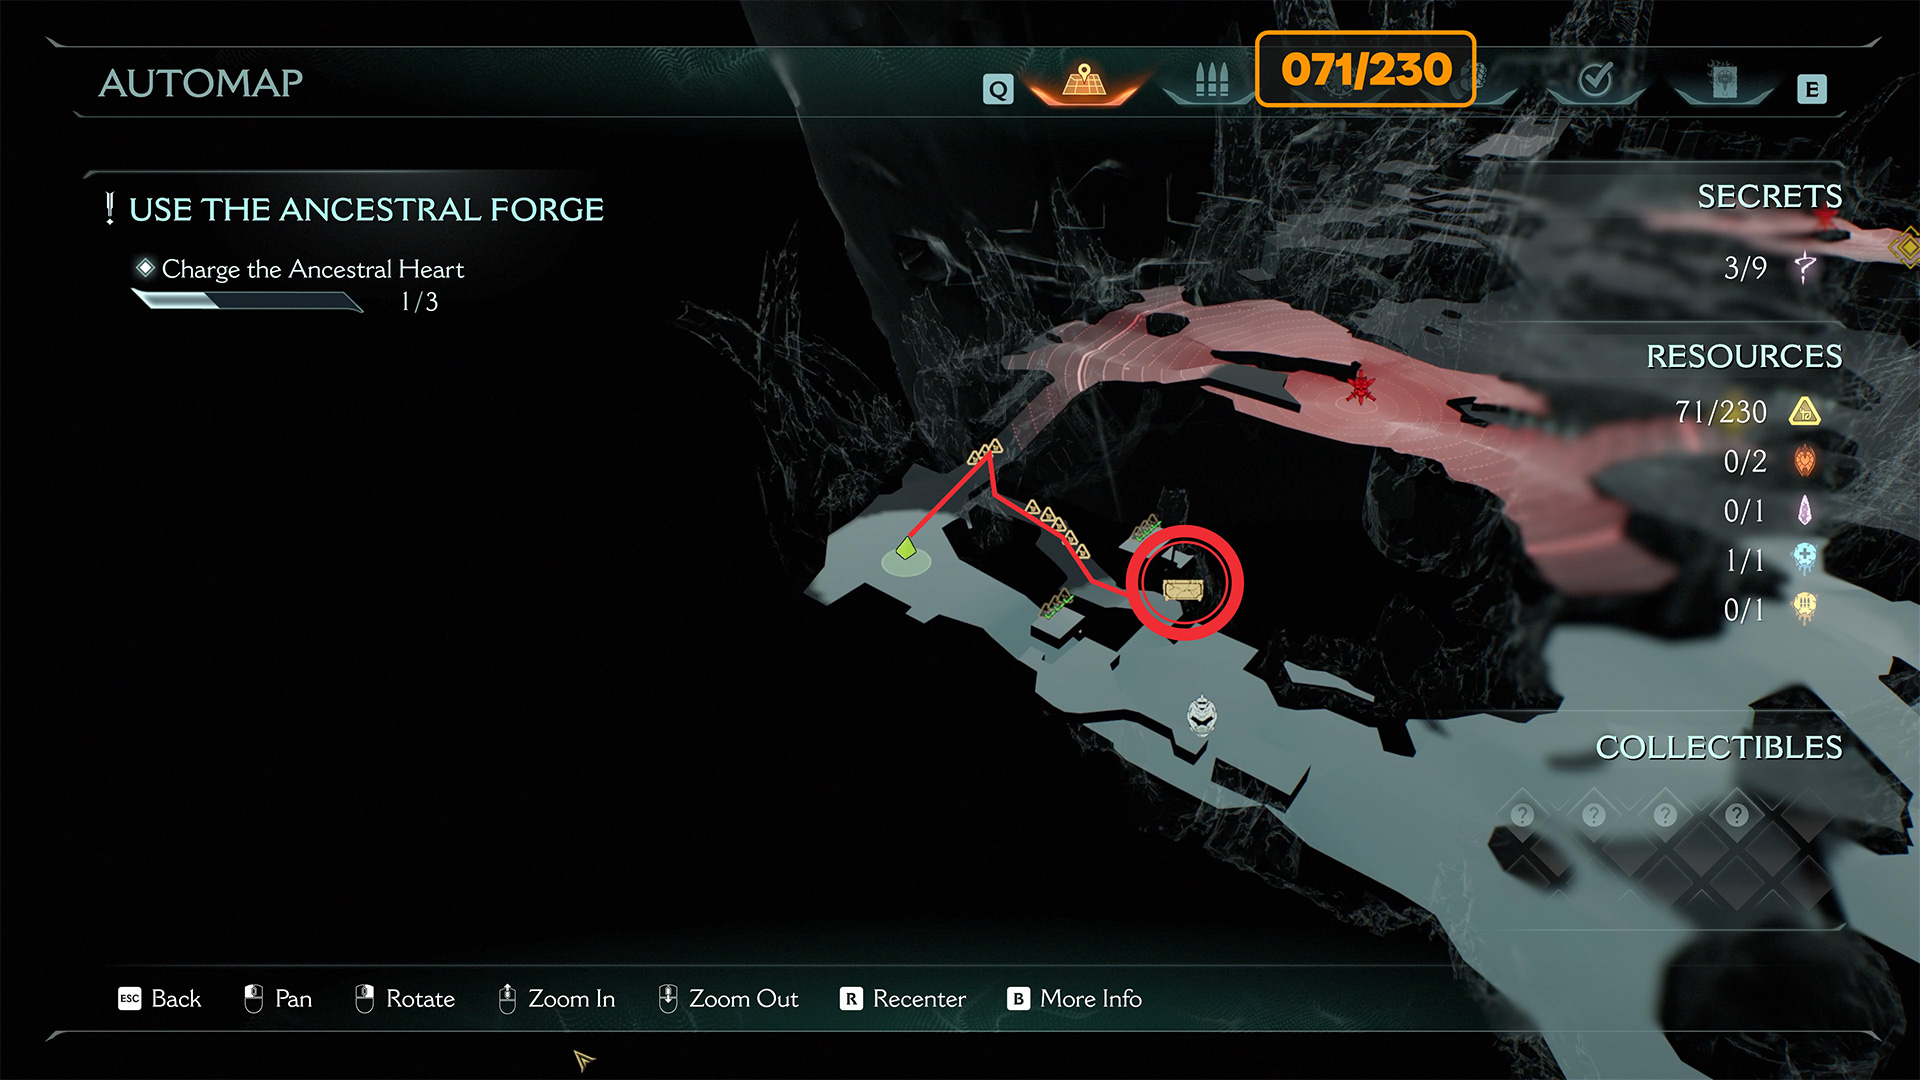
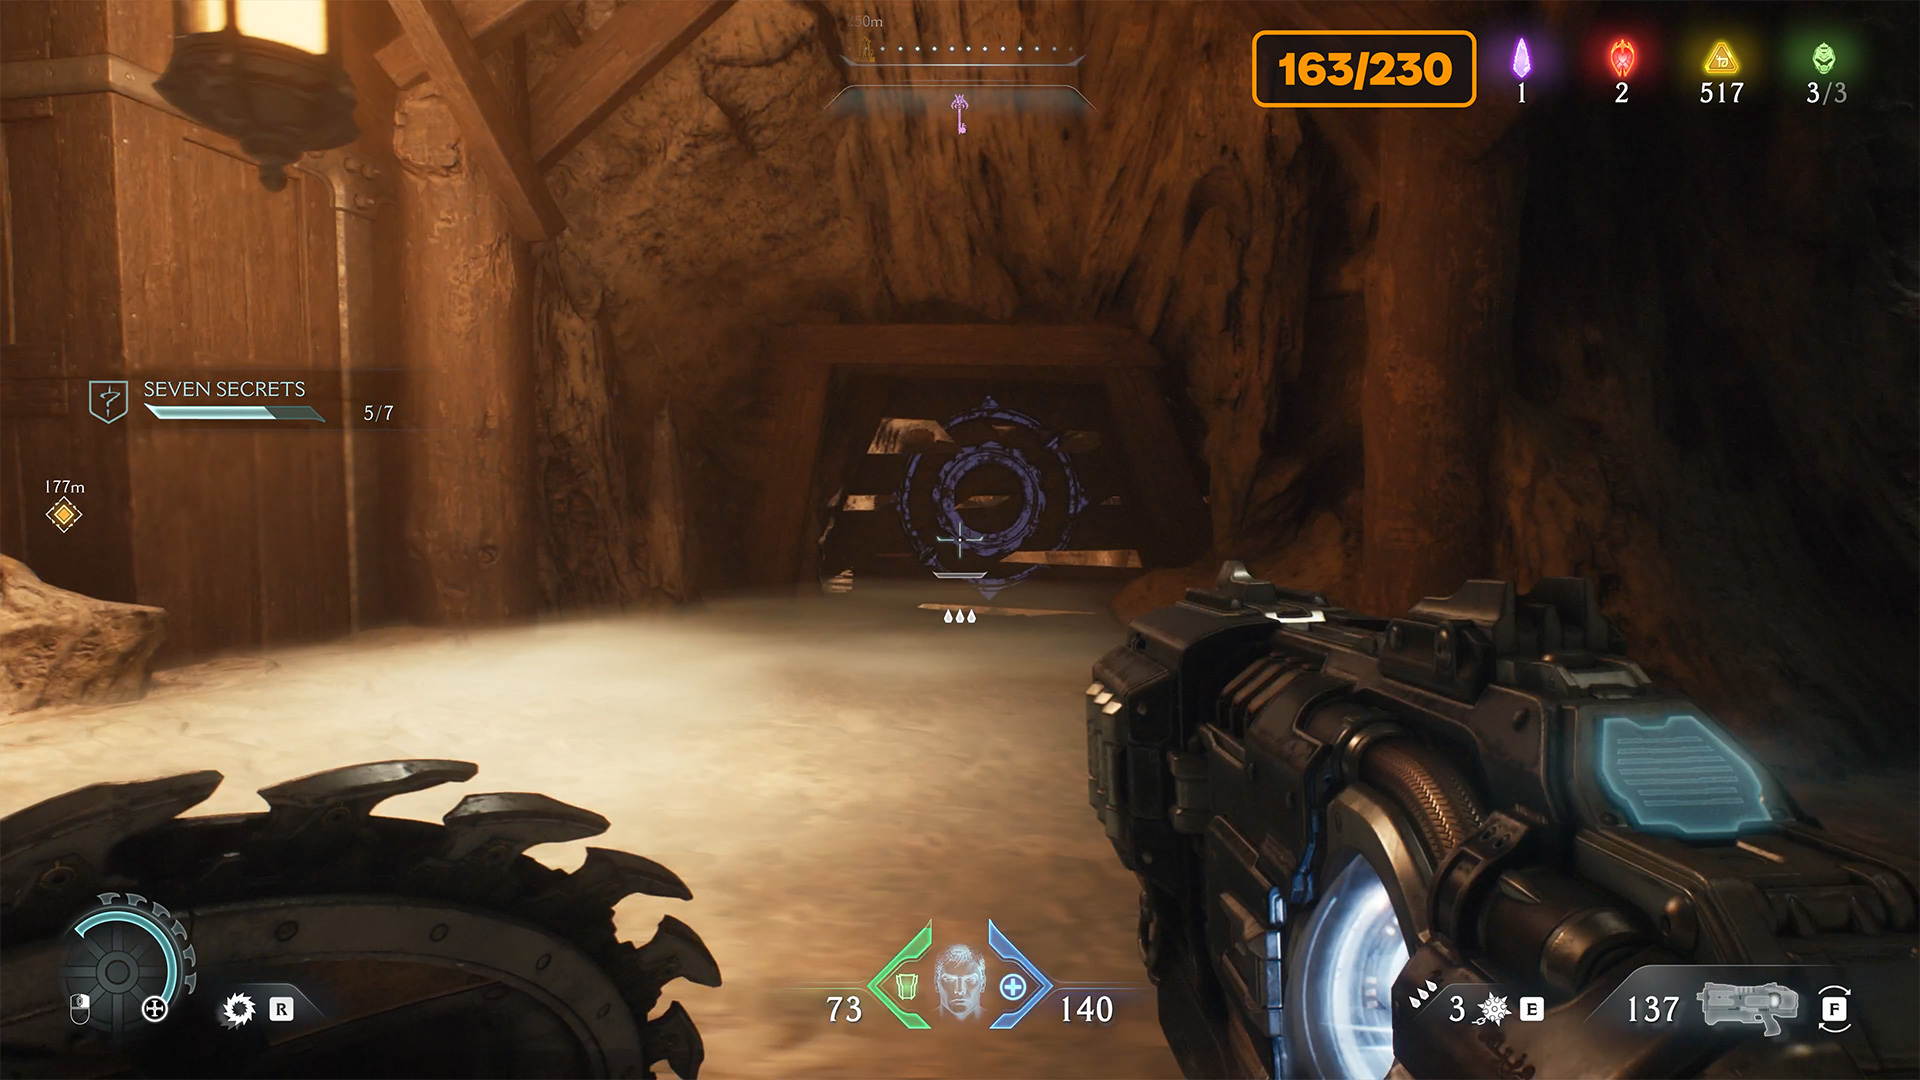
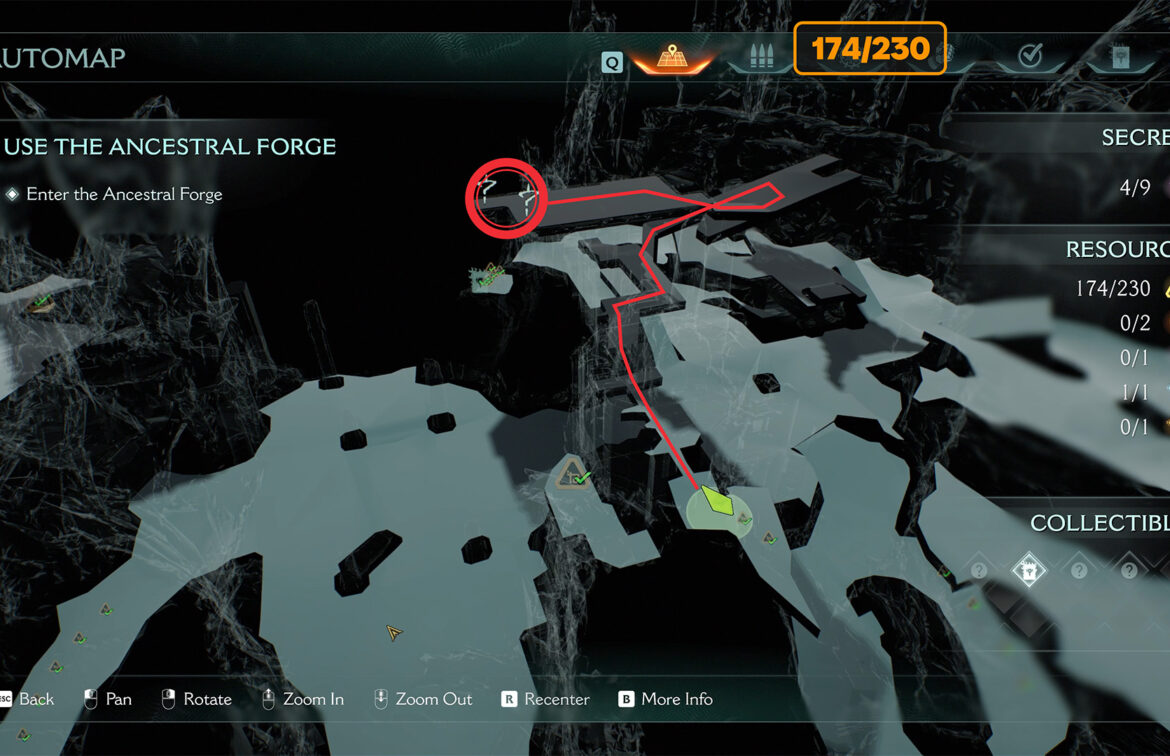
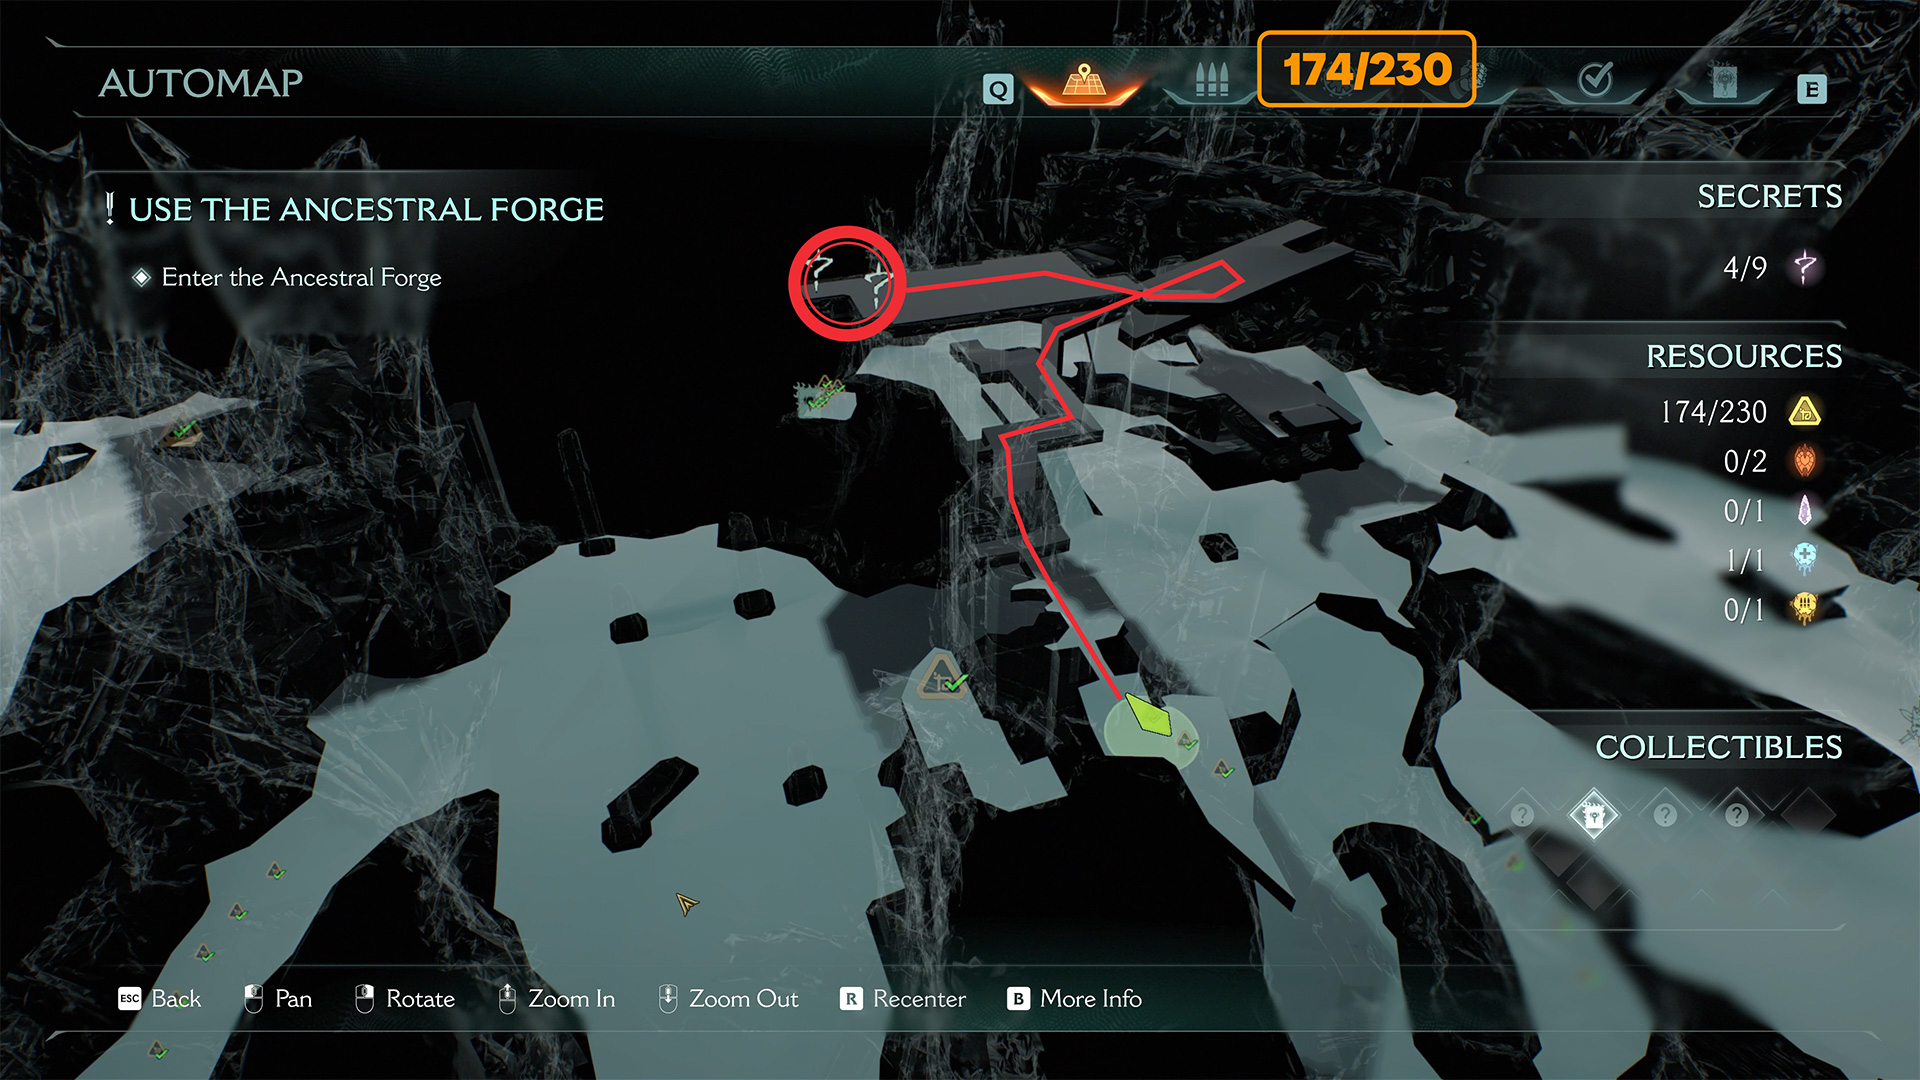
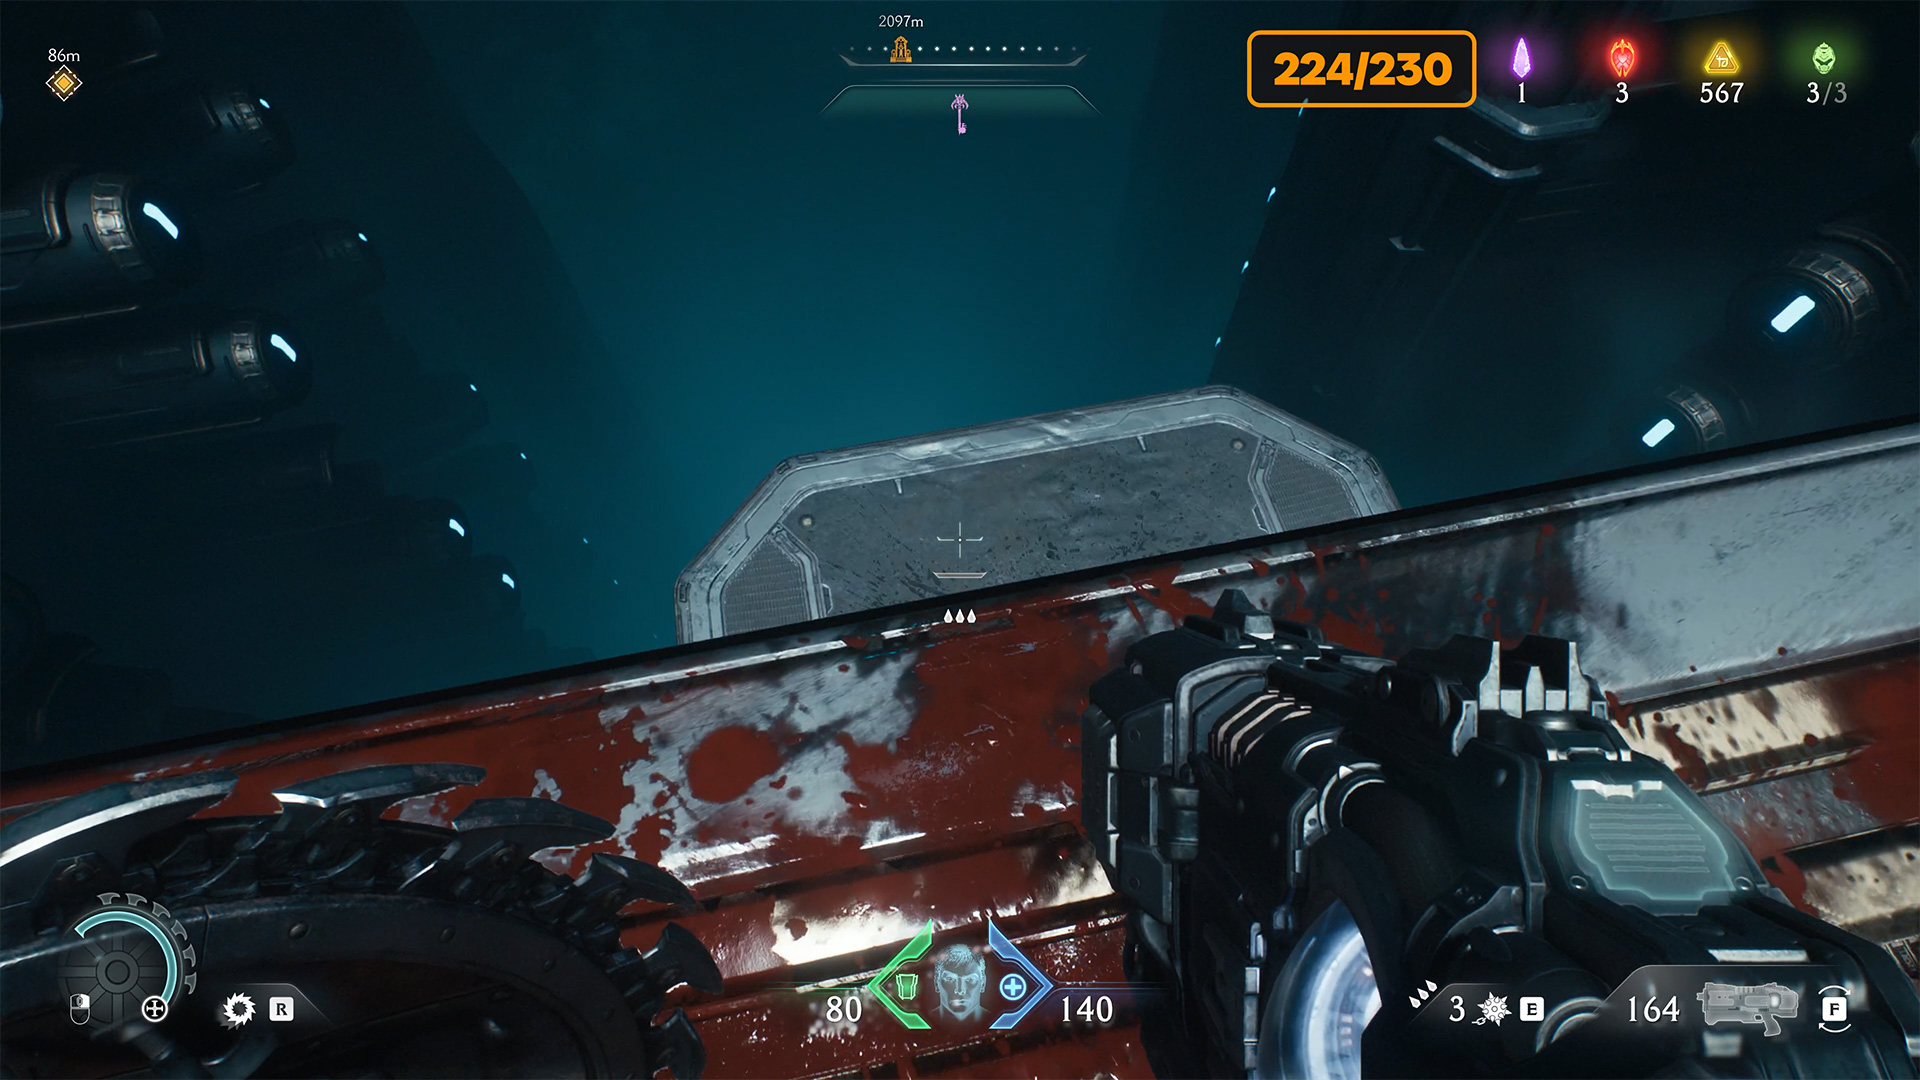
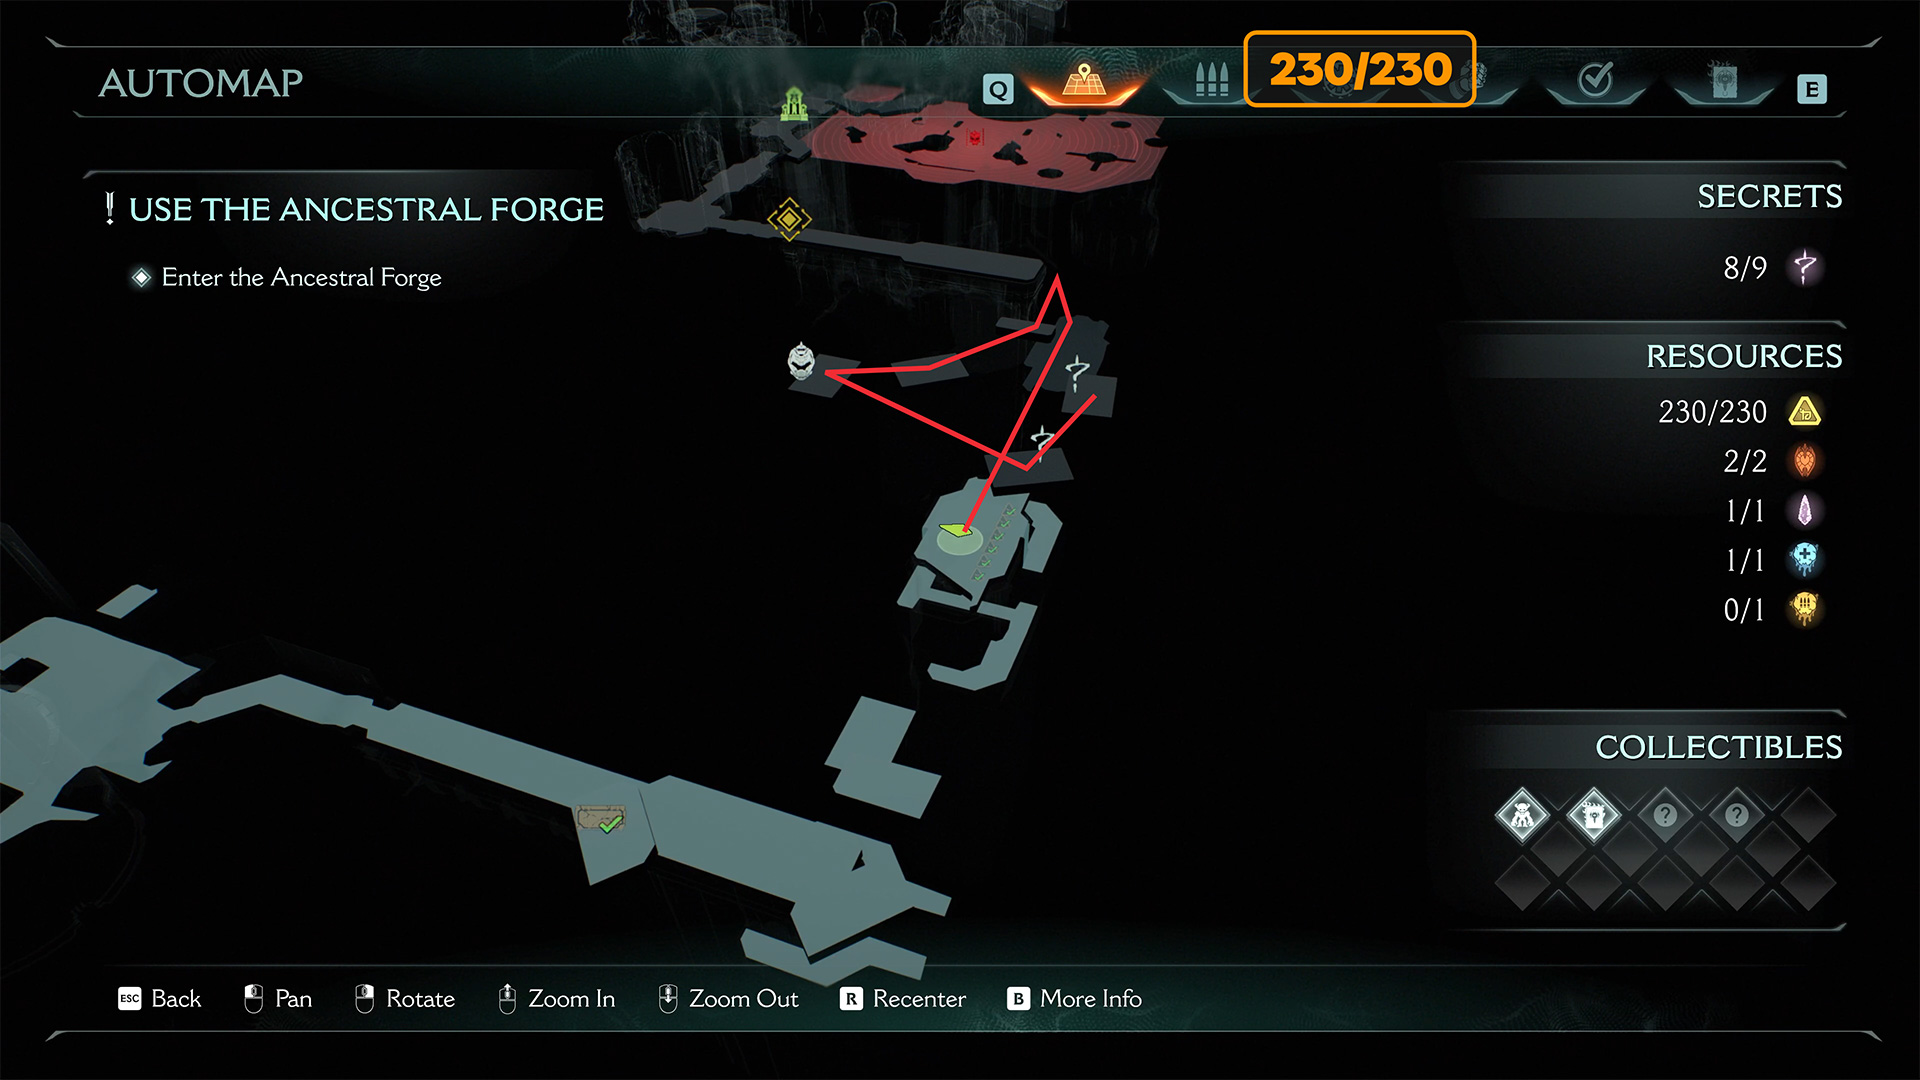
Ancestral Forge key location
After the first battle at the beginning of this area, find a wooden barrier that you can break. Behind it, you will receive 5 gold, and a little further on, you will find a secret key that will help you open many secret doors in this chapter.
-
- Ancestral Forge key location
-
- Ancestral Forge secret key
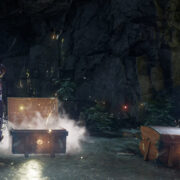
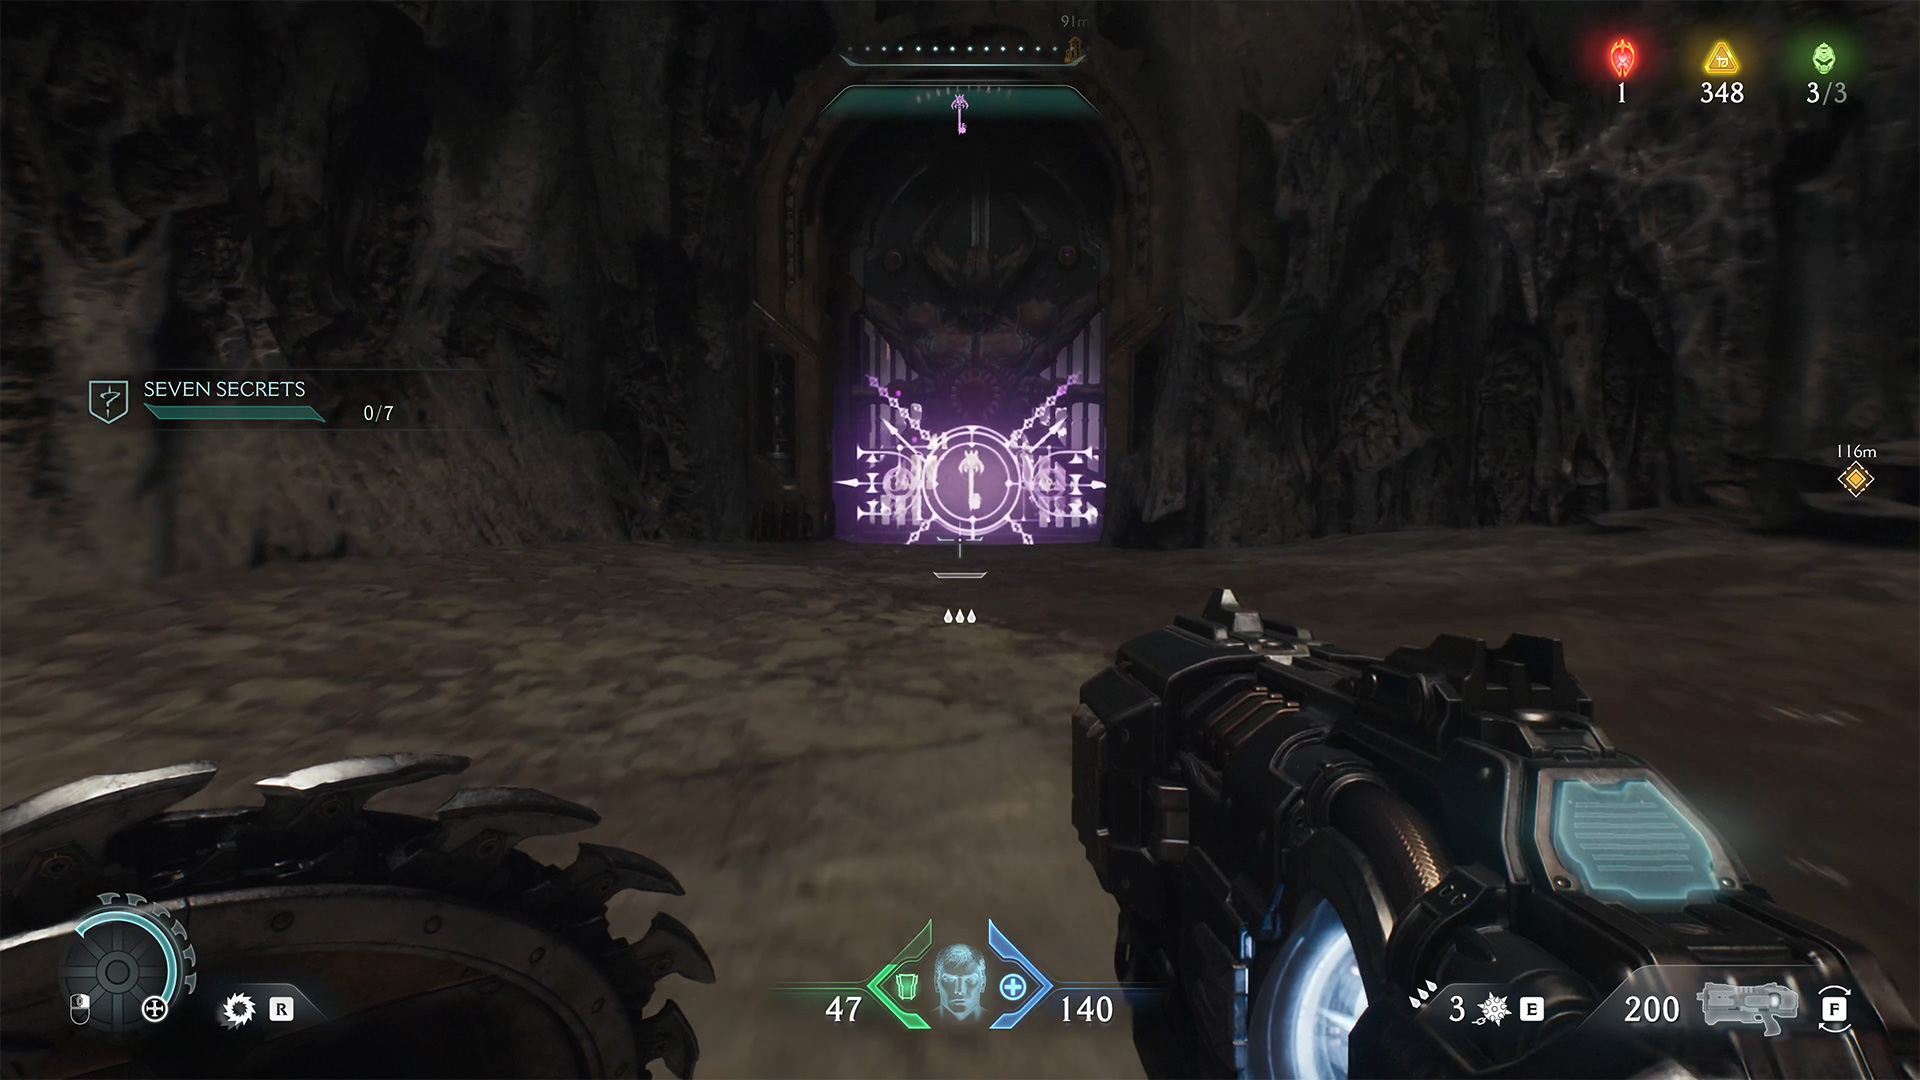
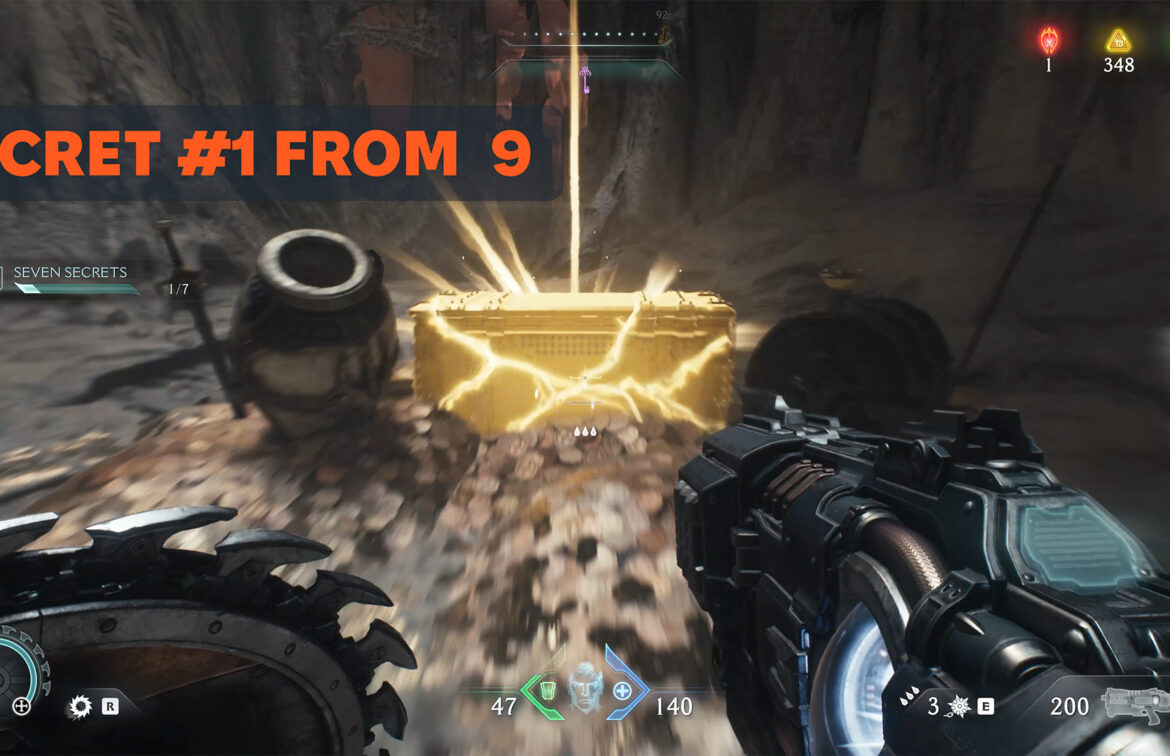
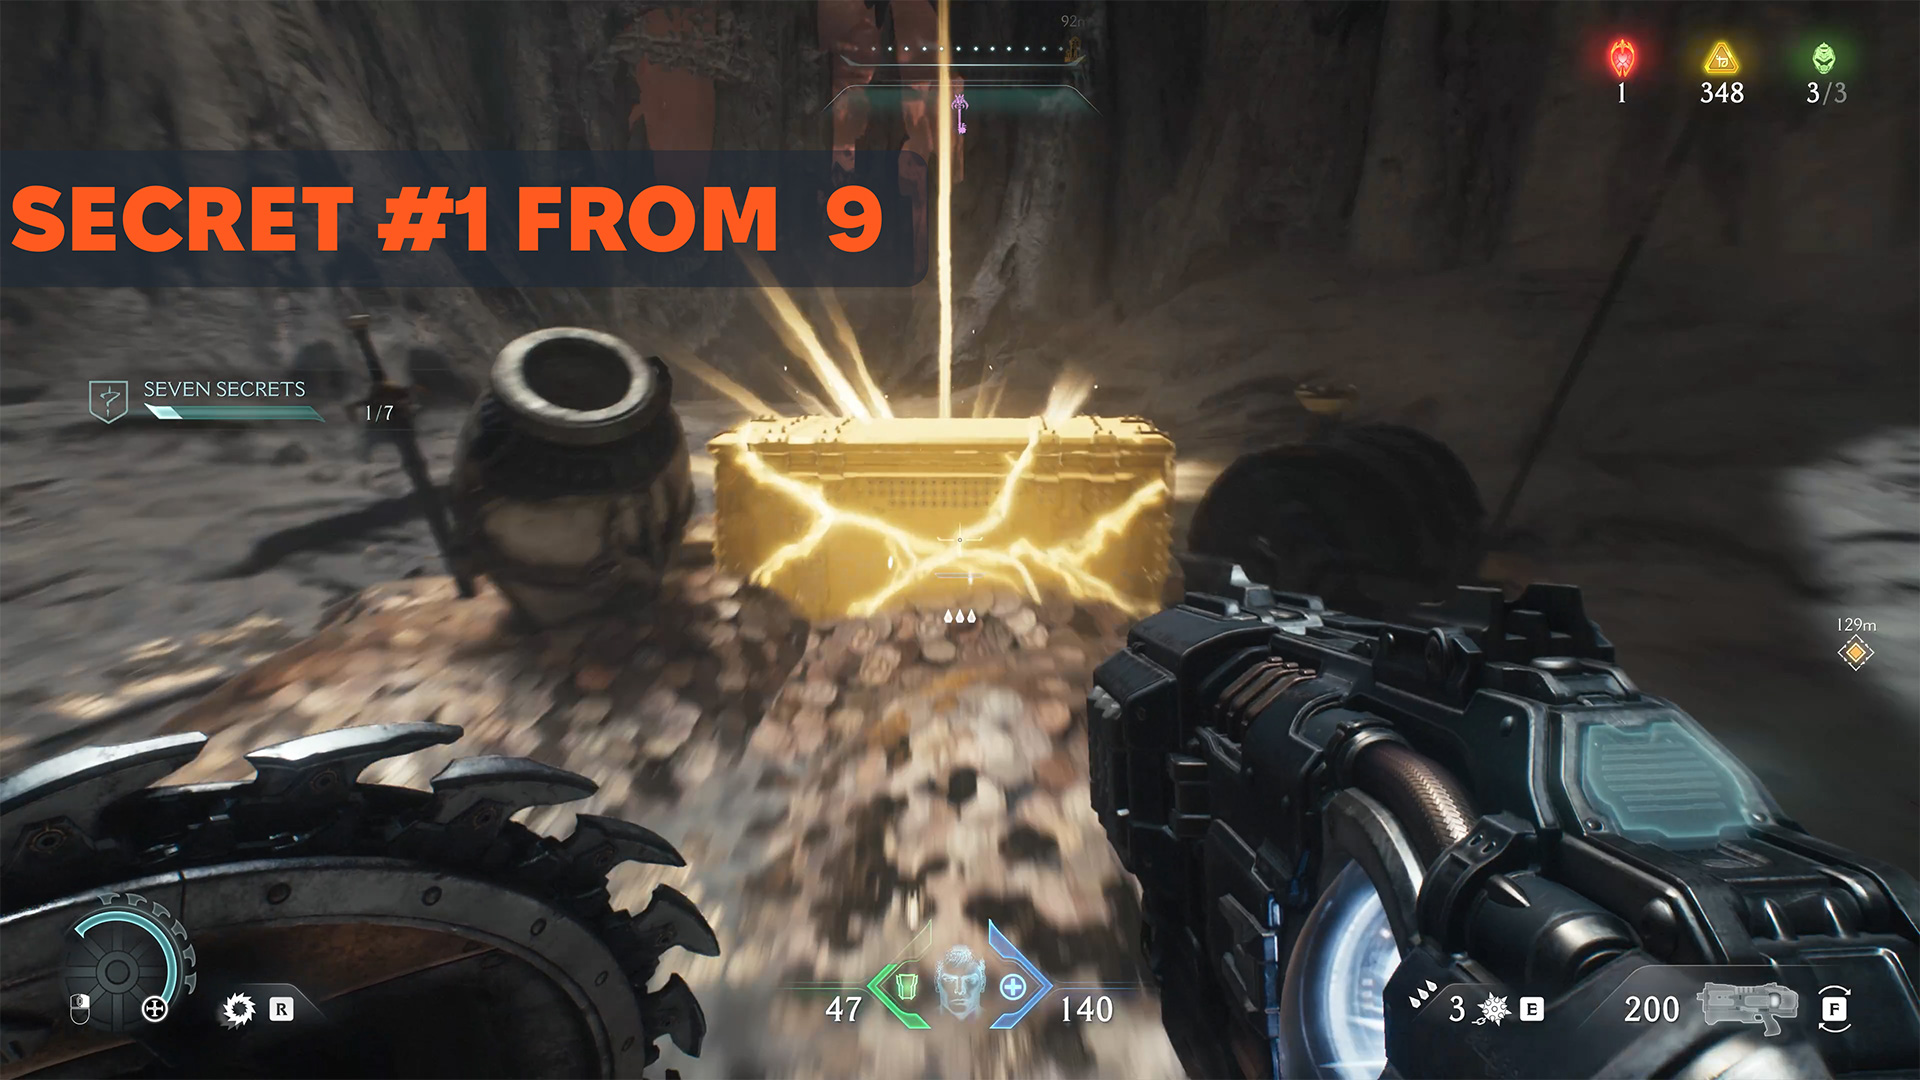
Doom Ancestral Forge Chest
Now you need to jump down and go straight ahead. Ahead, you will see a closed door that will open when you approach it, provided you have picked up the secret key earlier. Without the key, there will be no entrance. Behind the door, you will find the first secret location and a chest. Break it open and you will receive 50 gold coins.
-
- Doom Ancestral Forge Chest location
-

- A locked door that you will open with a secret key
-
- Doom Ancestral Forge Chest
Ancestral Forge Gold
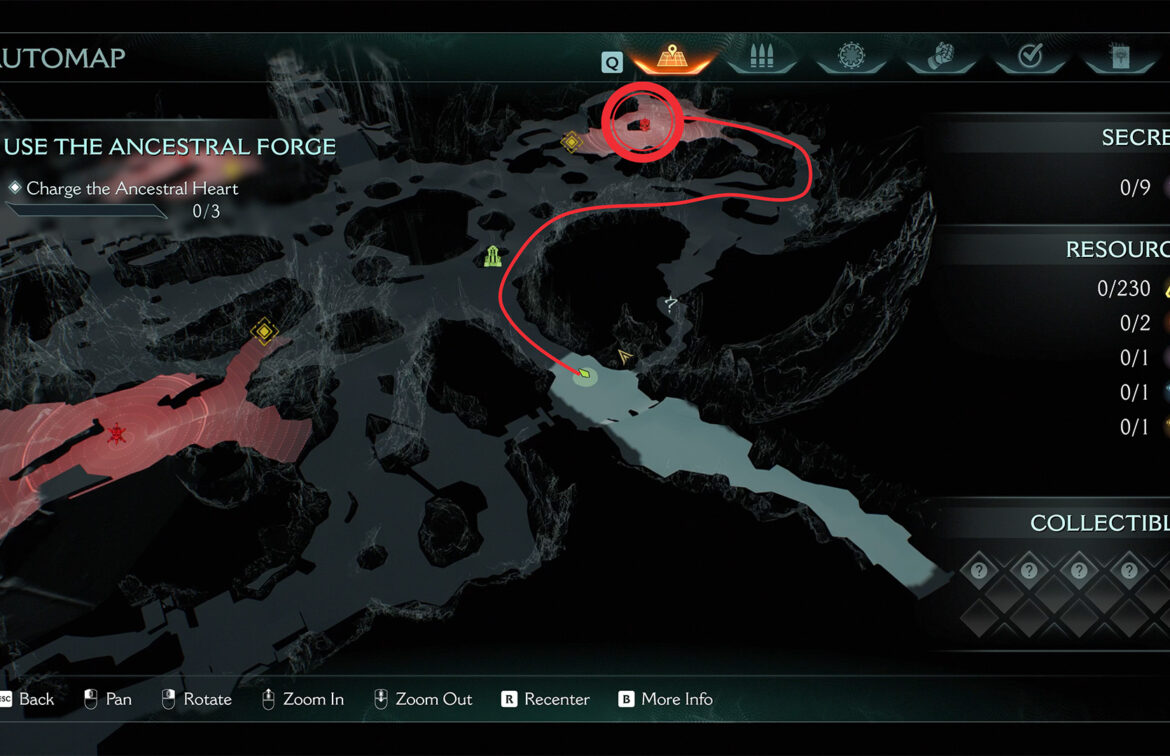
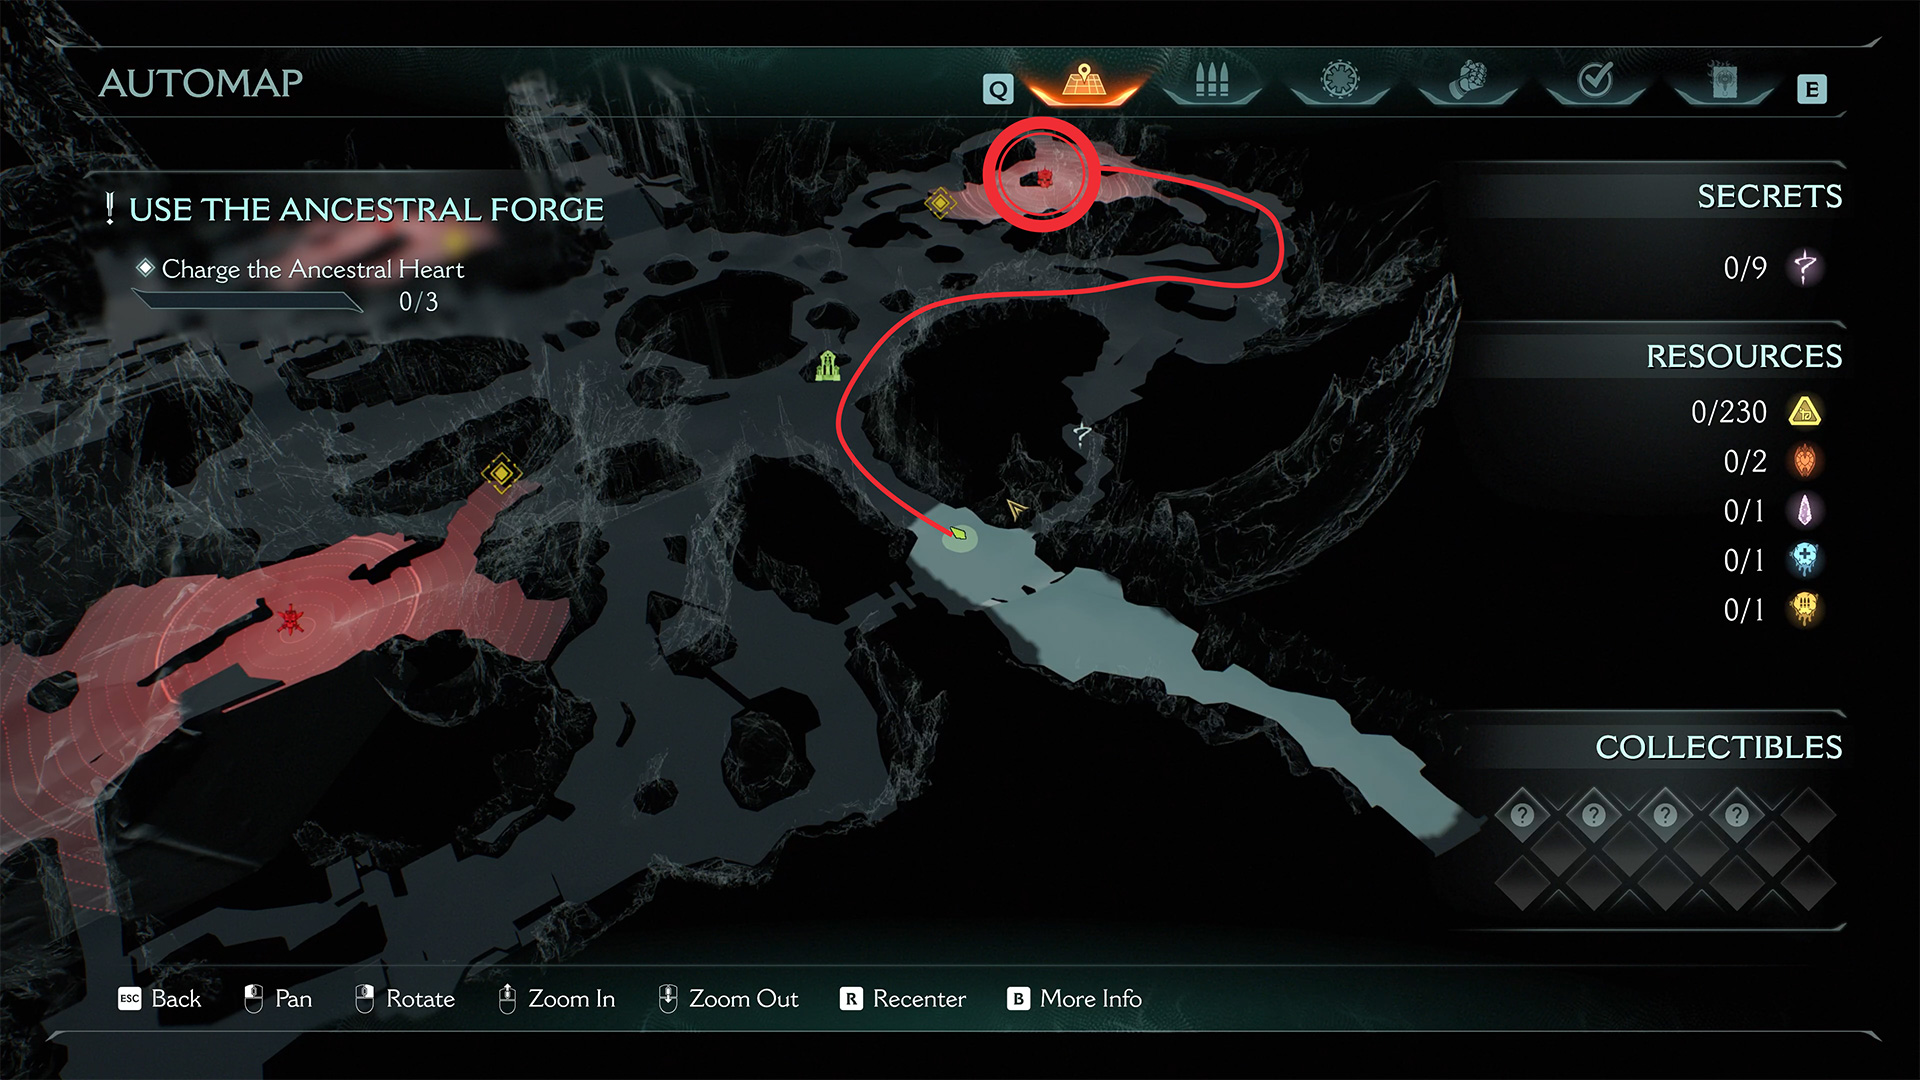
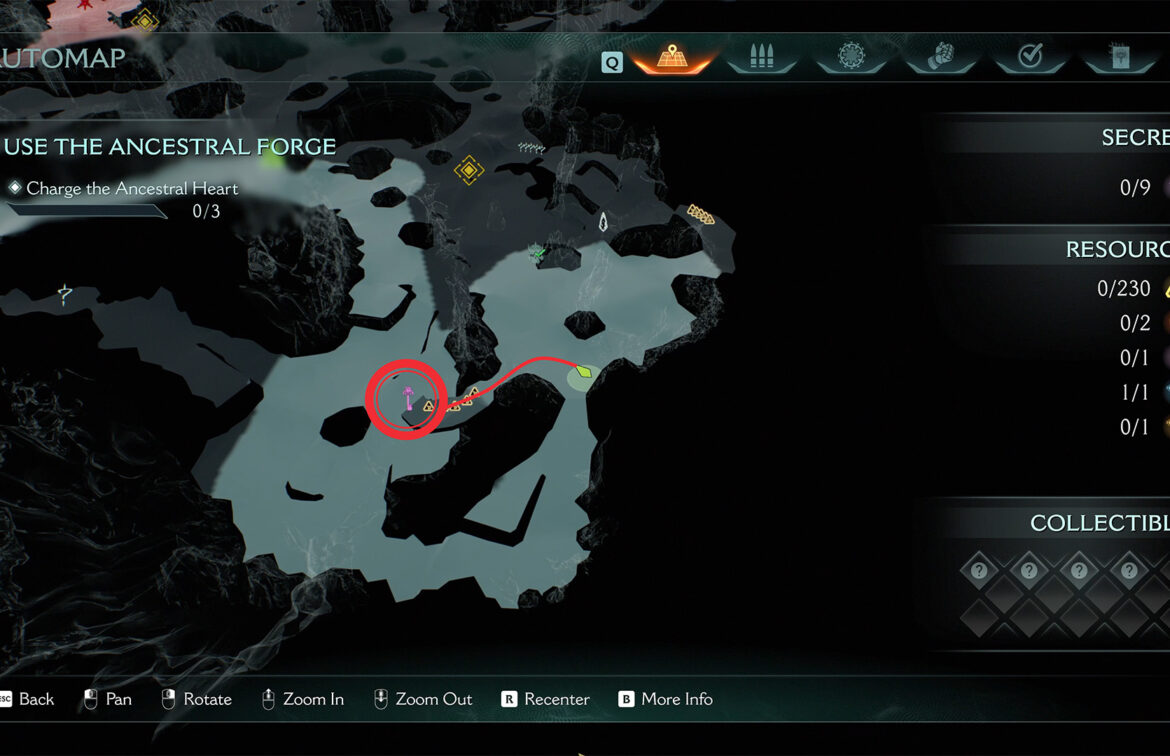
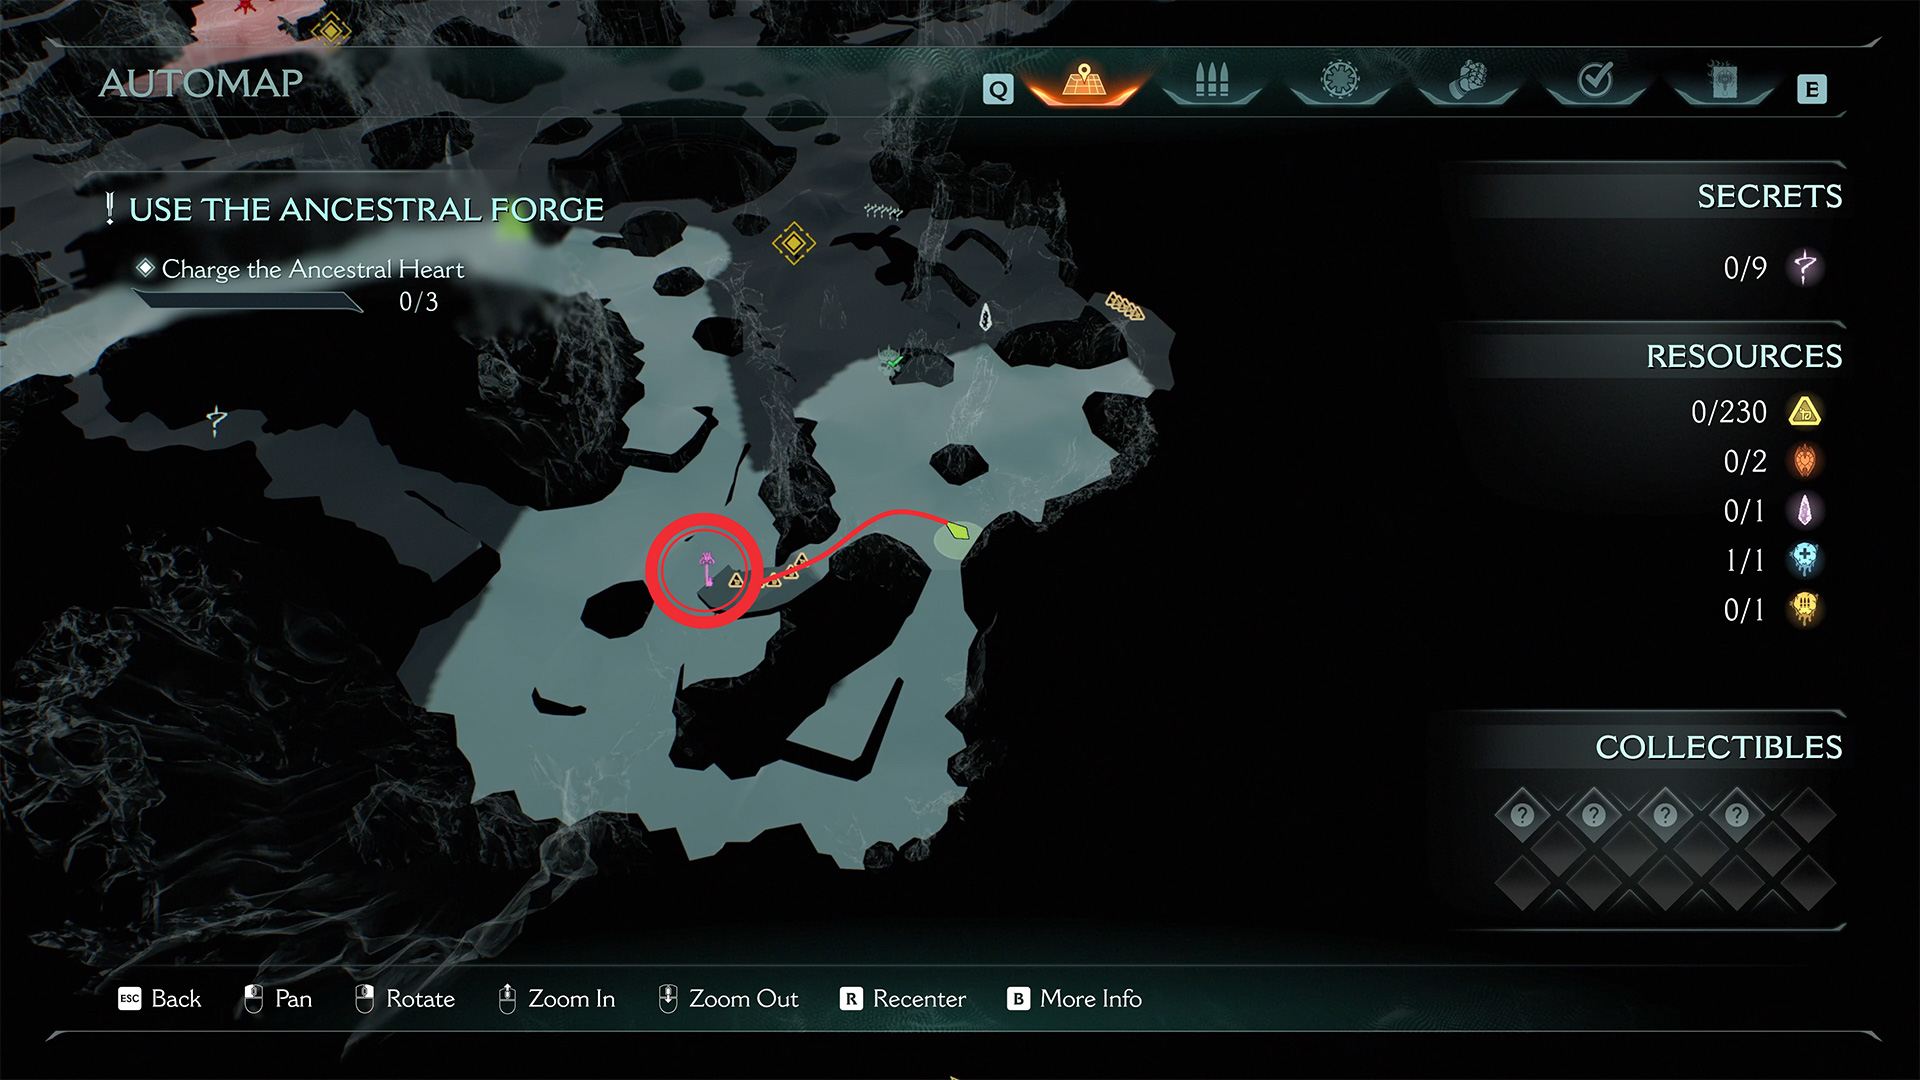
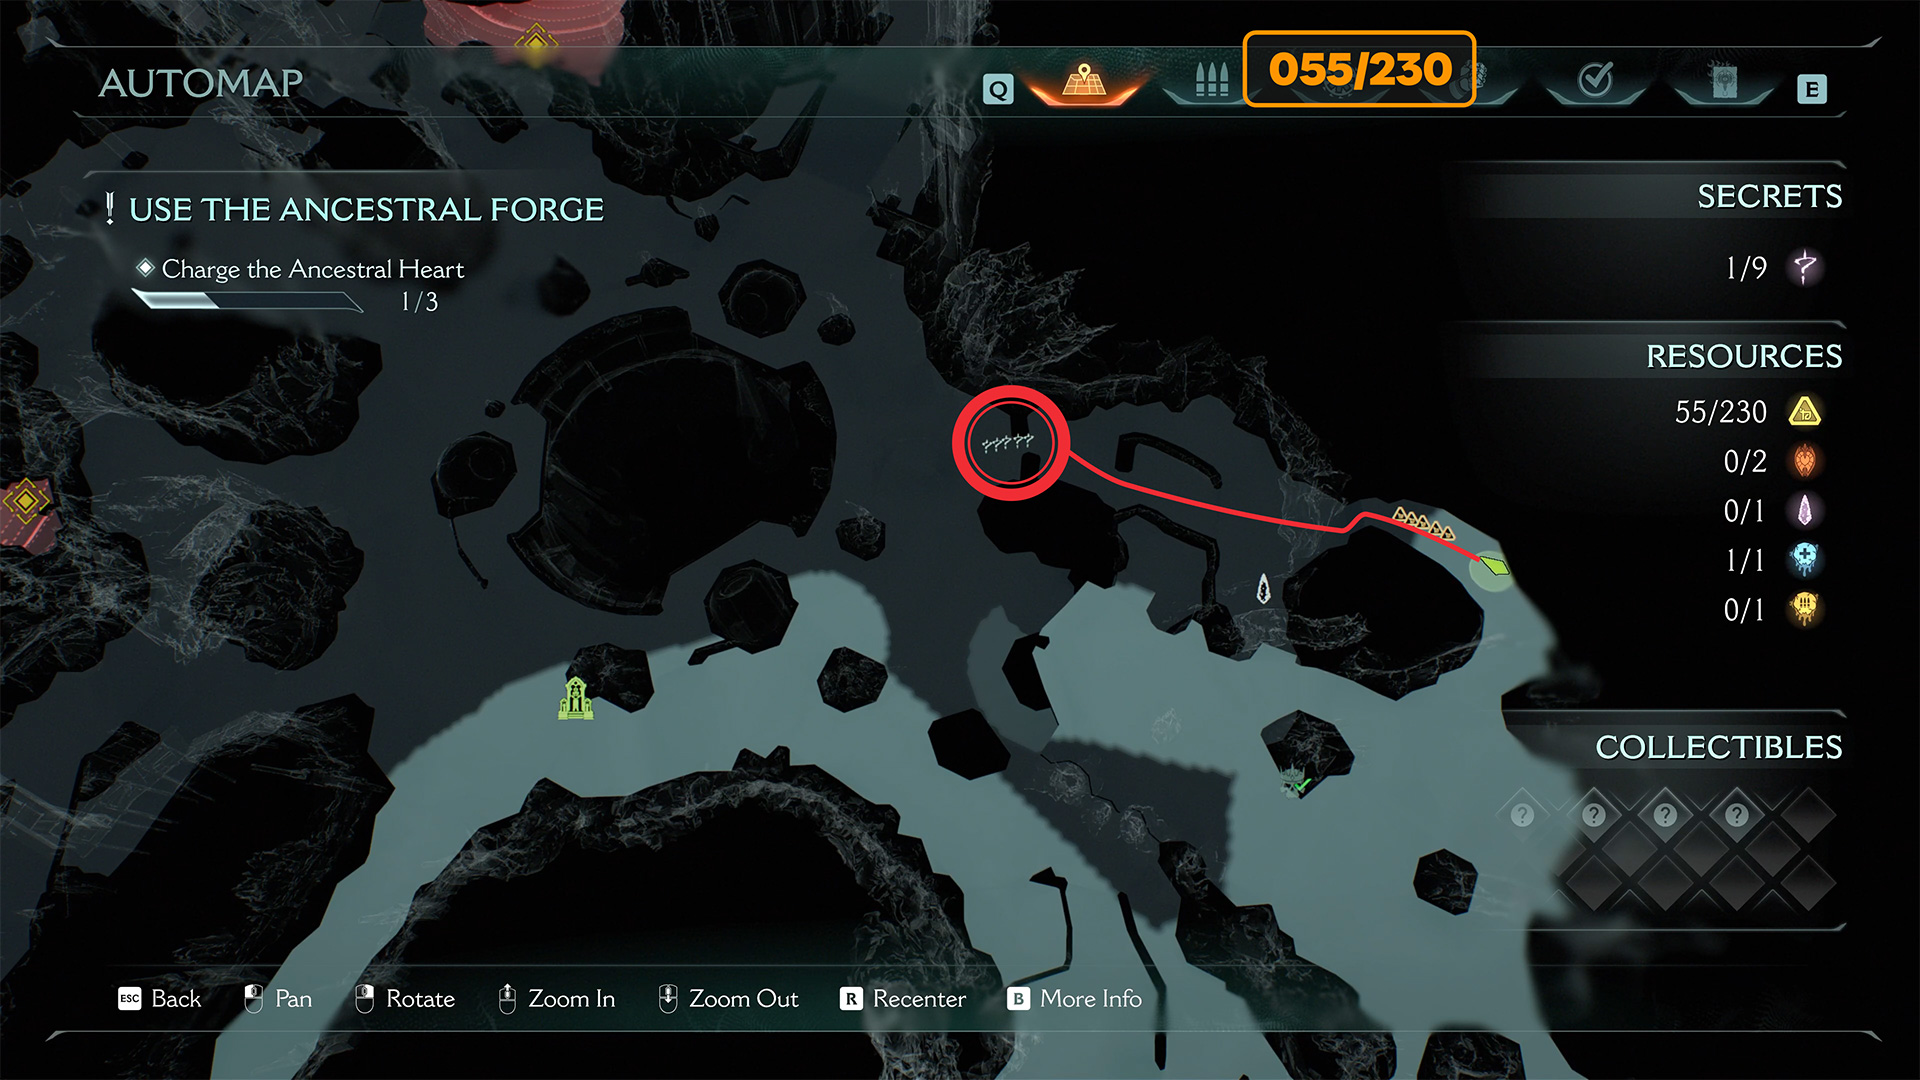
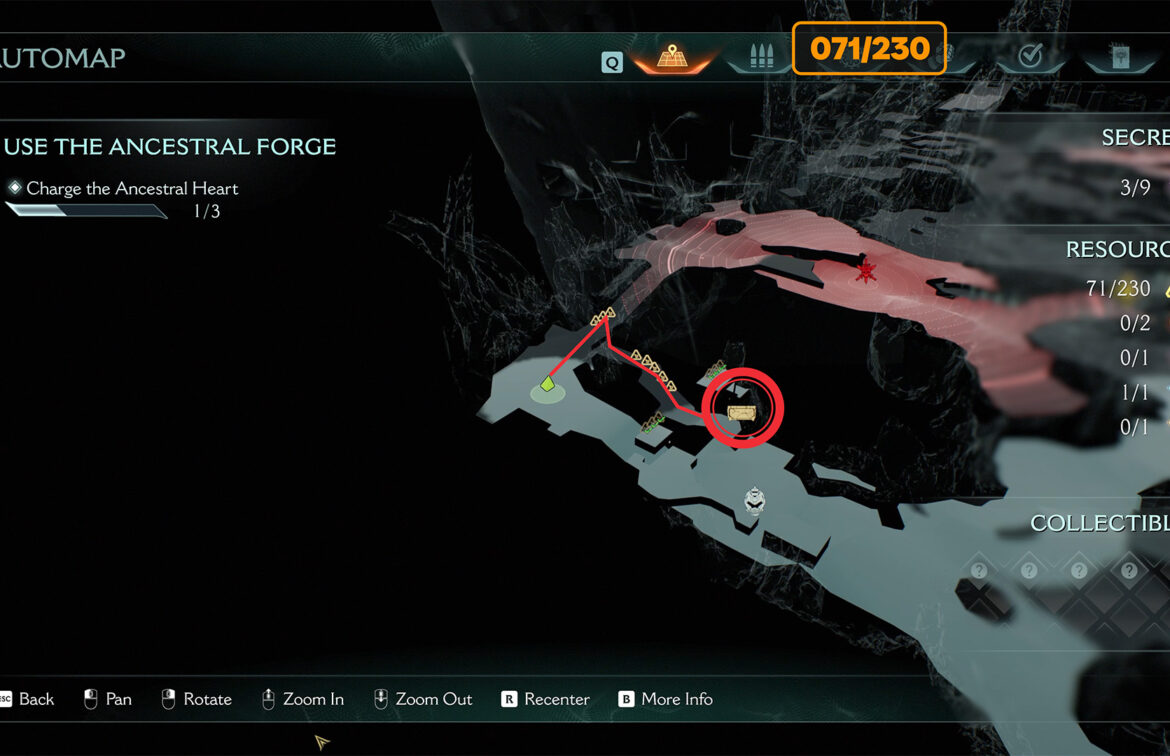
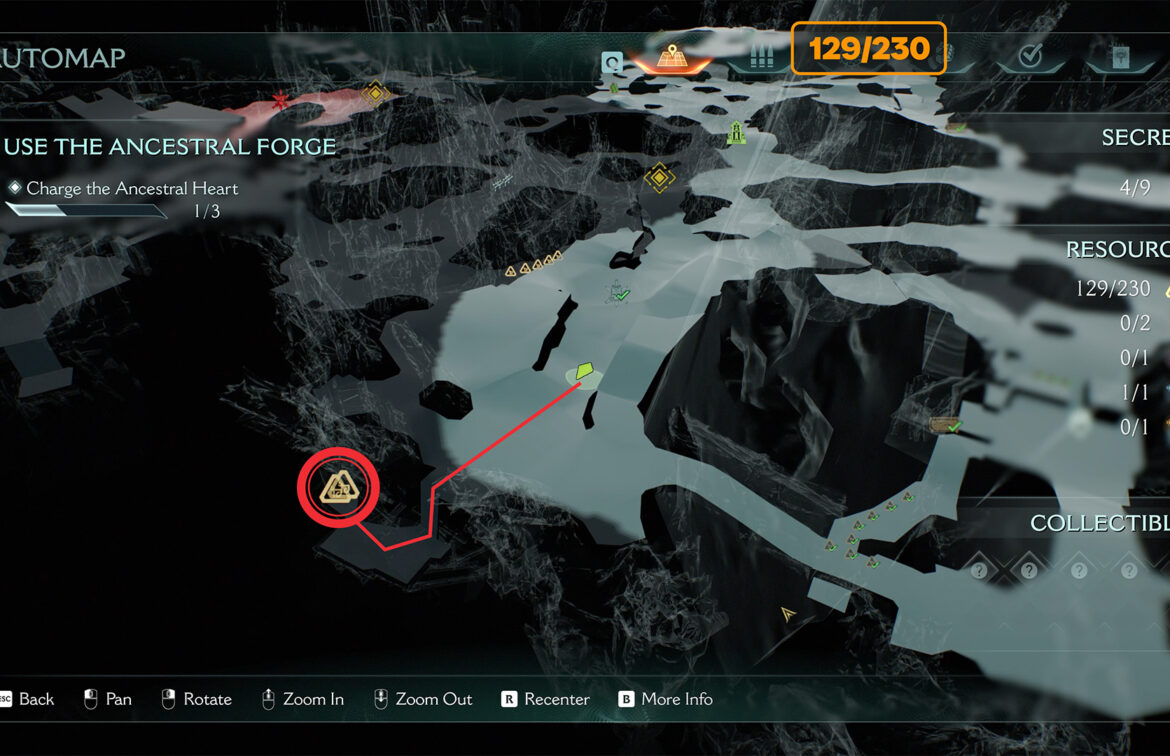
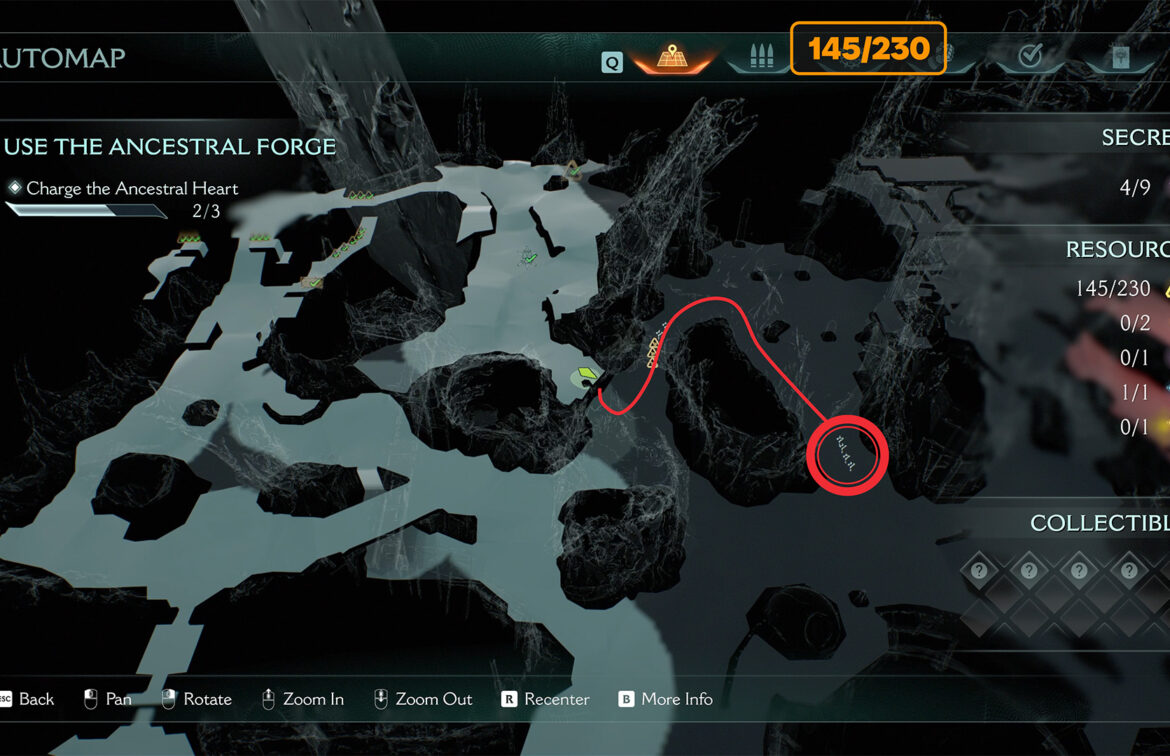
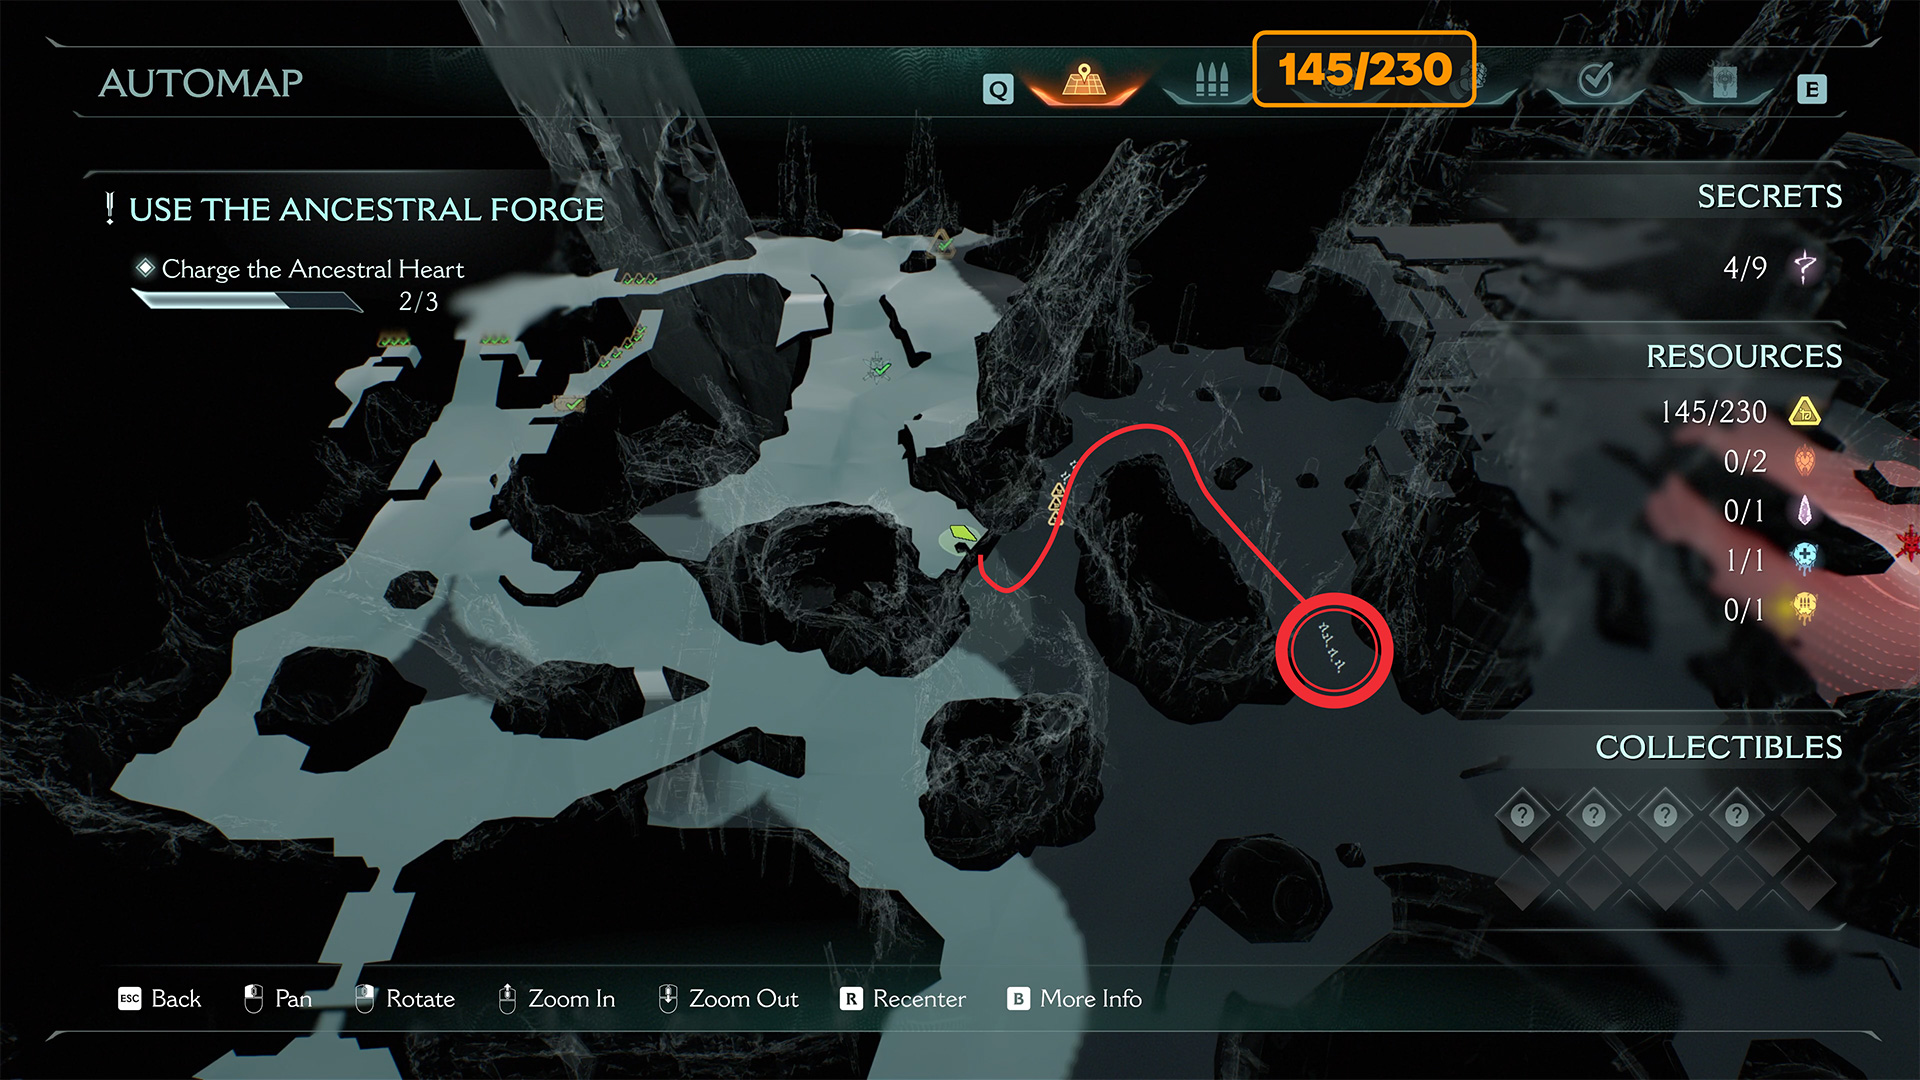
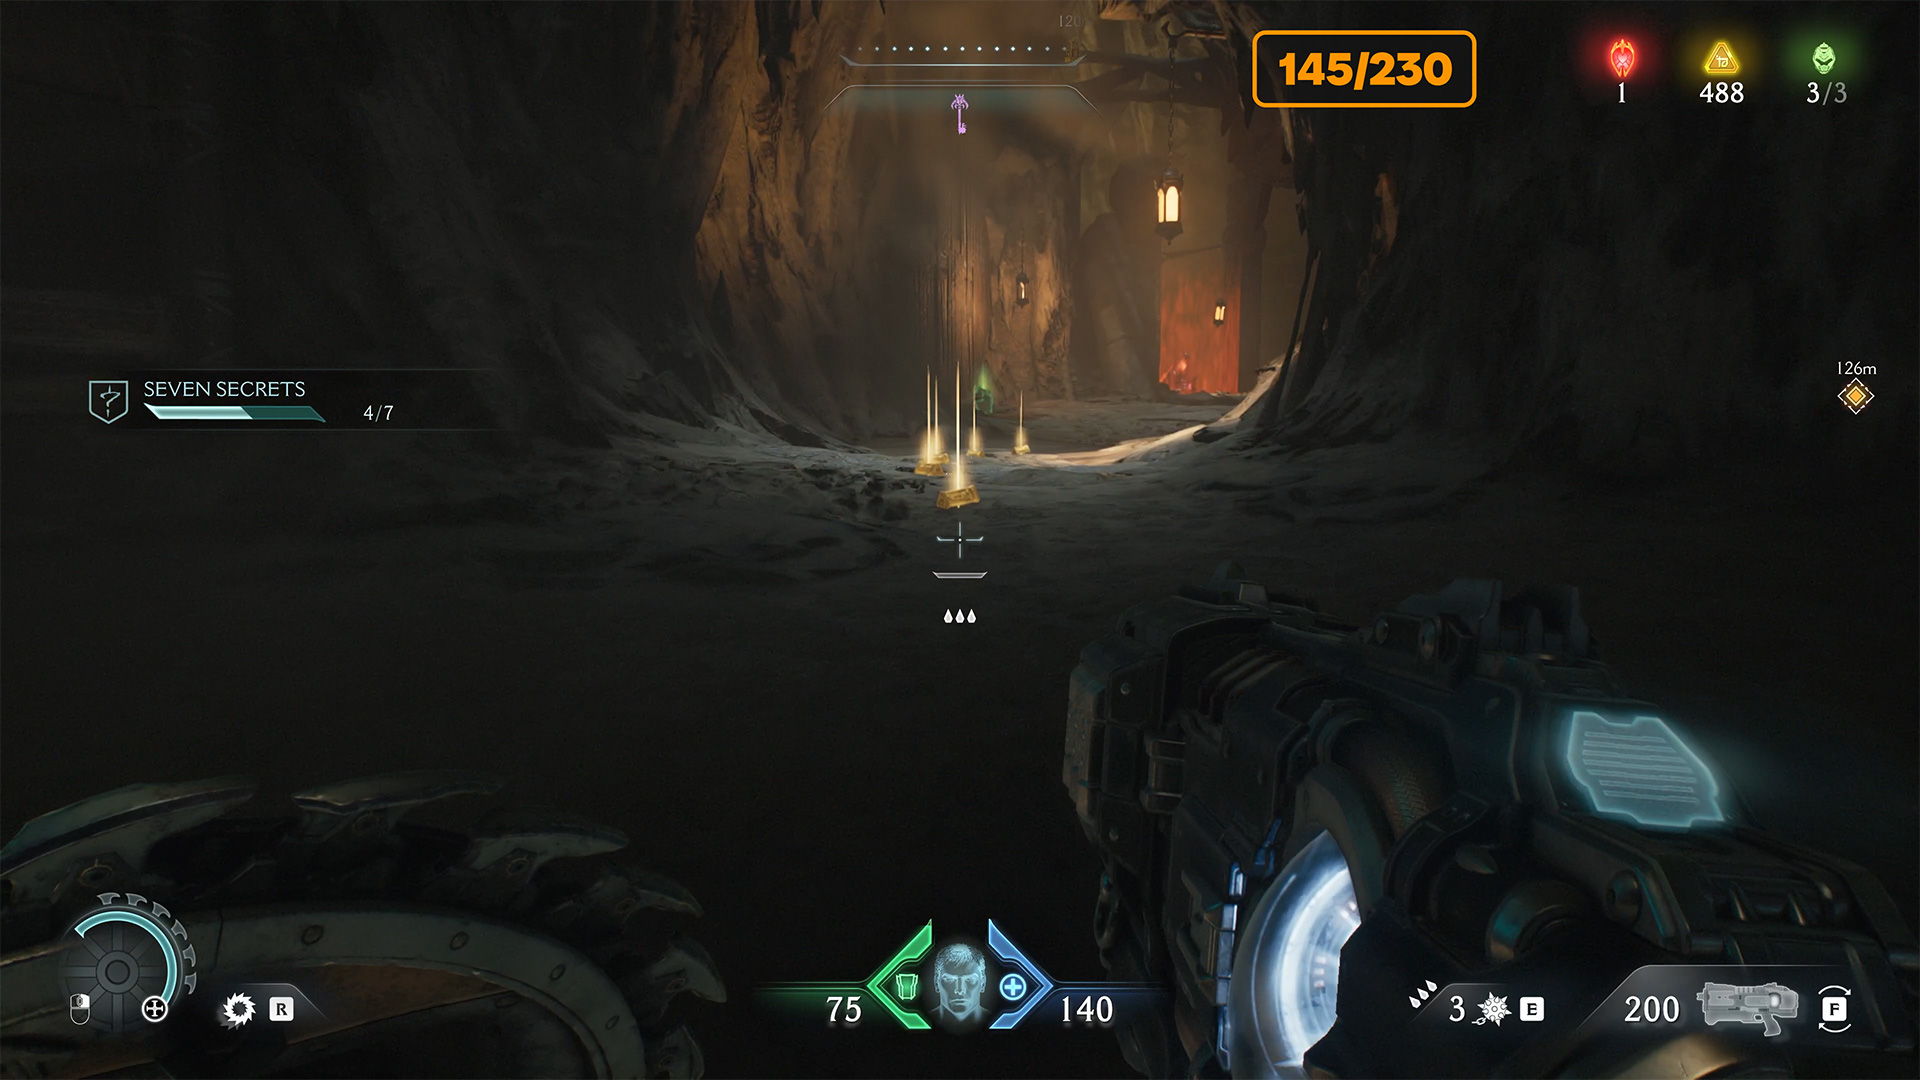
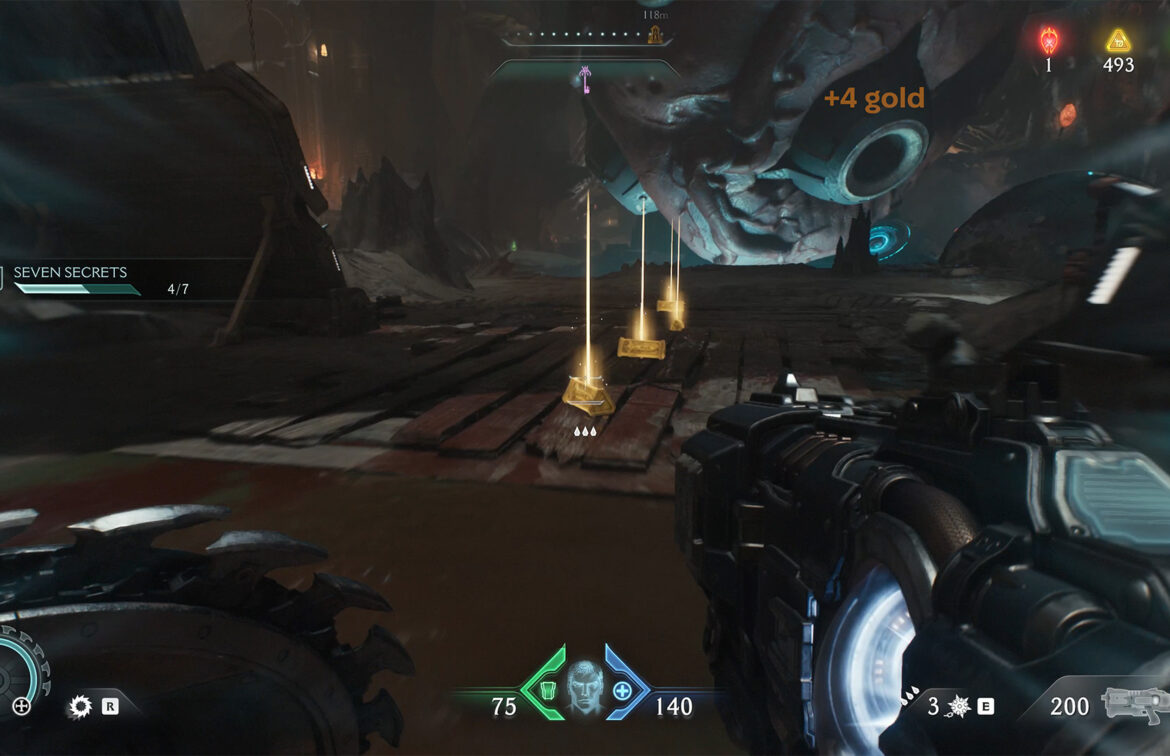
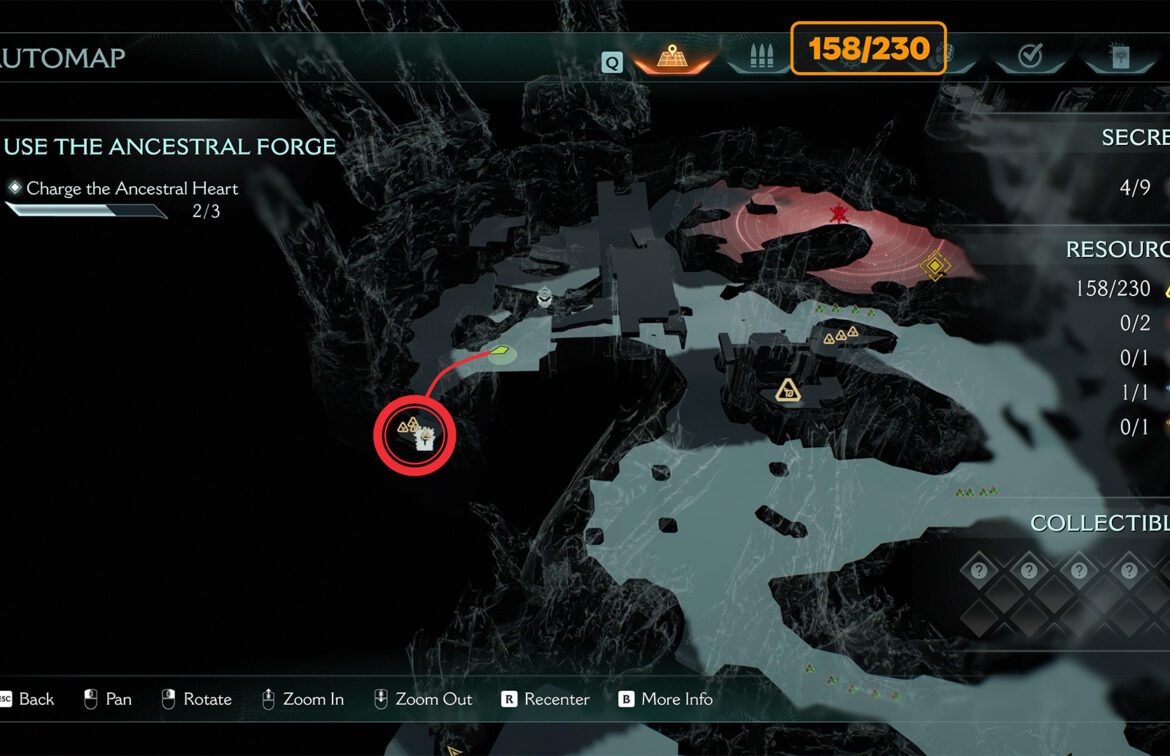
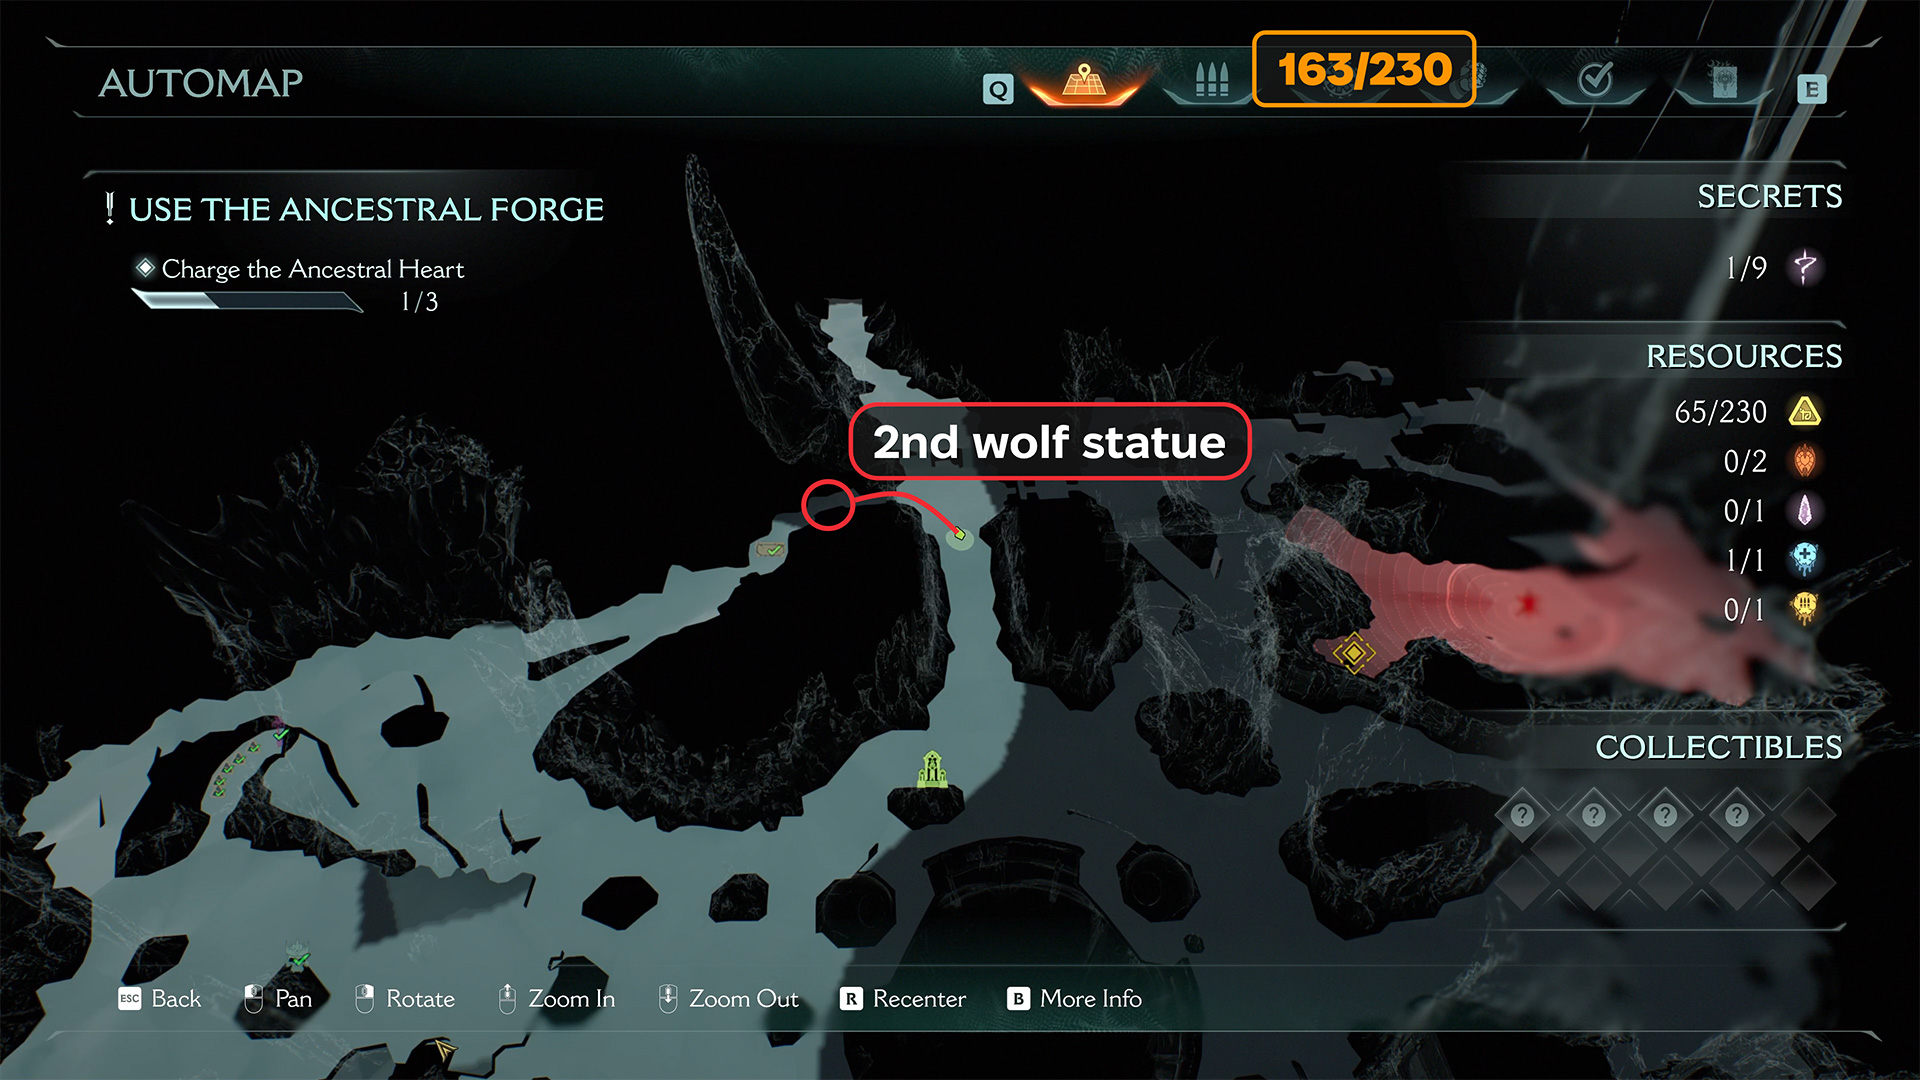
Now go back to where the first big battle took place and charge the Ancestral Heart, if you haven’t done so already. Then follow the route I have drawn on the map. You will receive 5 gold and a little further on another 5 gold. Don’t pay attention to the riddle with the wolves for now, we will reveal it later. Wraithstone is not available to you yet.
-

- Ancestral Forge Gold location
-
- Ancestral Forge Gold
-
- Additional 5 gold
Ancestral forge Life Sigil Crane
Go to the second Ancestral Heart. On the way, you will see the location I am showing you on the map. Here you need to throw your shield at the green statue and fly up after it. This is the second secret location. There will be a wall on the left. Climb this wall and you will see 3 gold coins. Jump to the other platform ahead and you will also get 3 gold coins here.
To the left of this place you will find a lever. Press it and the Life Sigil will fall to the bottom. If you need it, jump down and pick it up.
-

- Ancestral forge Life Sigil Crane location
-
- Throw a shield at a green statue

-

- Go to the other side collecting gold
-
- Ancestral forge Life Sigil Crane
Ancestral Forge Golden Chest
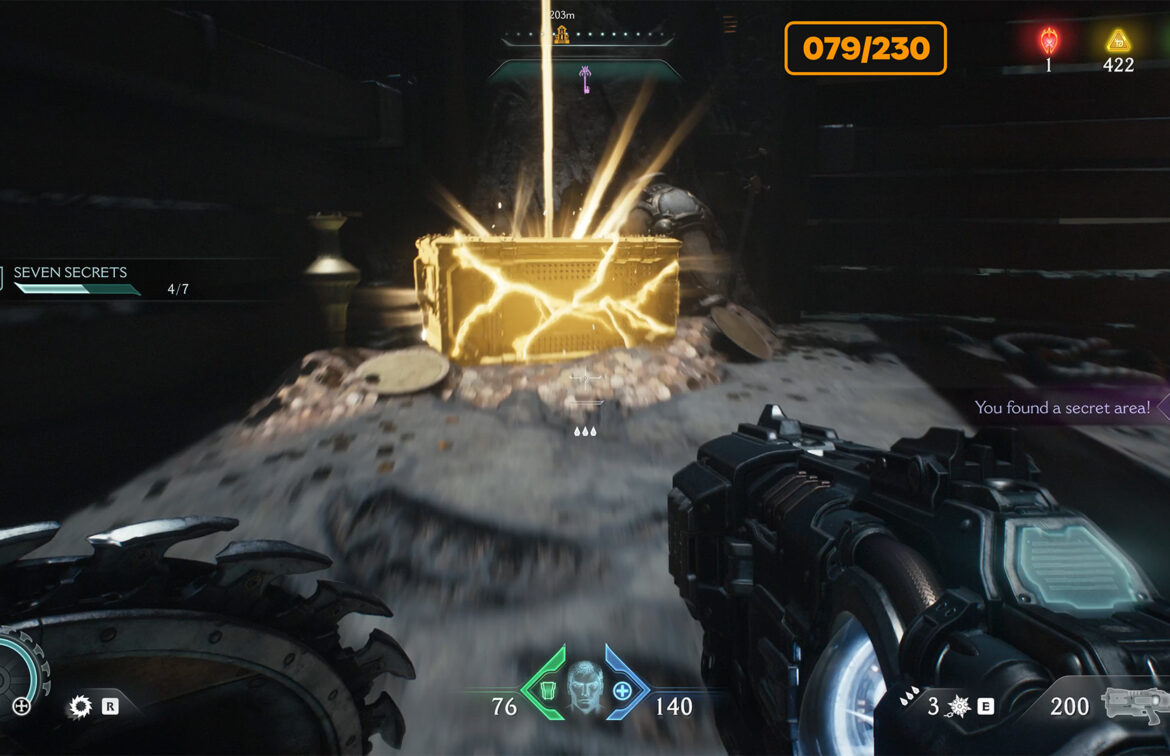
Right next to it, you will see three gold coins. Once you pick them up, immediately turn right and jump down. Here you will find the third secret location and five gold coins on the floor. Move forward and you will see a large chest. Break it to get an additional 50 gold coins.
-
- Ancestral Forge Golden Chest location
-

- Jump down at this point
-
- Ancestral Forge Golden Chest
Ancestral Forge gold locations
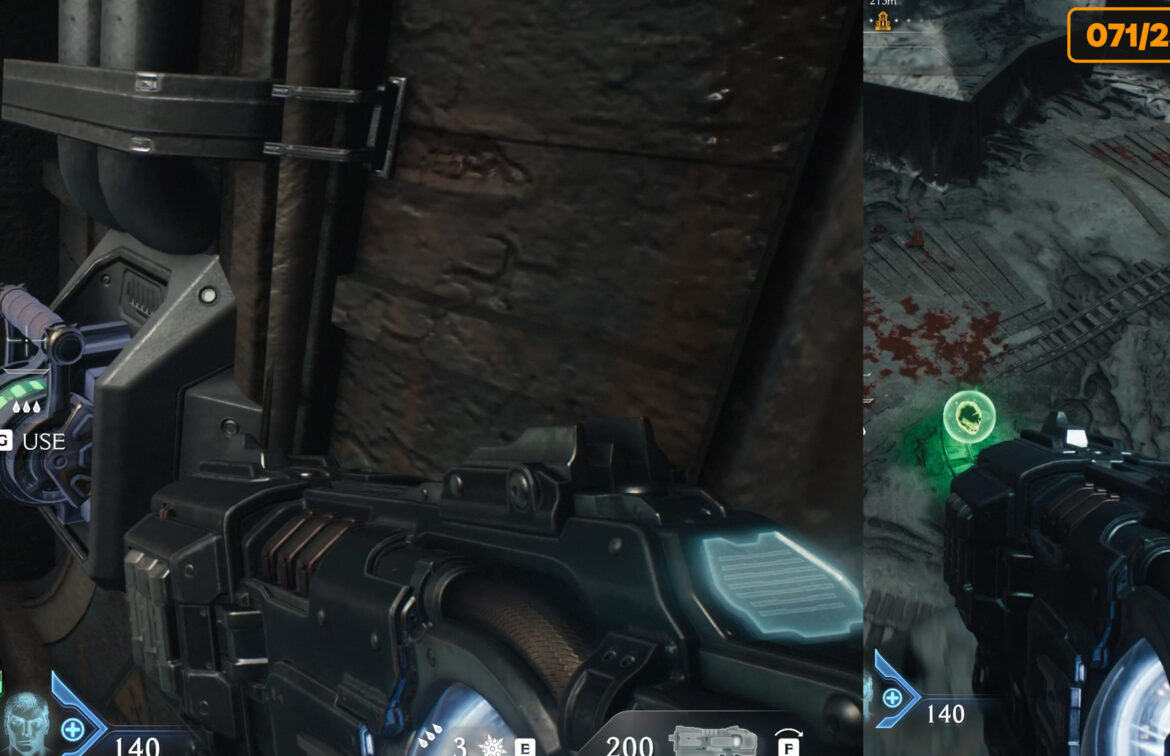
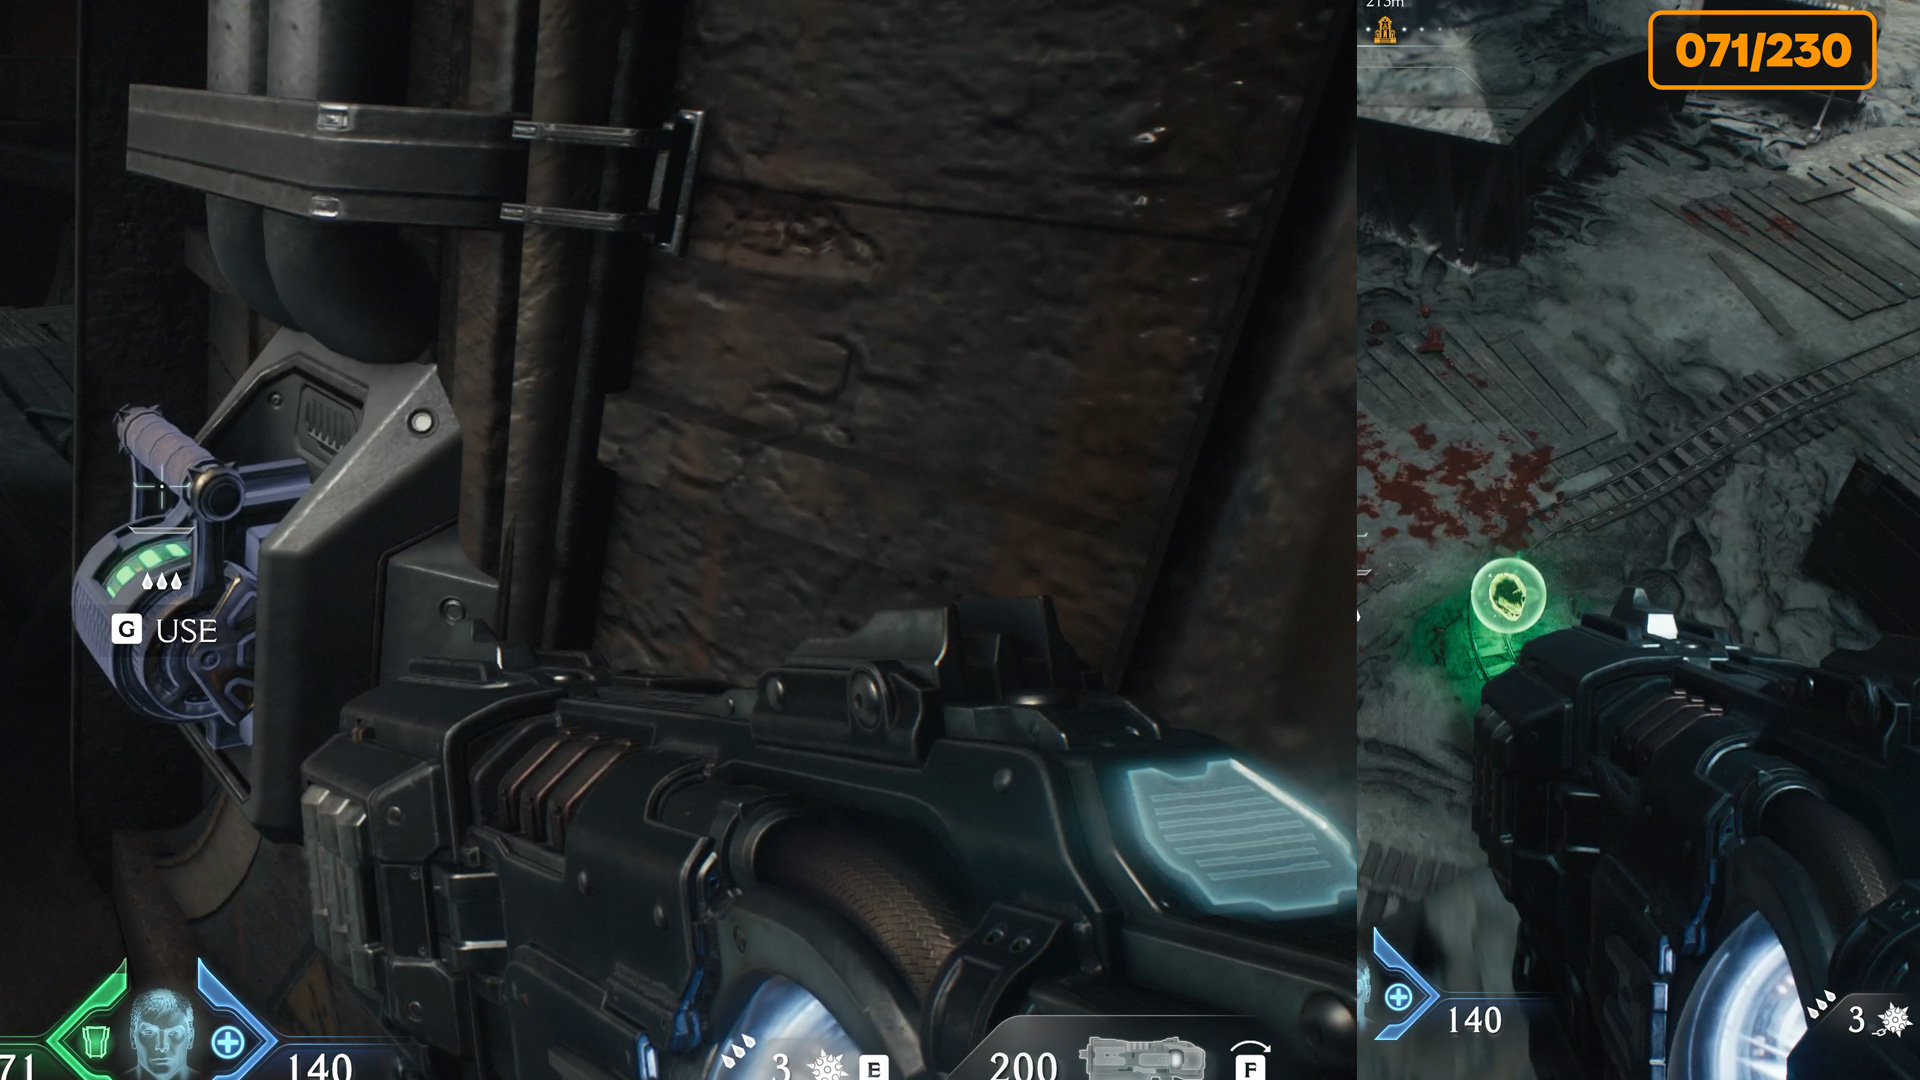
Here you need to go down. This place is easy to miss, so be careful. At the bottom, you will find 16 gold coins and an ambush of monsters that will appear as soon as you get the gold. Be prepared for combat in a confined space.
-
- Ancestral Forge gold locations
-
- Gold, after which there will be an ambush
Ancestral Forge Gold Doom
Now you face your second big battle. After winning, charge the second Ancestral Heart. Then jump down and turn left. You will see 5 gold coins in front of you. After that, go a little further and turn right. I have marked this route on the map. Here you will find another 4 gold coins.
-
- Ancestral Forge Gold Doom locations
-

- Ancestral Forge Gold Doom
-
- 4 gold coins at the end of the route
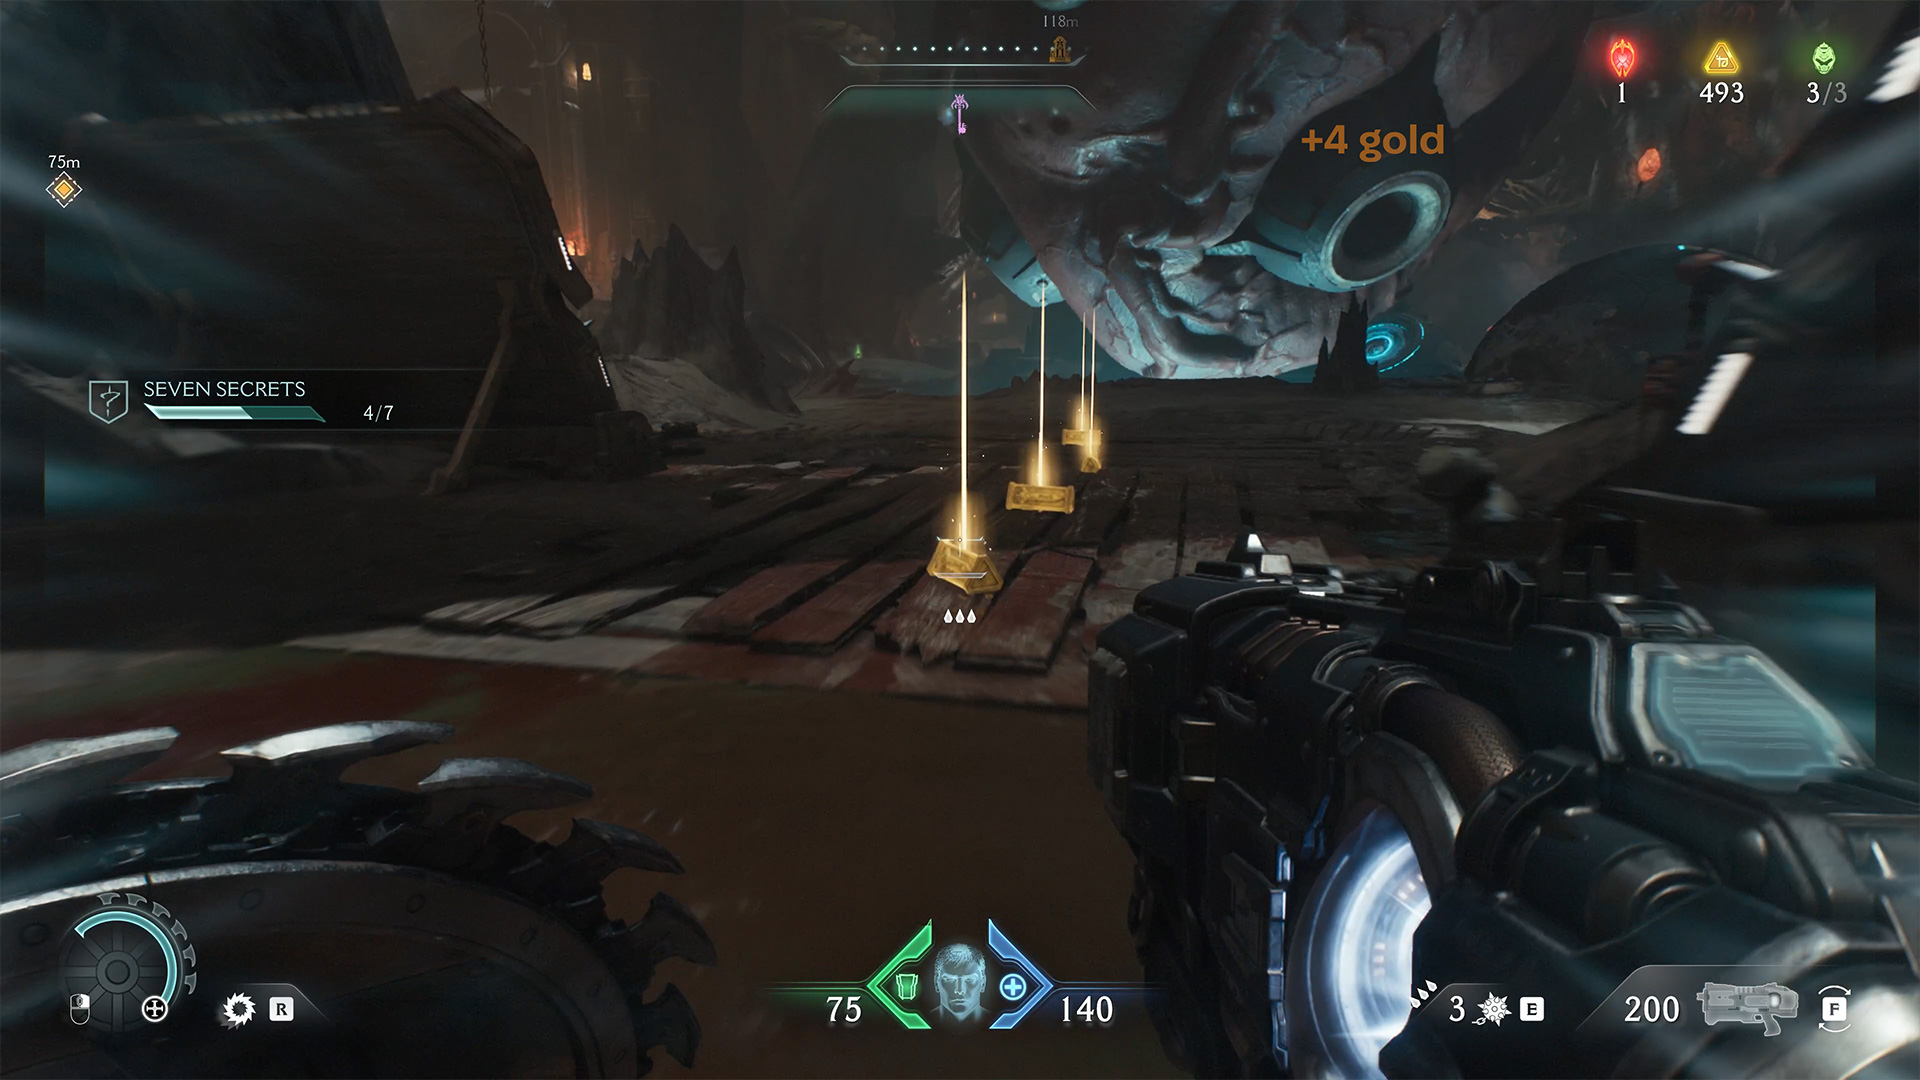
Ancestral Forge 4 gold
Move towards the third major battle, where there is a red spot on the map. Along the way, following the route I showed you, you will find 4 gold coins on the floor.
-
- Ancestral Forge 4 gold locations
-
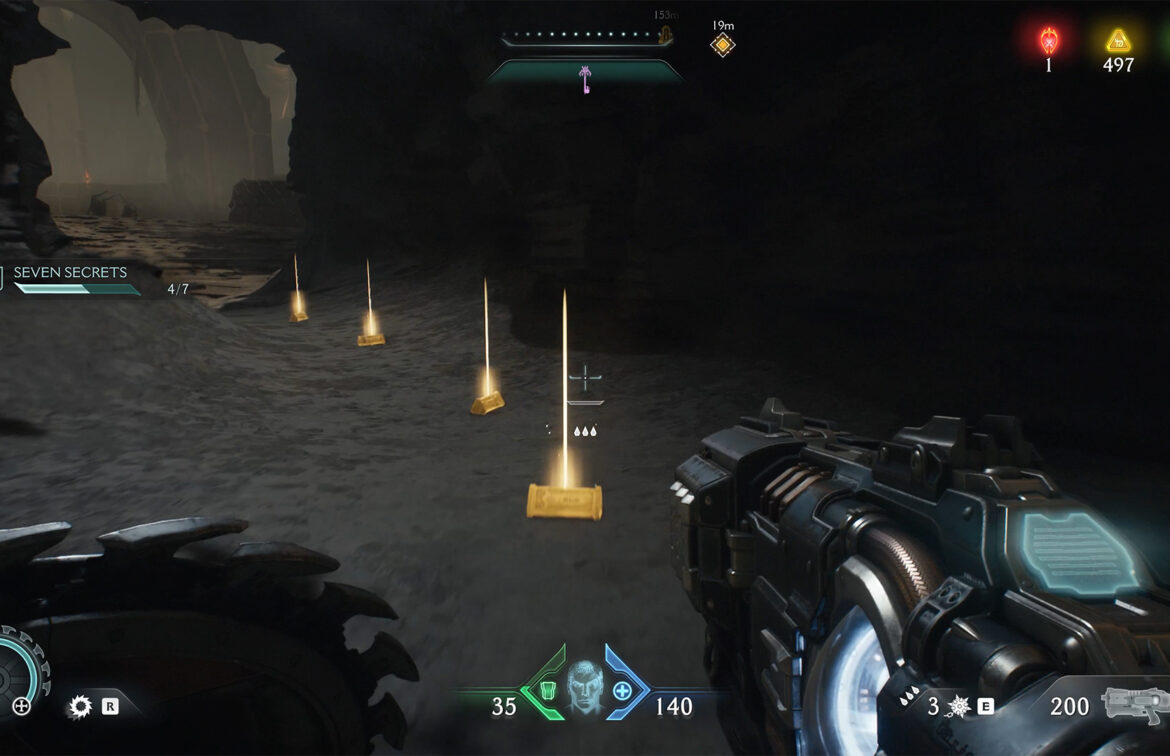
- Ancestral Forge 4 gold
Doom Ancestral Forge Codex
Before you go to the third big battle, follow the route I have marked on the map. Here, at the bottom, you will receive 5 gold and a page from the codex. To avoid having to return here later, it is better to do this before the battle in the third zone.
-
- Doom Ancestral Forge Codex locations
-
- Doom Ancestral Forge Codex
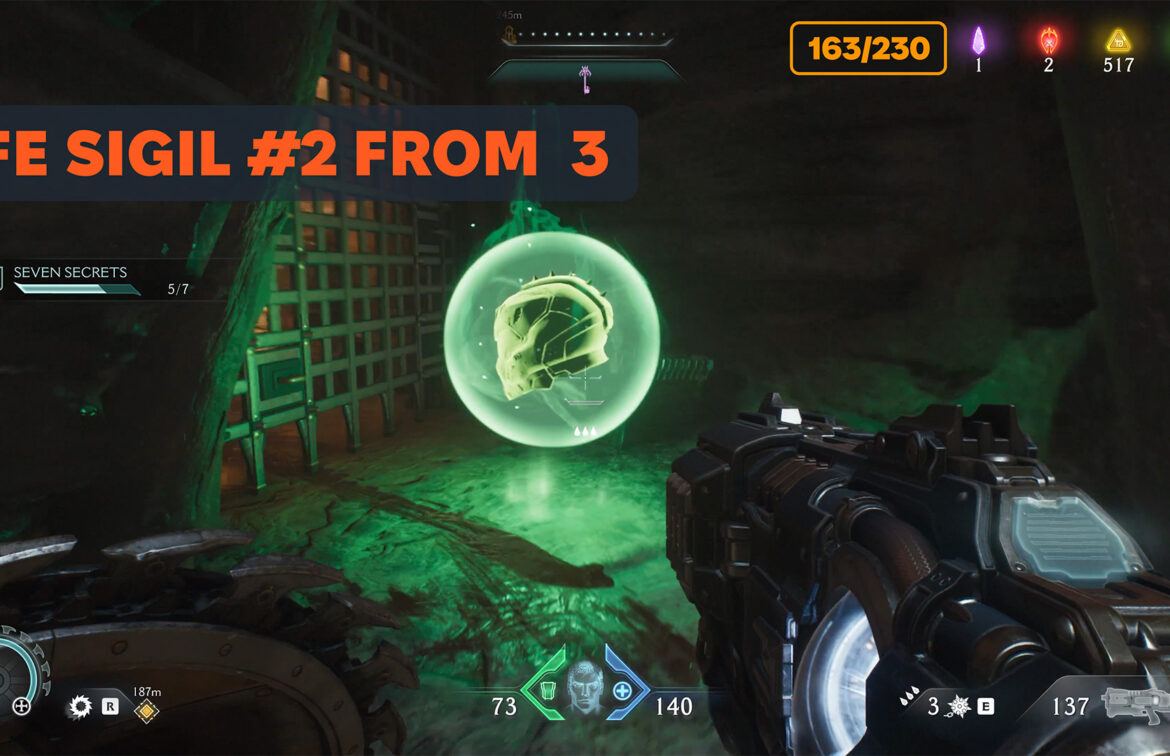
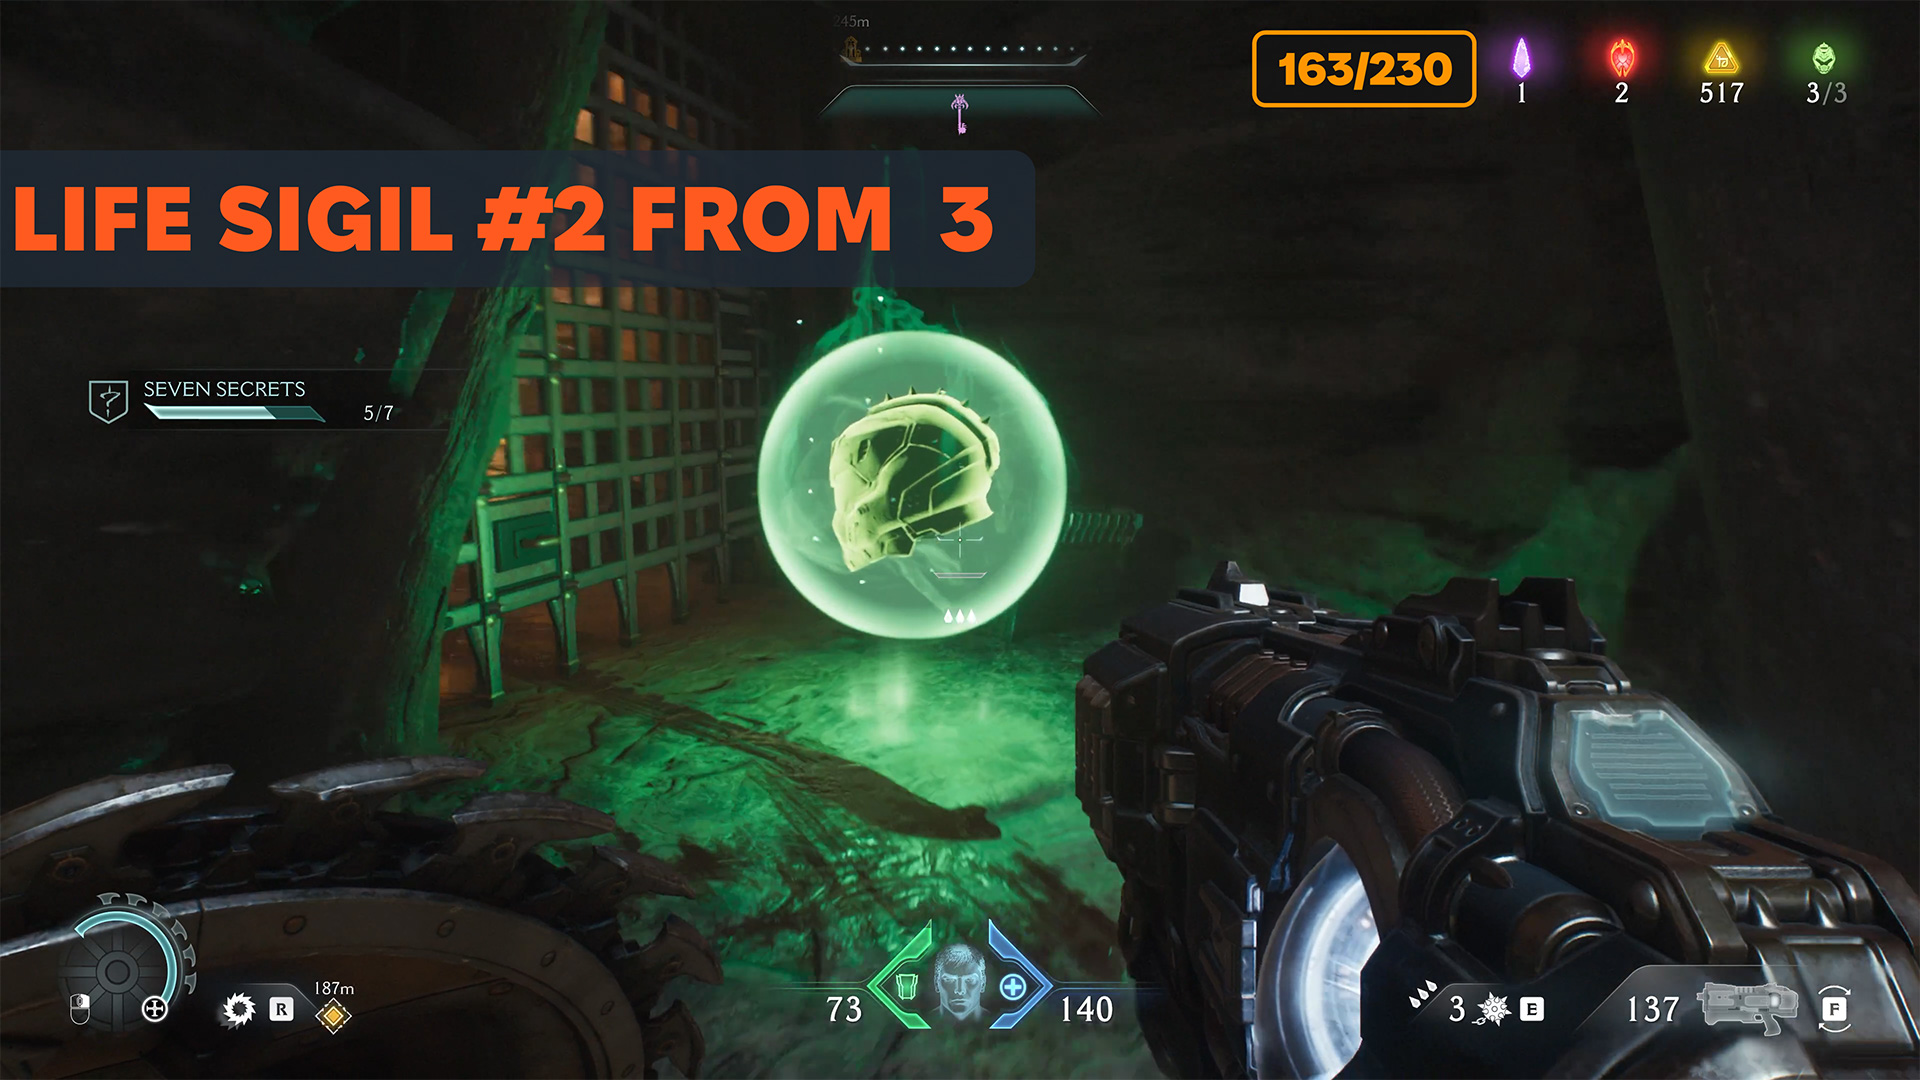
Ancestral Forge Life Sigil
Near this location, you can see the Life Sigil on the map. There is no secret area near it, so only go there if you need it. Follow the indicated route to find a wooden barrier. Once you break it, you will fall into the room where the Life Sigil is located.
-
- Ancestral Forge Life Sigil locations
-
- A wooden barrier that must be broken
-
- Ancestral Forge Life Sigil
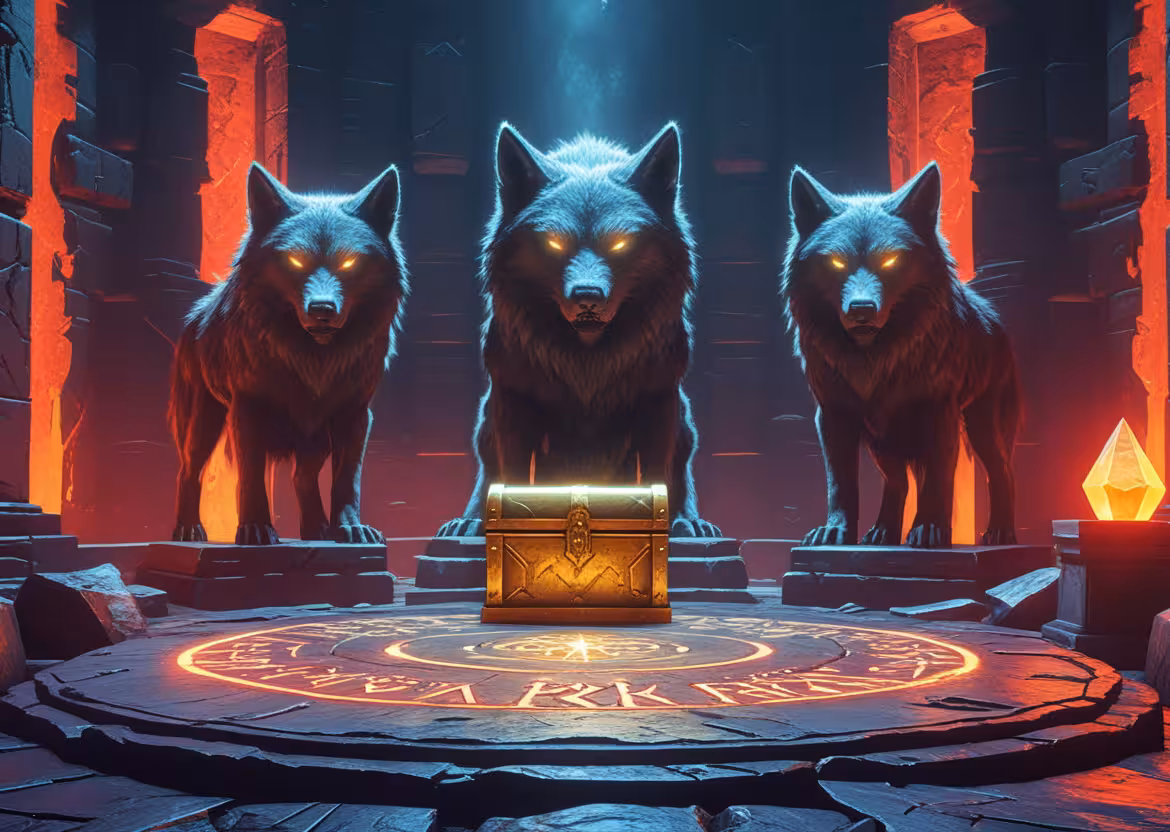
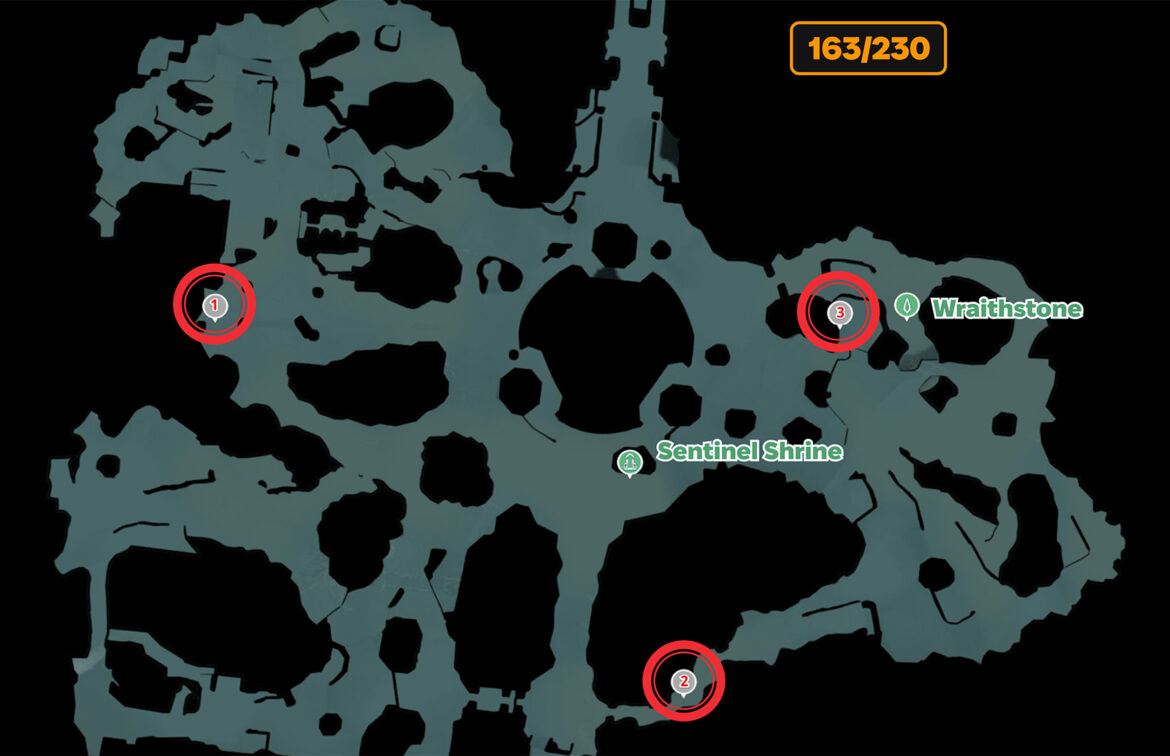
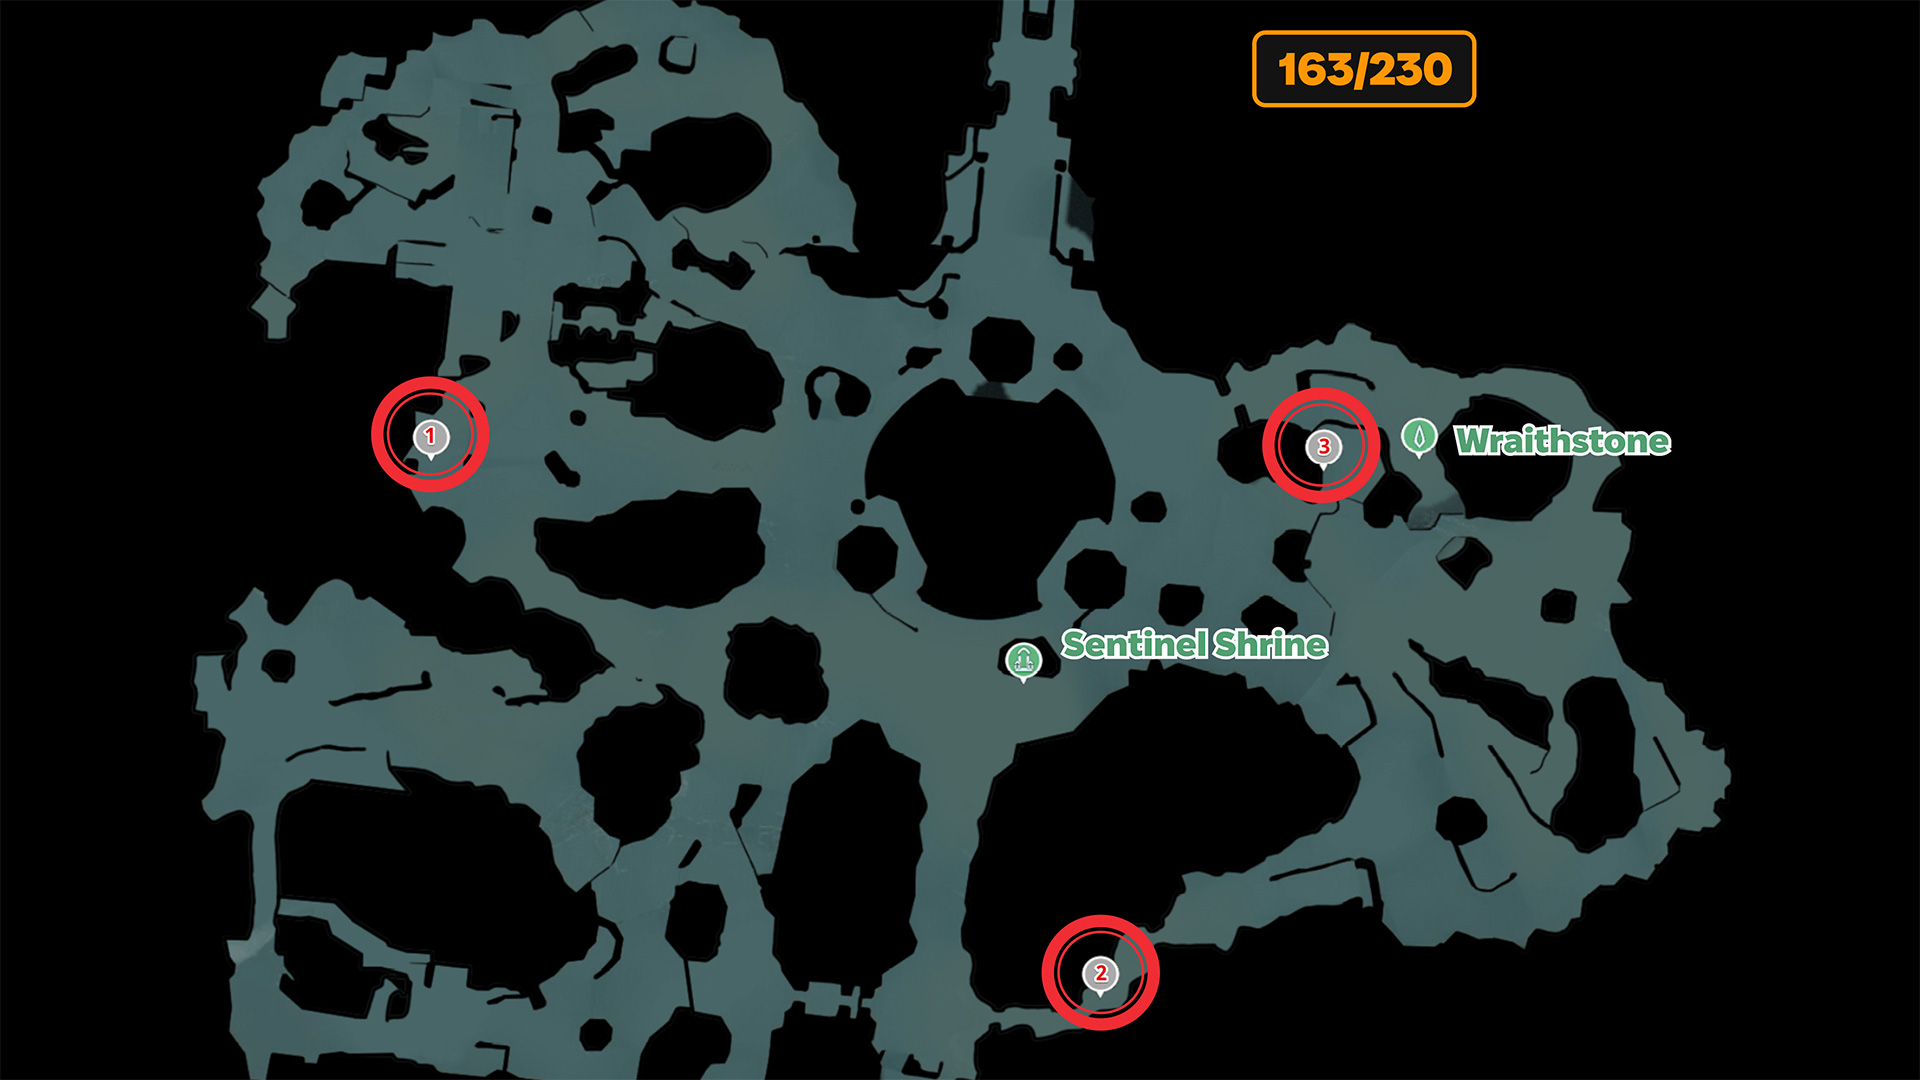
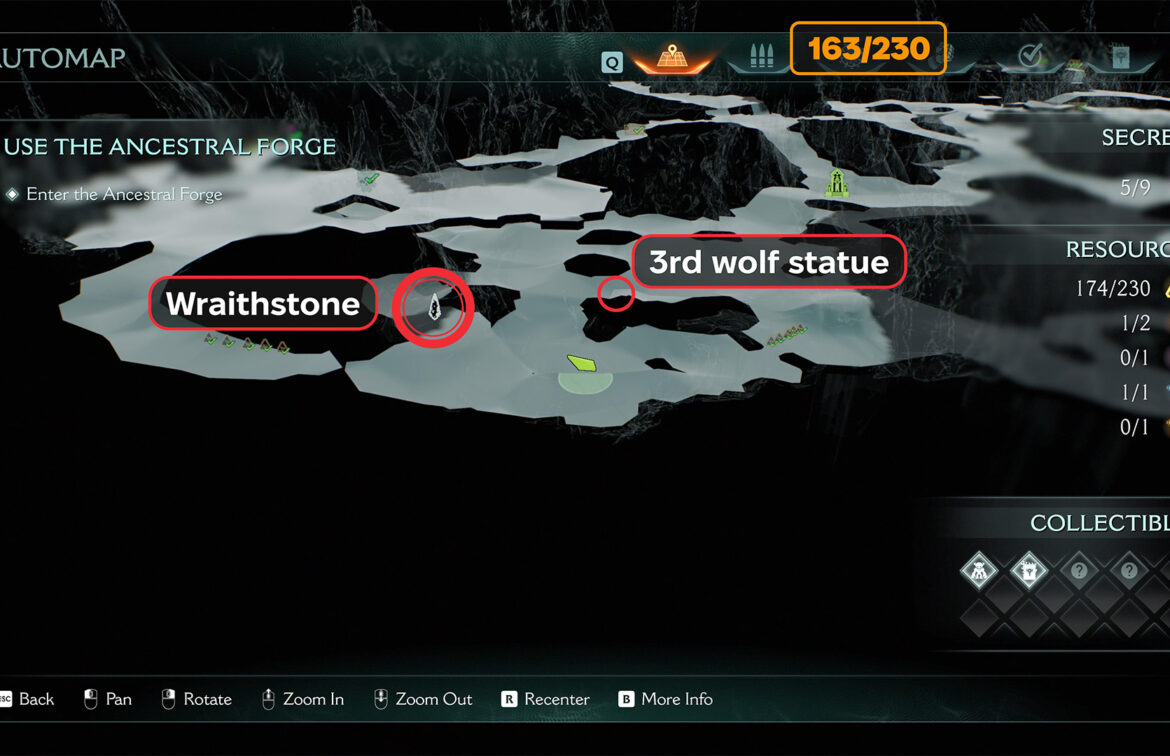
Ancestral Forge wolf puzzle locations – wraithstone
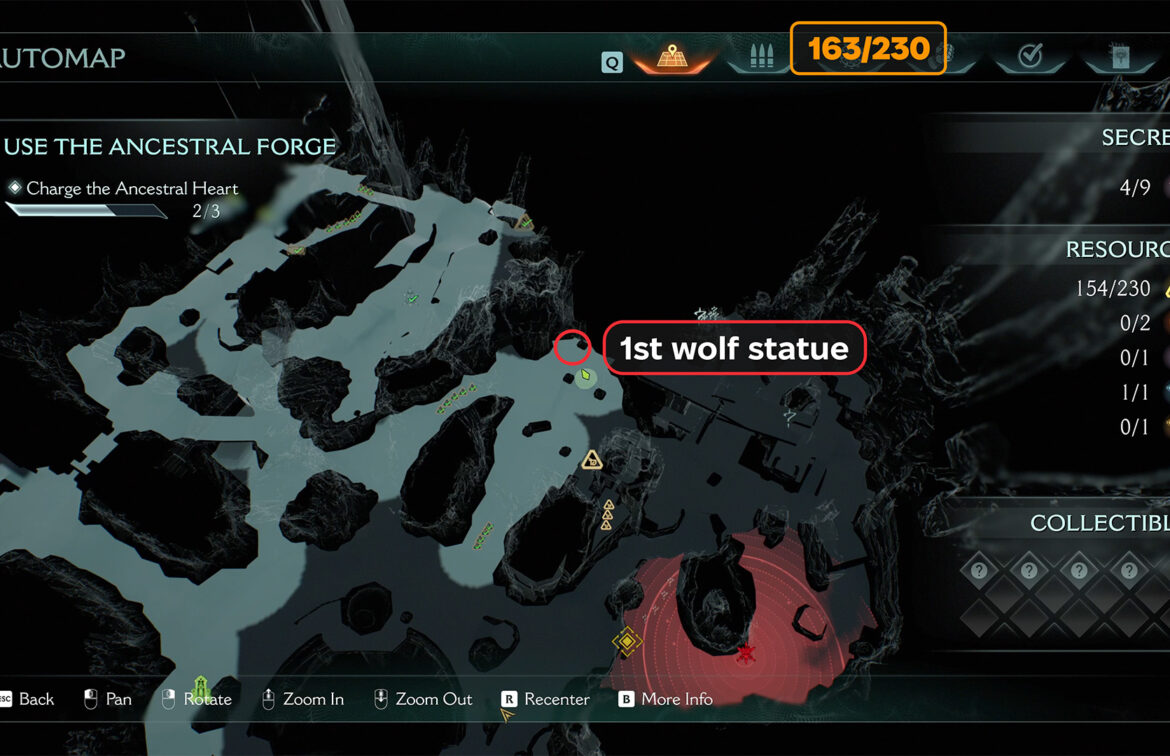
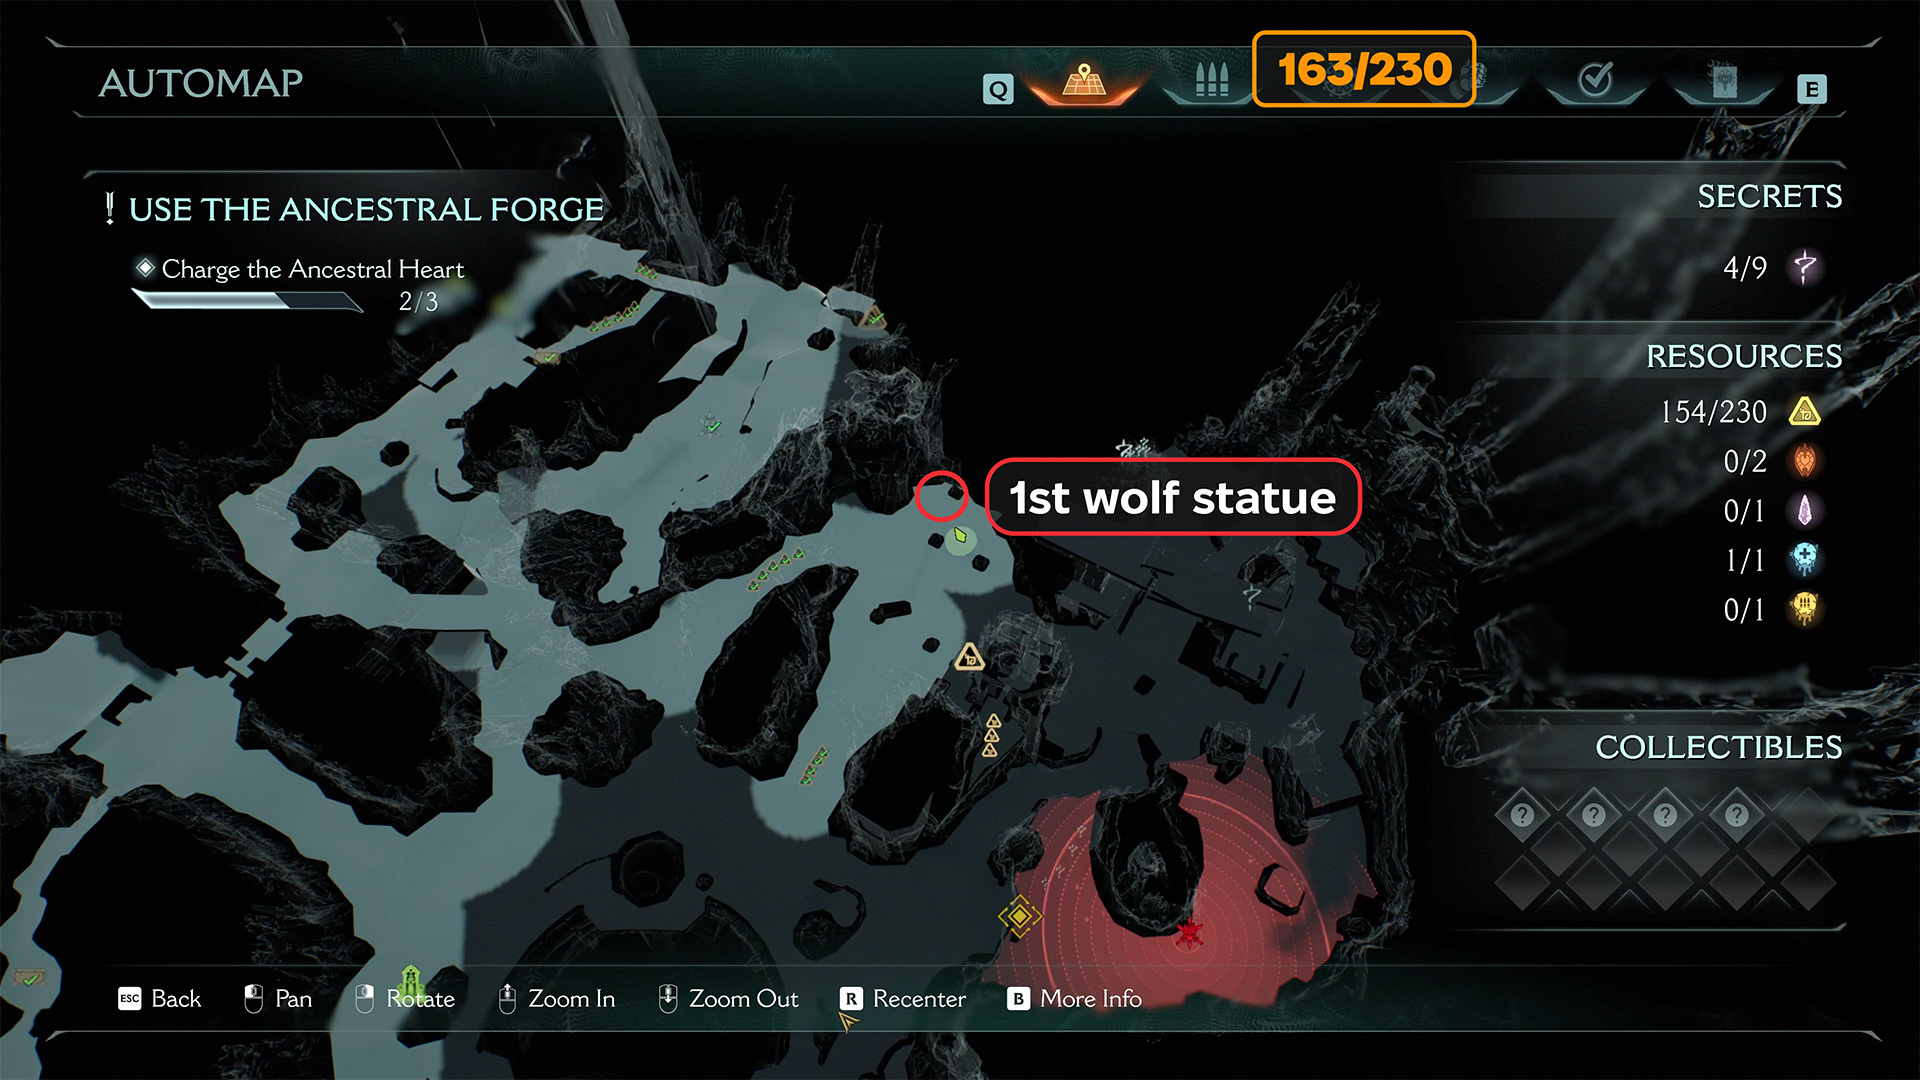
It’s time to solve the puzzle with the three wolves. On the map, I have marked the locations of all three statues that you need to break. The statue of the first wolf is protected by a barrier. It will disappear when you defeat all the enemies around it.
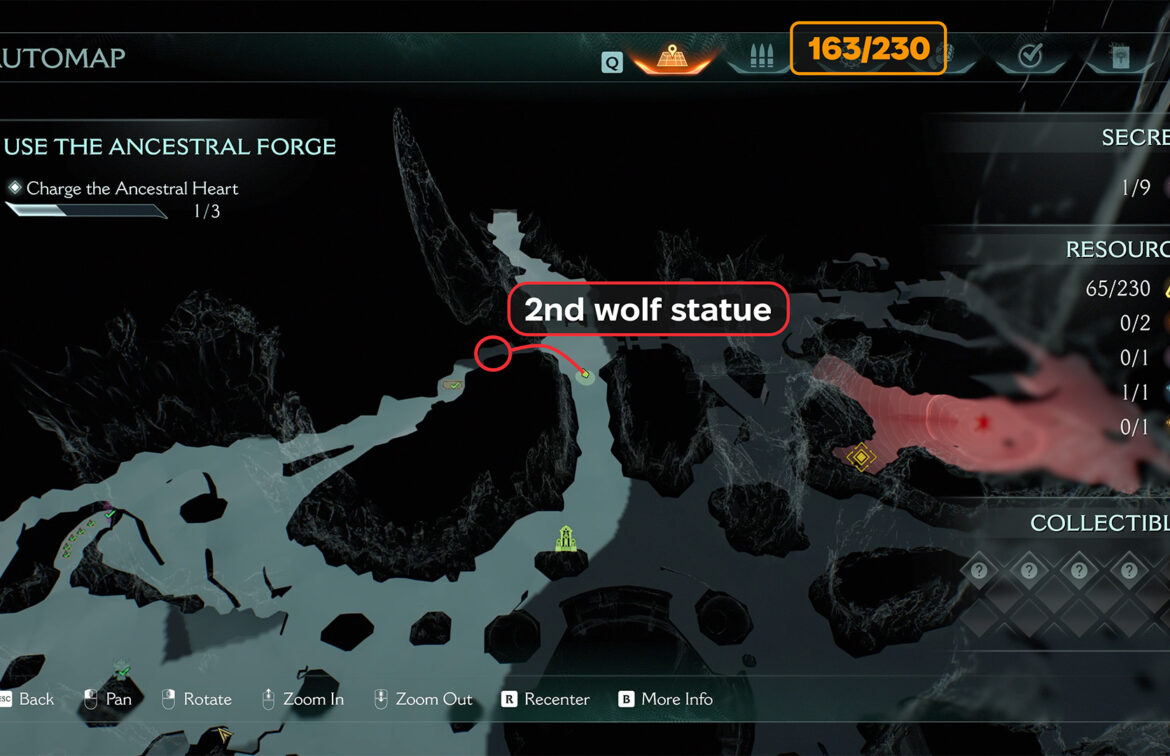
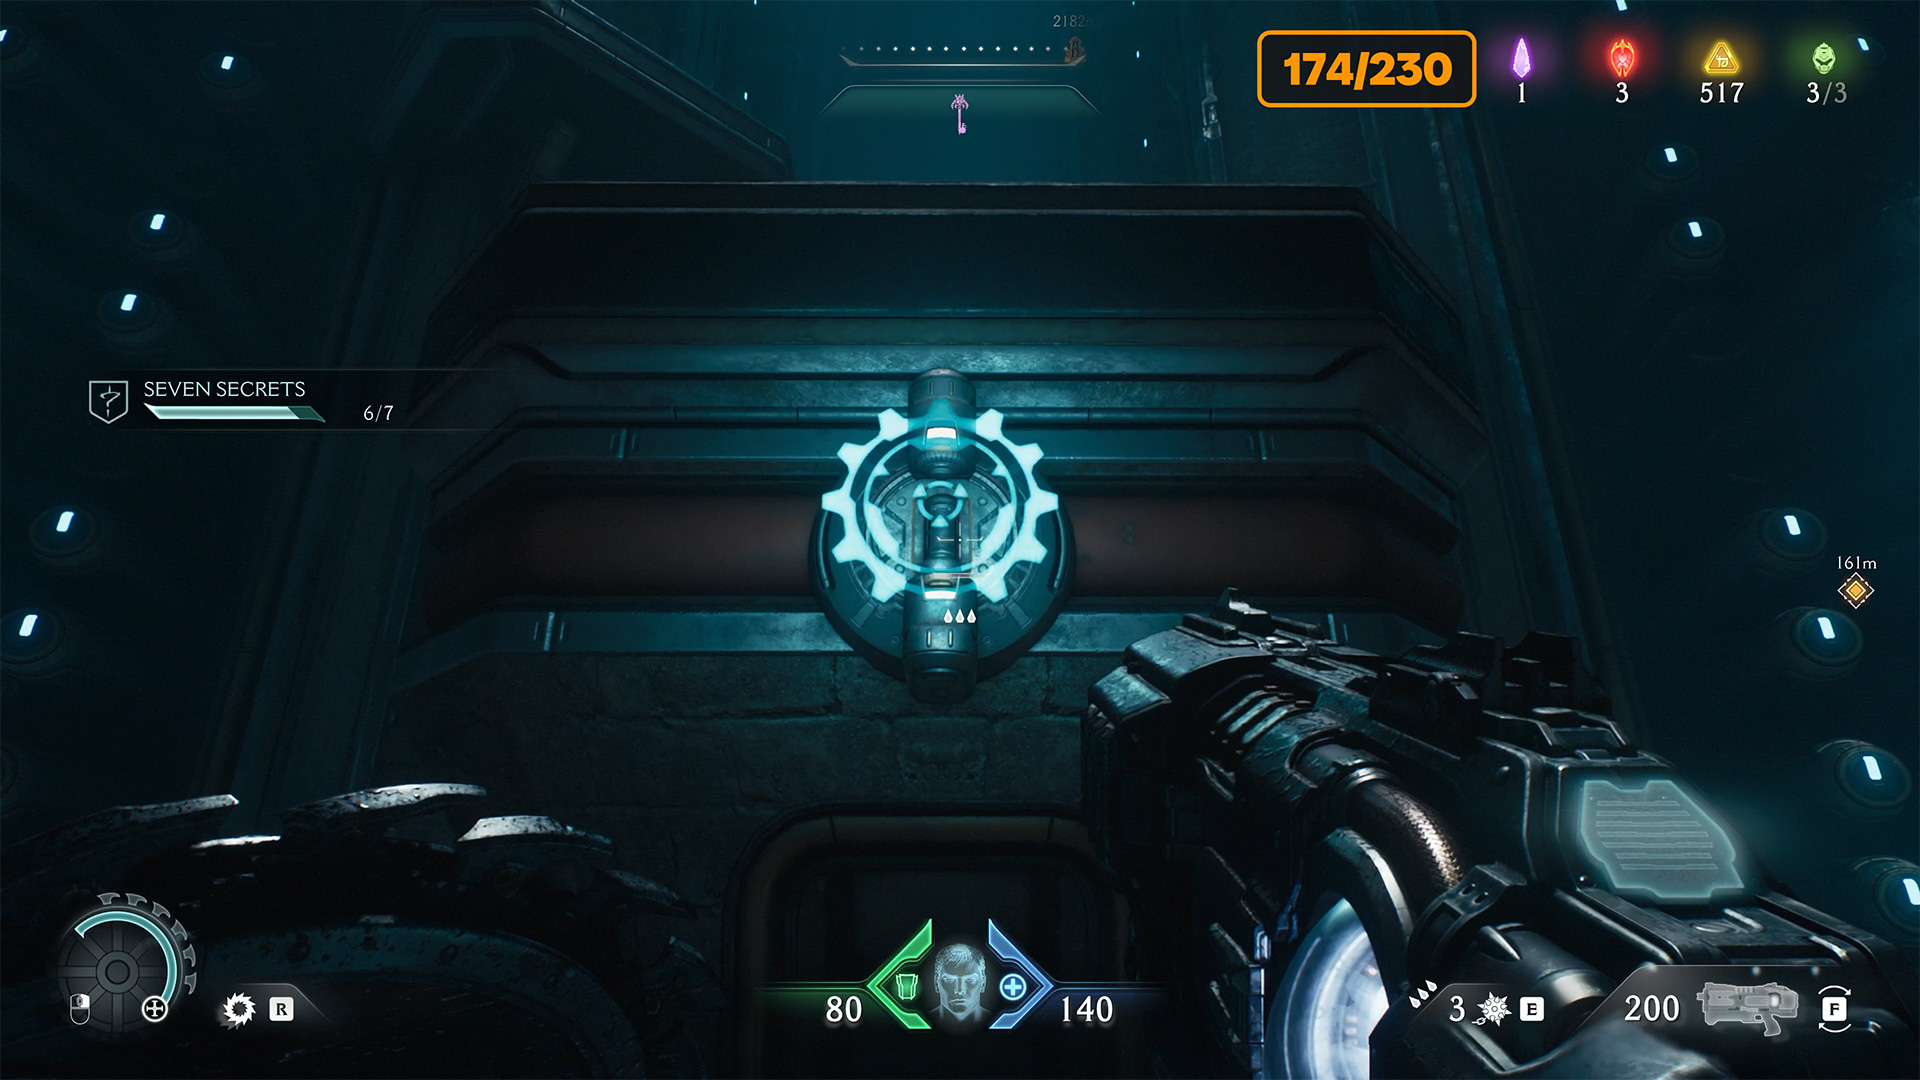
The second wolf statue is located at the beginning of the location. When you entered, you saw that there was a closed door. You have the key, so go to that place, open the door, and inside you will find the fourth secret location. After that, you can throw away your shield and break the second wolf statue.
The last third statue of the wolf is located near Wraithstone. As soon as you throw your shield to break it, many monsters will appear around you, which you must defeat. Now the puzzle is solved and you have free access to collect your reward. Go ahead and collect the first Wraithstone in the game. This difficult puzzle is available at the beginning, but we were only able to solve it in the middle of the chapter.
-
- Ancestral Forge wolf locations
-
- The first statue of a wolf
-
- The second statue of a wolf
-
- Purple doors at the entrance to the second statue
-
- The third statue of a wolf

-
- The puzzle is solved, the reward is Wraithstone
Ancestral Forge missing gold
Now you can finally return to the third big battle. After winning, charge the third Ancestral Heart. From this point, move slightly to the right and jump onto the platform ahead, collect 3 gold coins here, and without opening the gate with the secret key, go down to the left to find another 8 gold coins.
-
- Ancestral Forge missing gold locations
-
- Ancestral Forge missing gold in front of the door
-
- Ancestral Forge missing gold
Ancestral Forge Toy and Ruby Location
After that, go back to the closed door and go through it. Ahead, you’ll see a wall you can climb. You need to get some speed, jump to it, and climb up. When you turn right around the corner of the building, a monster will be waiting for you. After defeating it, climb up the wall on the right, where the monster was standing.
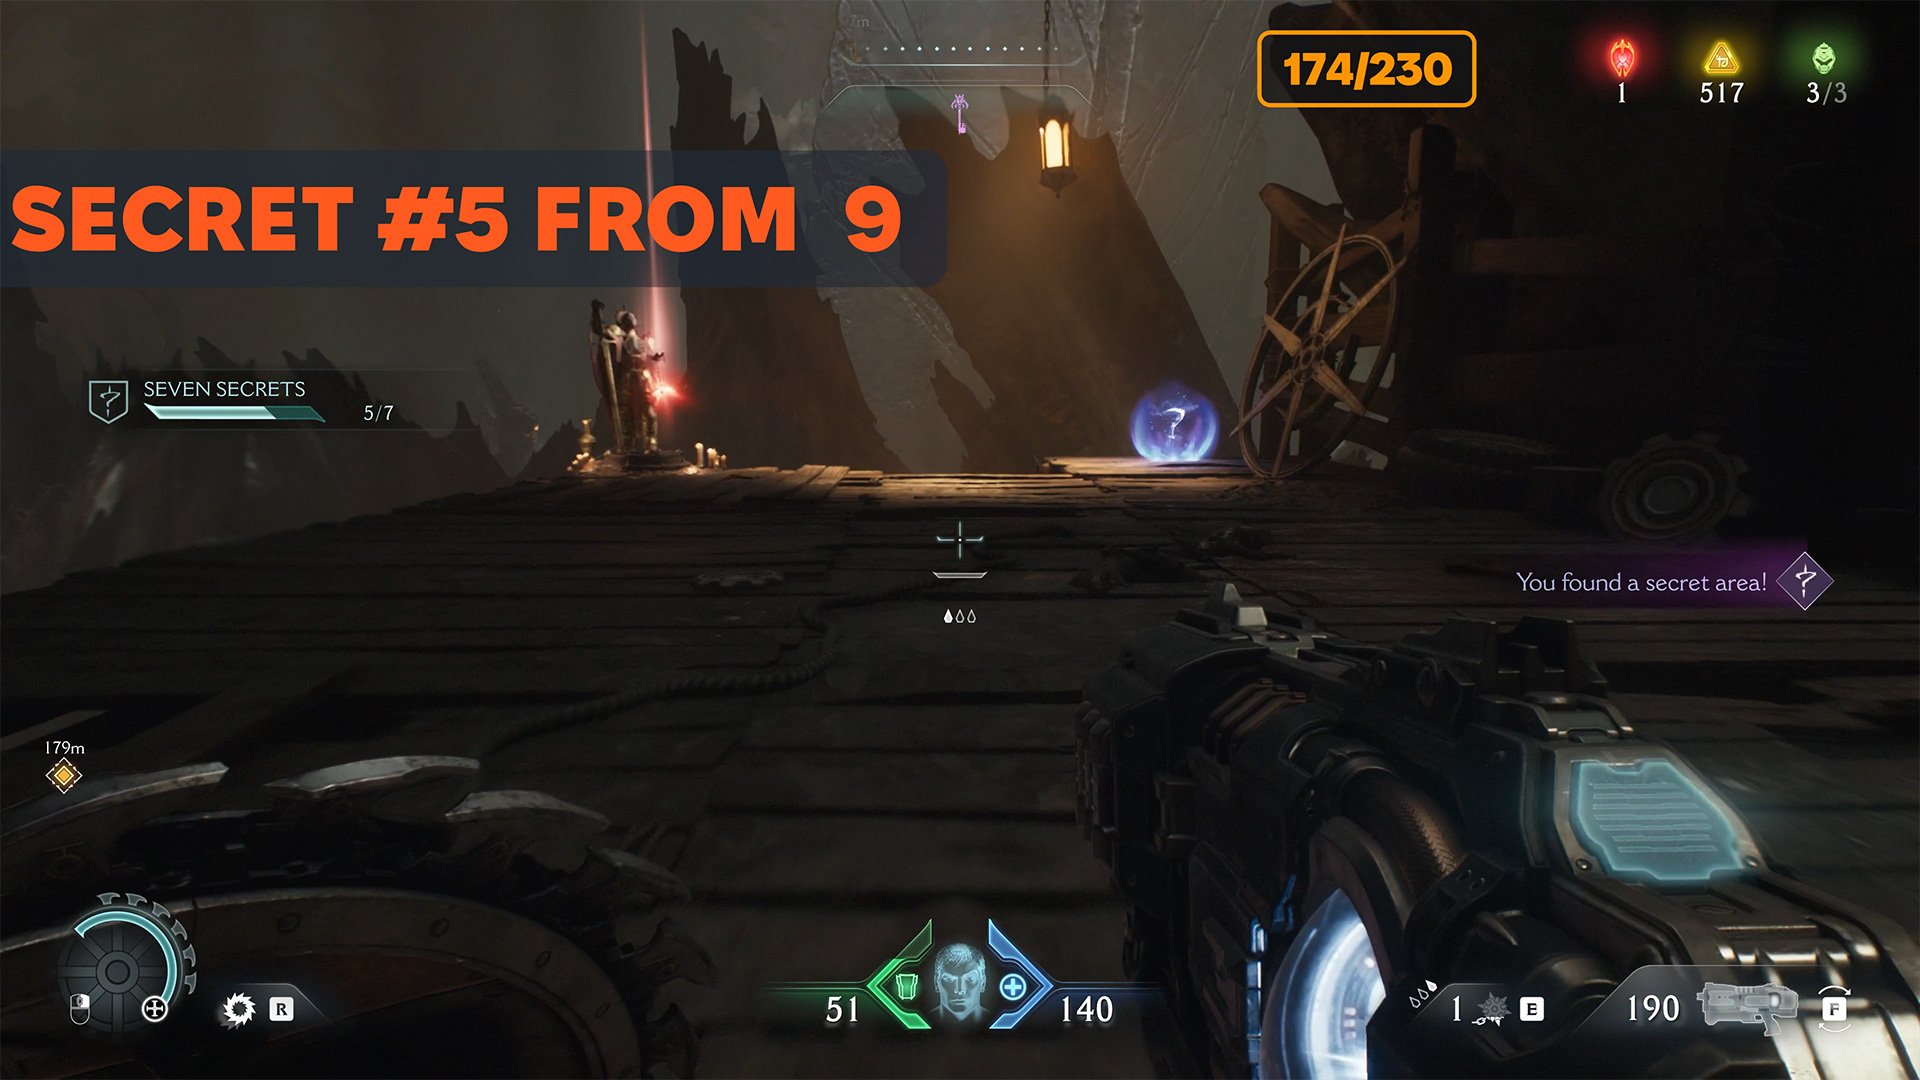
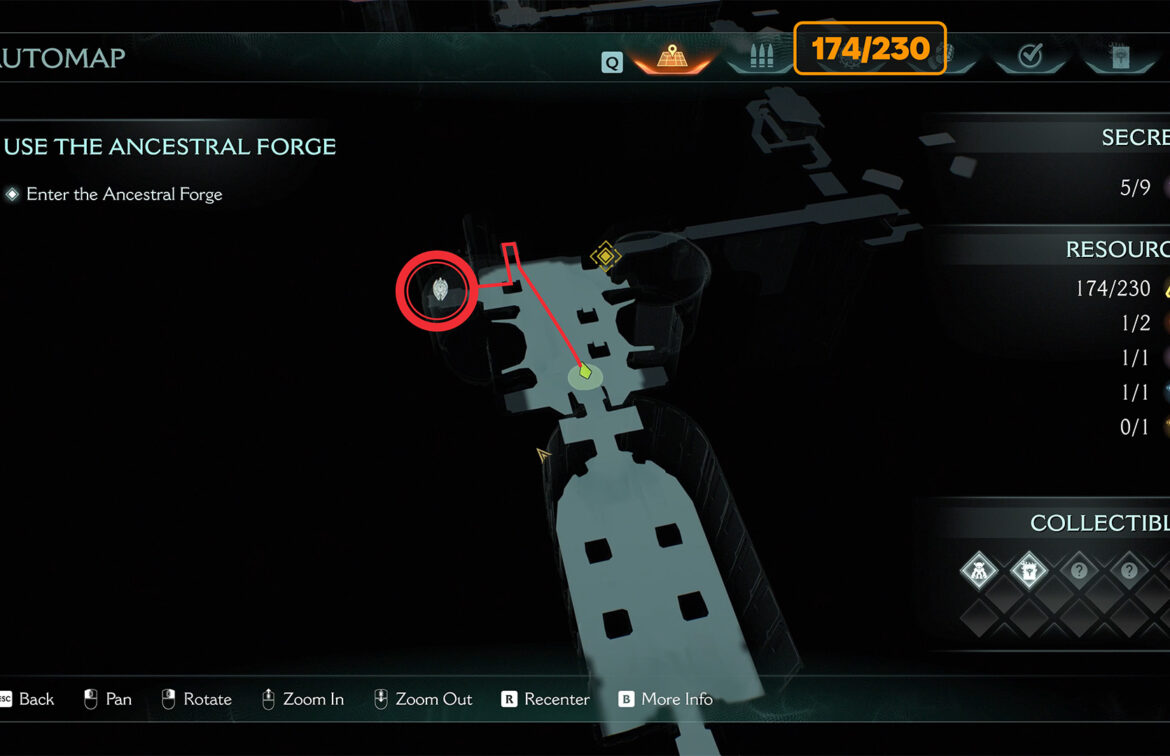
On this platform, you will again encounter a group of enemies that you must destroy. After that, go to the end of the platform. Here you will find the fifth secret area, the Vagary collectible toy, and the first ruby in Chapter 9 – Ancestral Forge. A powerful stash with many collectible items.
-
- Ancestral Forge Toy and Ruby Location
-
- Monster on the way to collectibles
-
- Enemy attacking on the platform
-

- Collectible toy Vagary and ruby
Ancestral Forge second ruby
After you take the elevator down, you will see two rooms in front of you. At the end of the second room, you will see a stone barrier that can be broken. Do so and enter the room behind the barrier. Here, on the left side of the wall opening, you will see a metal connection. Throw your shield at it to break the connection. Now leave the room and you will see a metal grate rising nearby, behind which is hidden the sixth secret location and the second ruby of this chapter.
-
- Ancestral Forge second ruby Location
-
- The secret room you need to enter
-

- Then break the metal connection

-
- Ancestral Forge second ruby
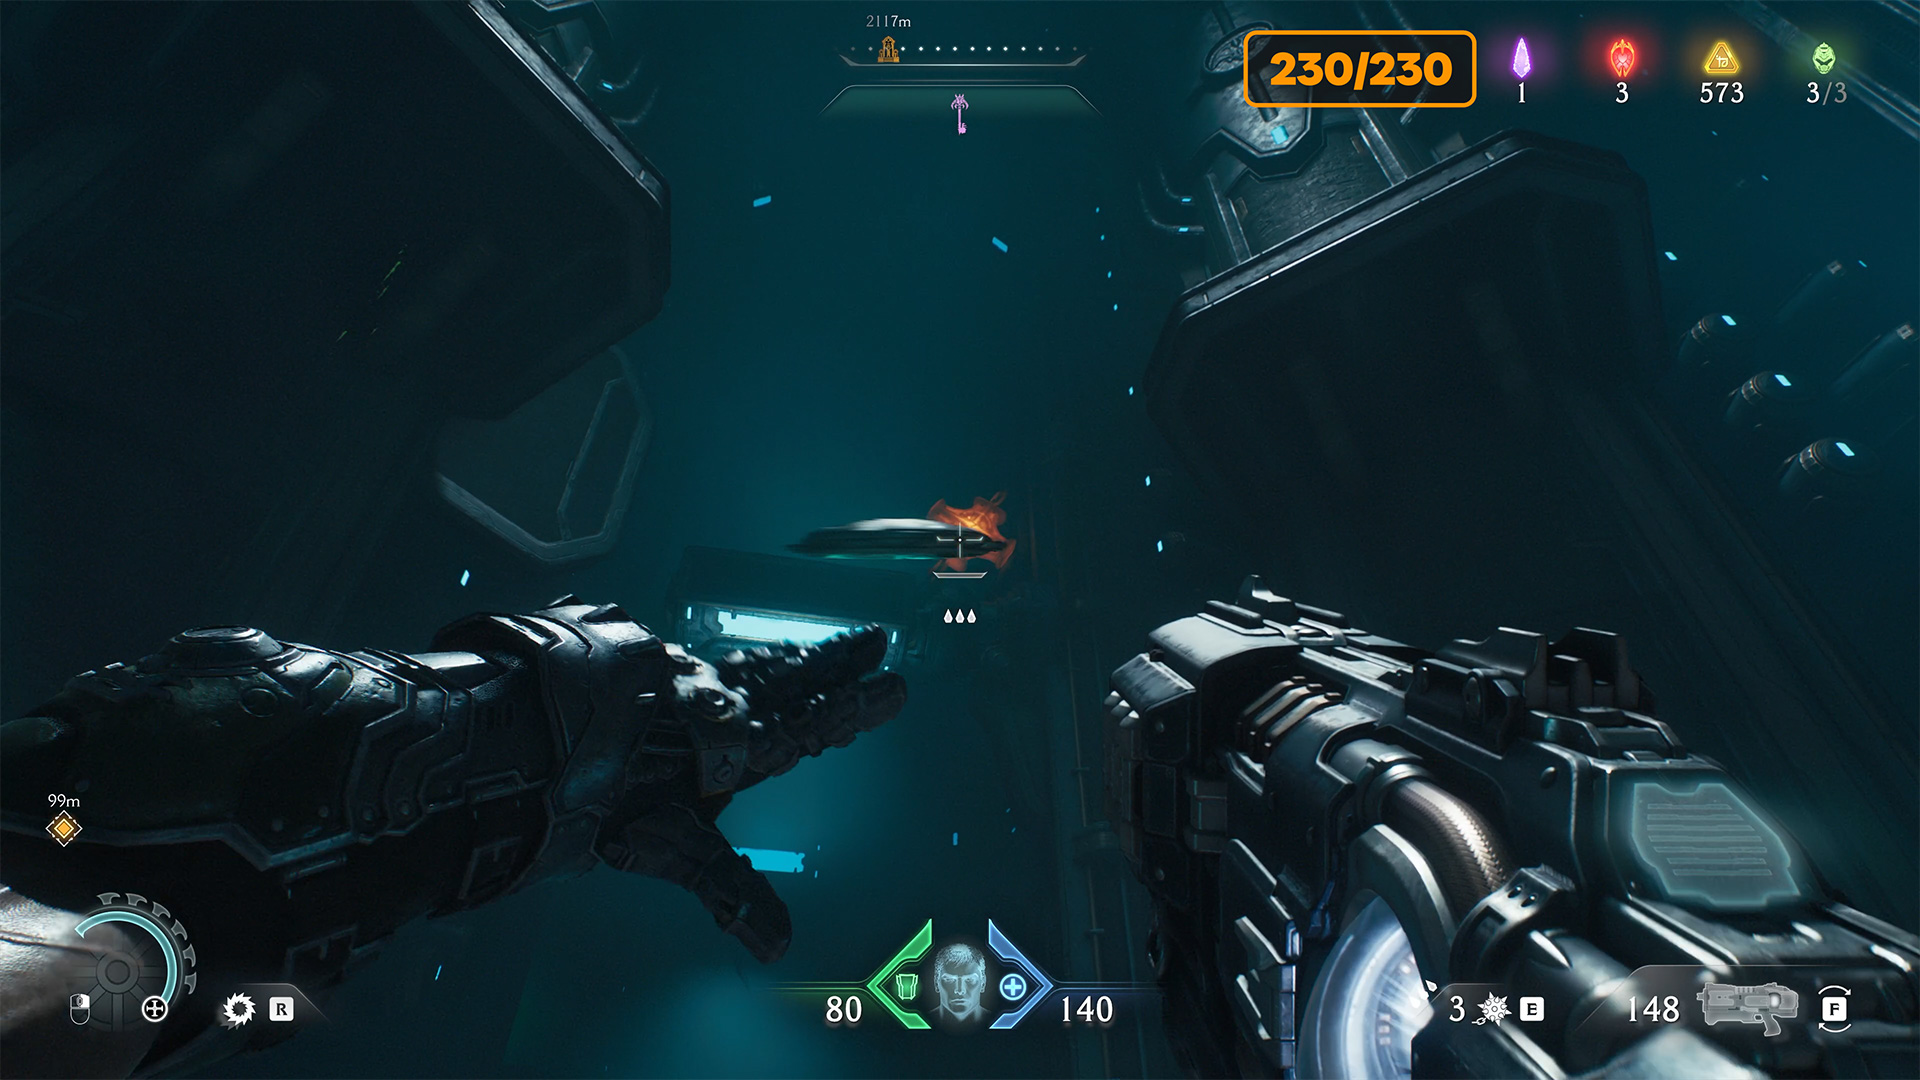
Ancestral Forge last gold chest
Now enter the tunnel. At the end, jump onto the platform below and turn around. You will see a mechanism. Throw your shield into it, and while it is spinning, the mechanism will lift the platform you are standing on. This will allow you to jump to another platform, where you will find a large chest containing 50 gold coins.
-
- Ancestral Forge last gold chest Location
-
- The mechanism that must be activated for the platform to rise
-
- Ancestral Forge last gold chest

Ancestral Forge secret location
Keep moving forward until you reach a wall that you need to climb. You will see 6 gold coins on the map nearby. To get them, climb the wall, move forward a little, jump down onto the ledge, turn around, and you will have access to the room to collect the last 6 gold coins in this chapter.
-
- Ancestral Forge secret location
-

- Jump onto the platform at this spot
-
- The last gold in this chapter
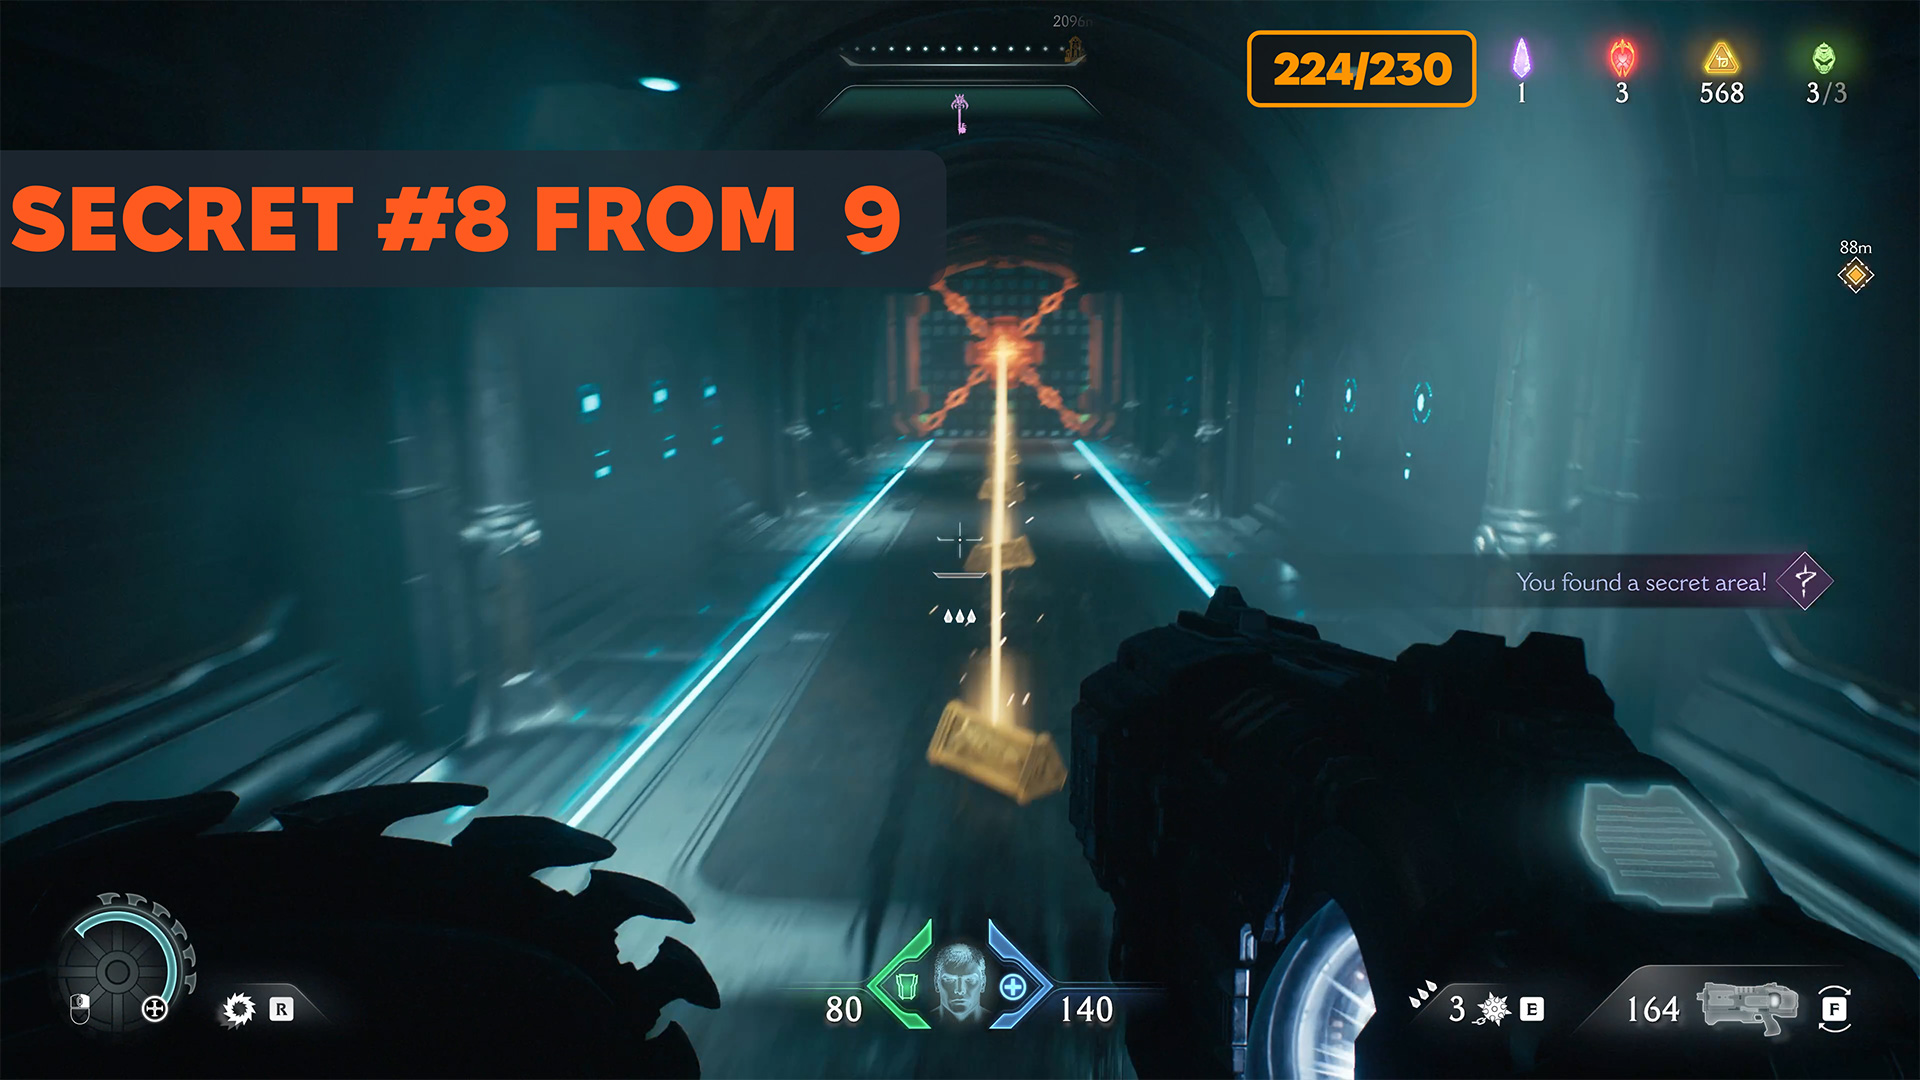
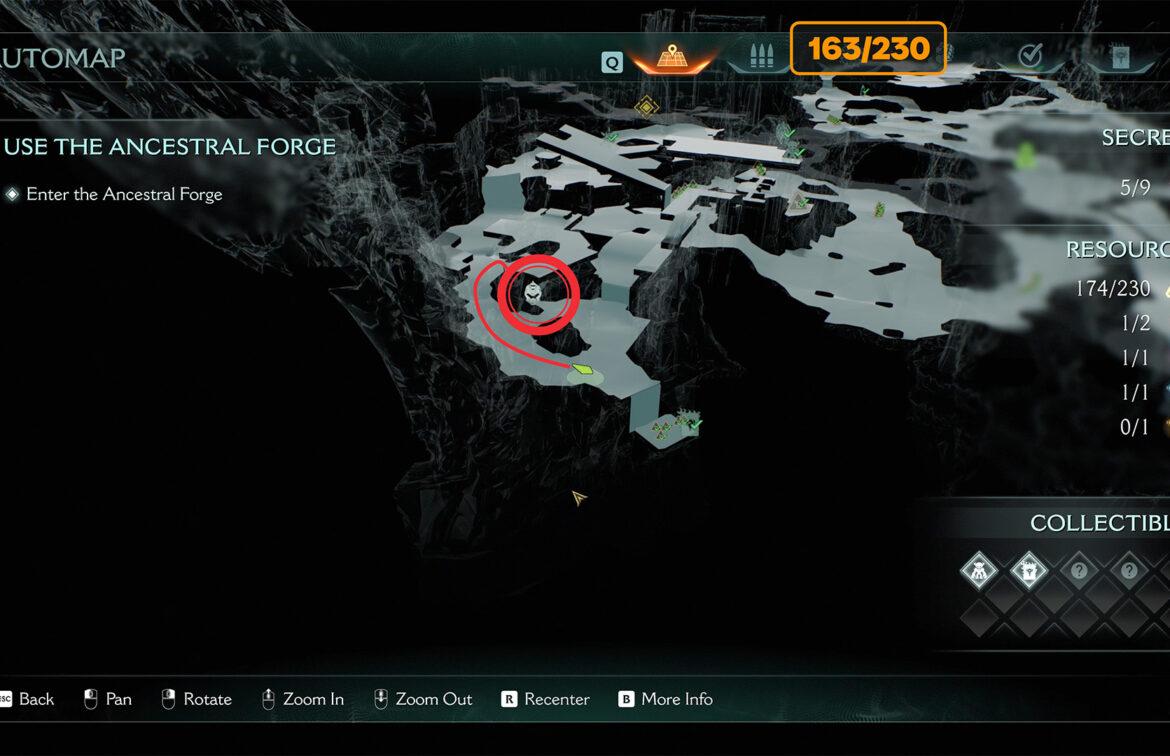
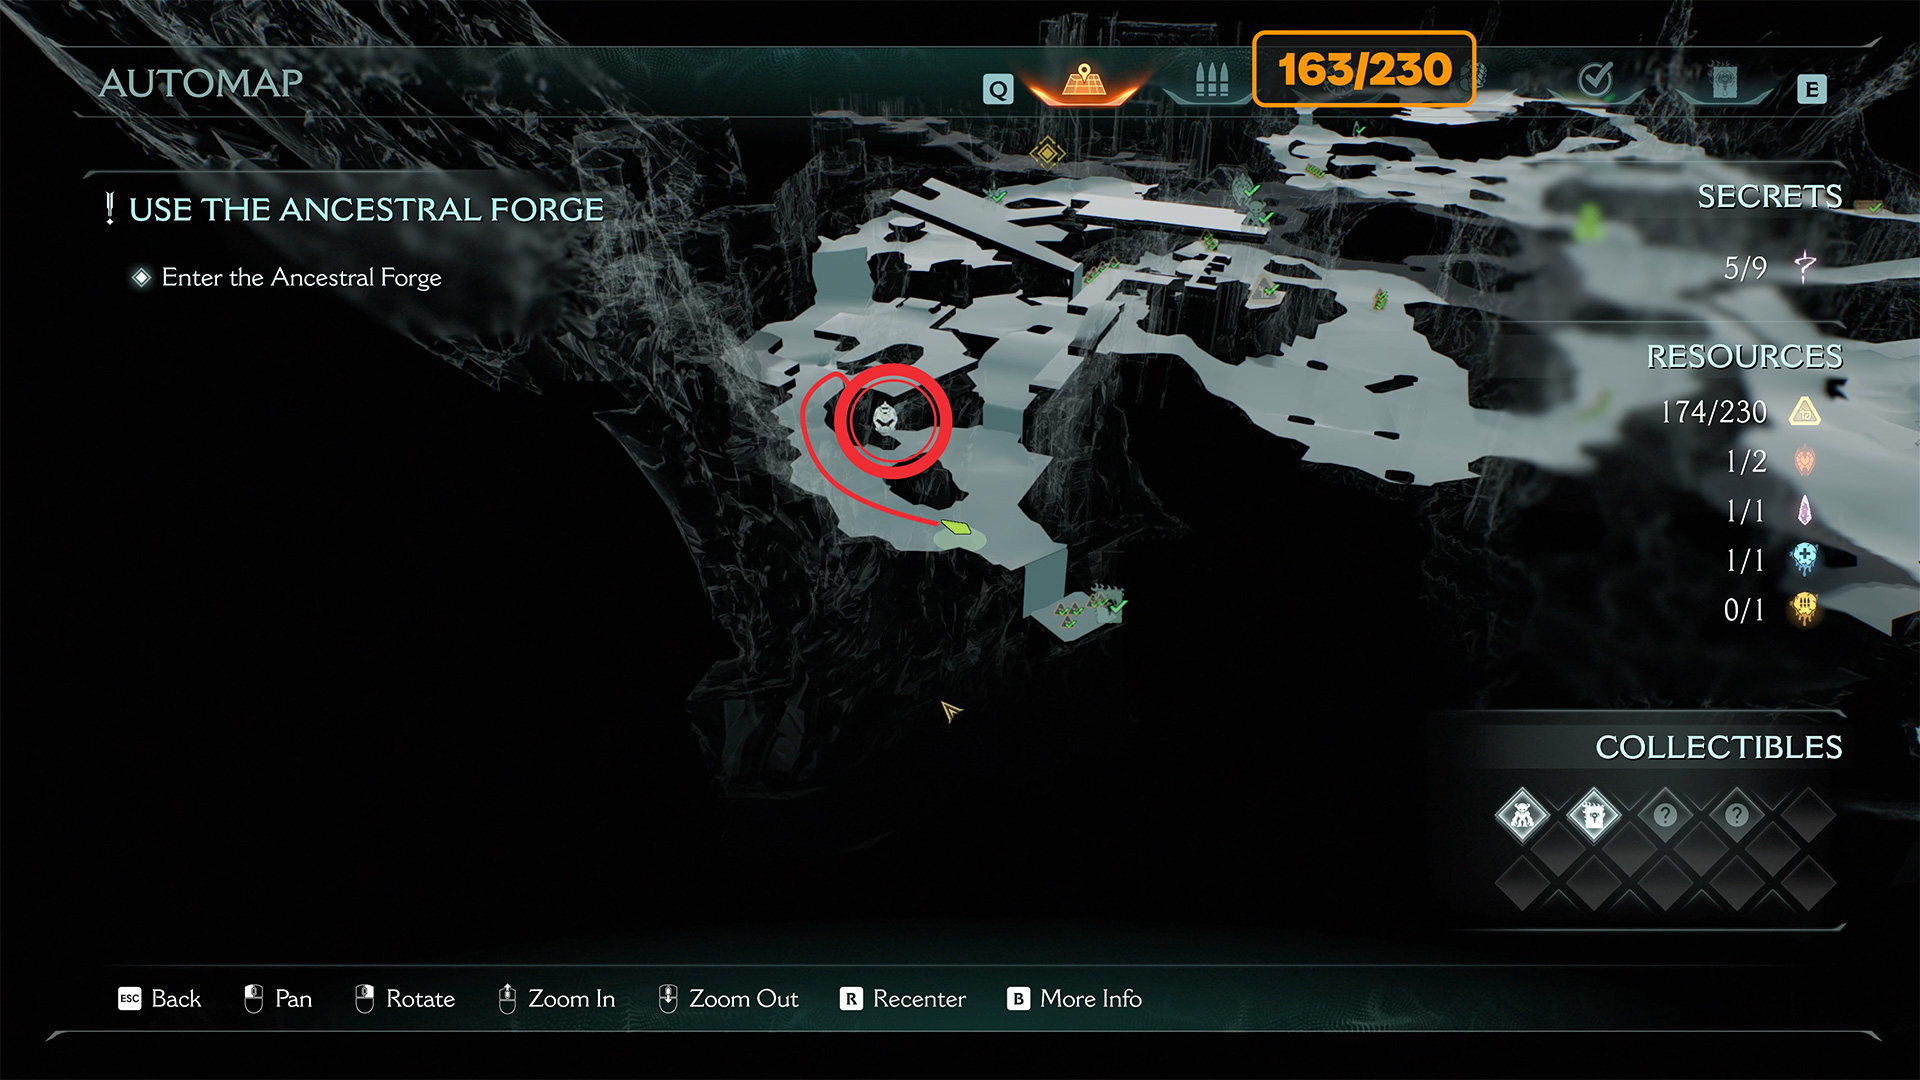
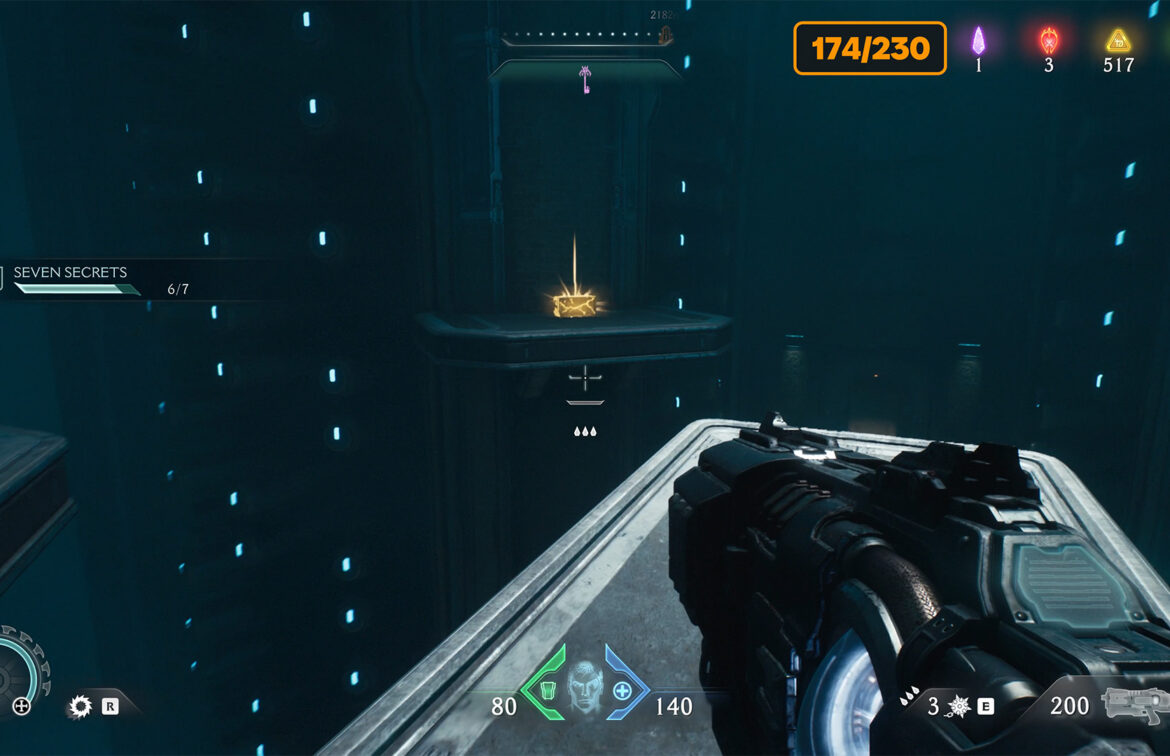
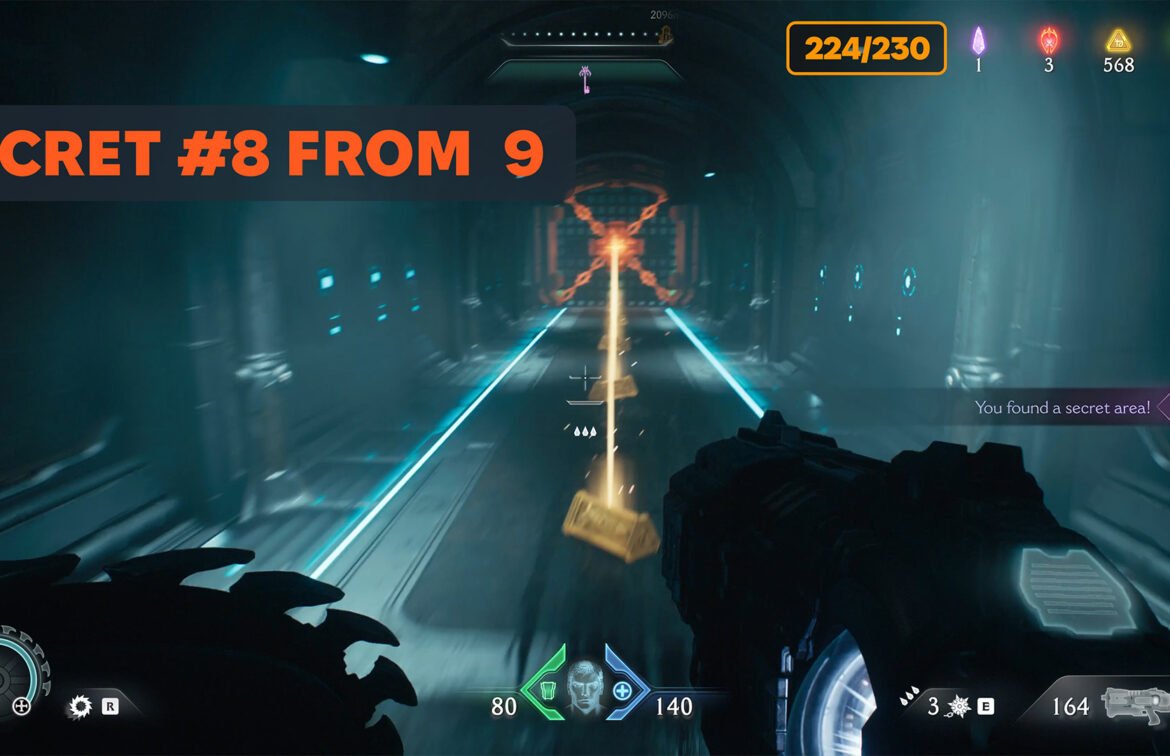
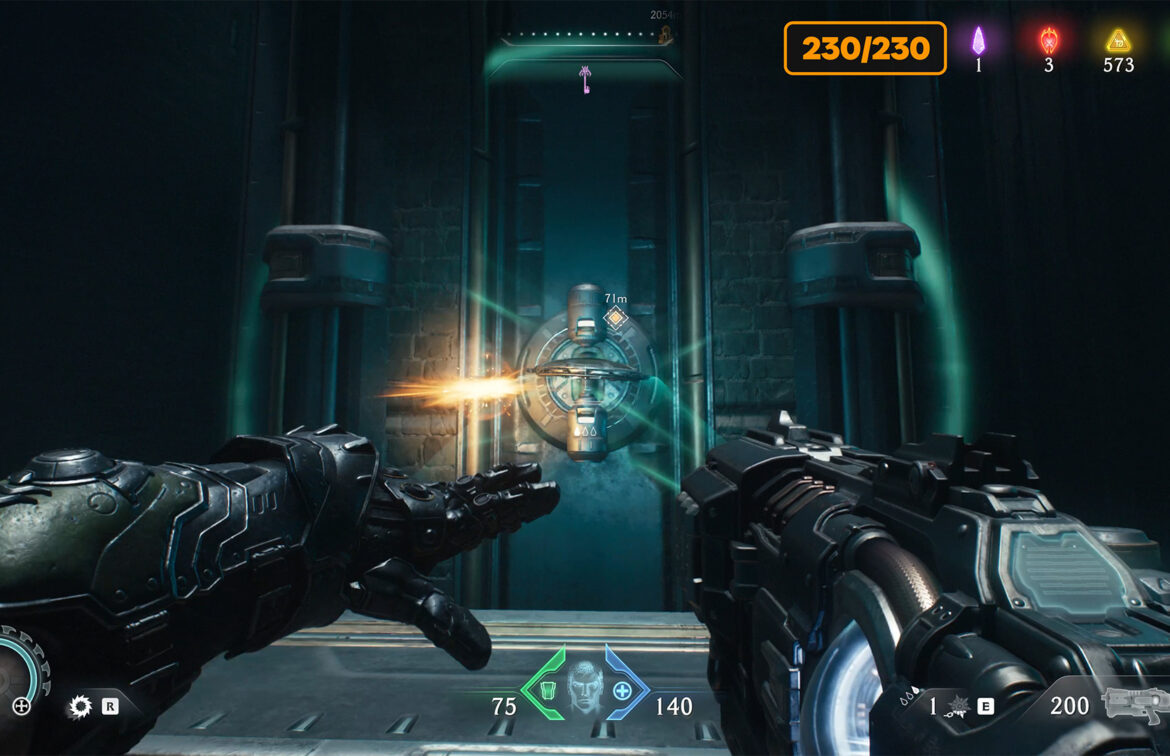
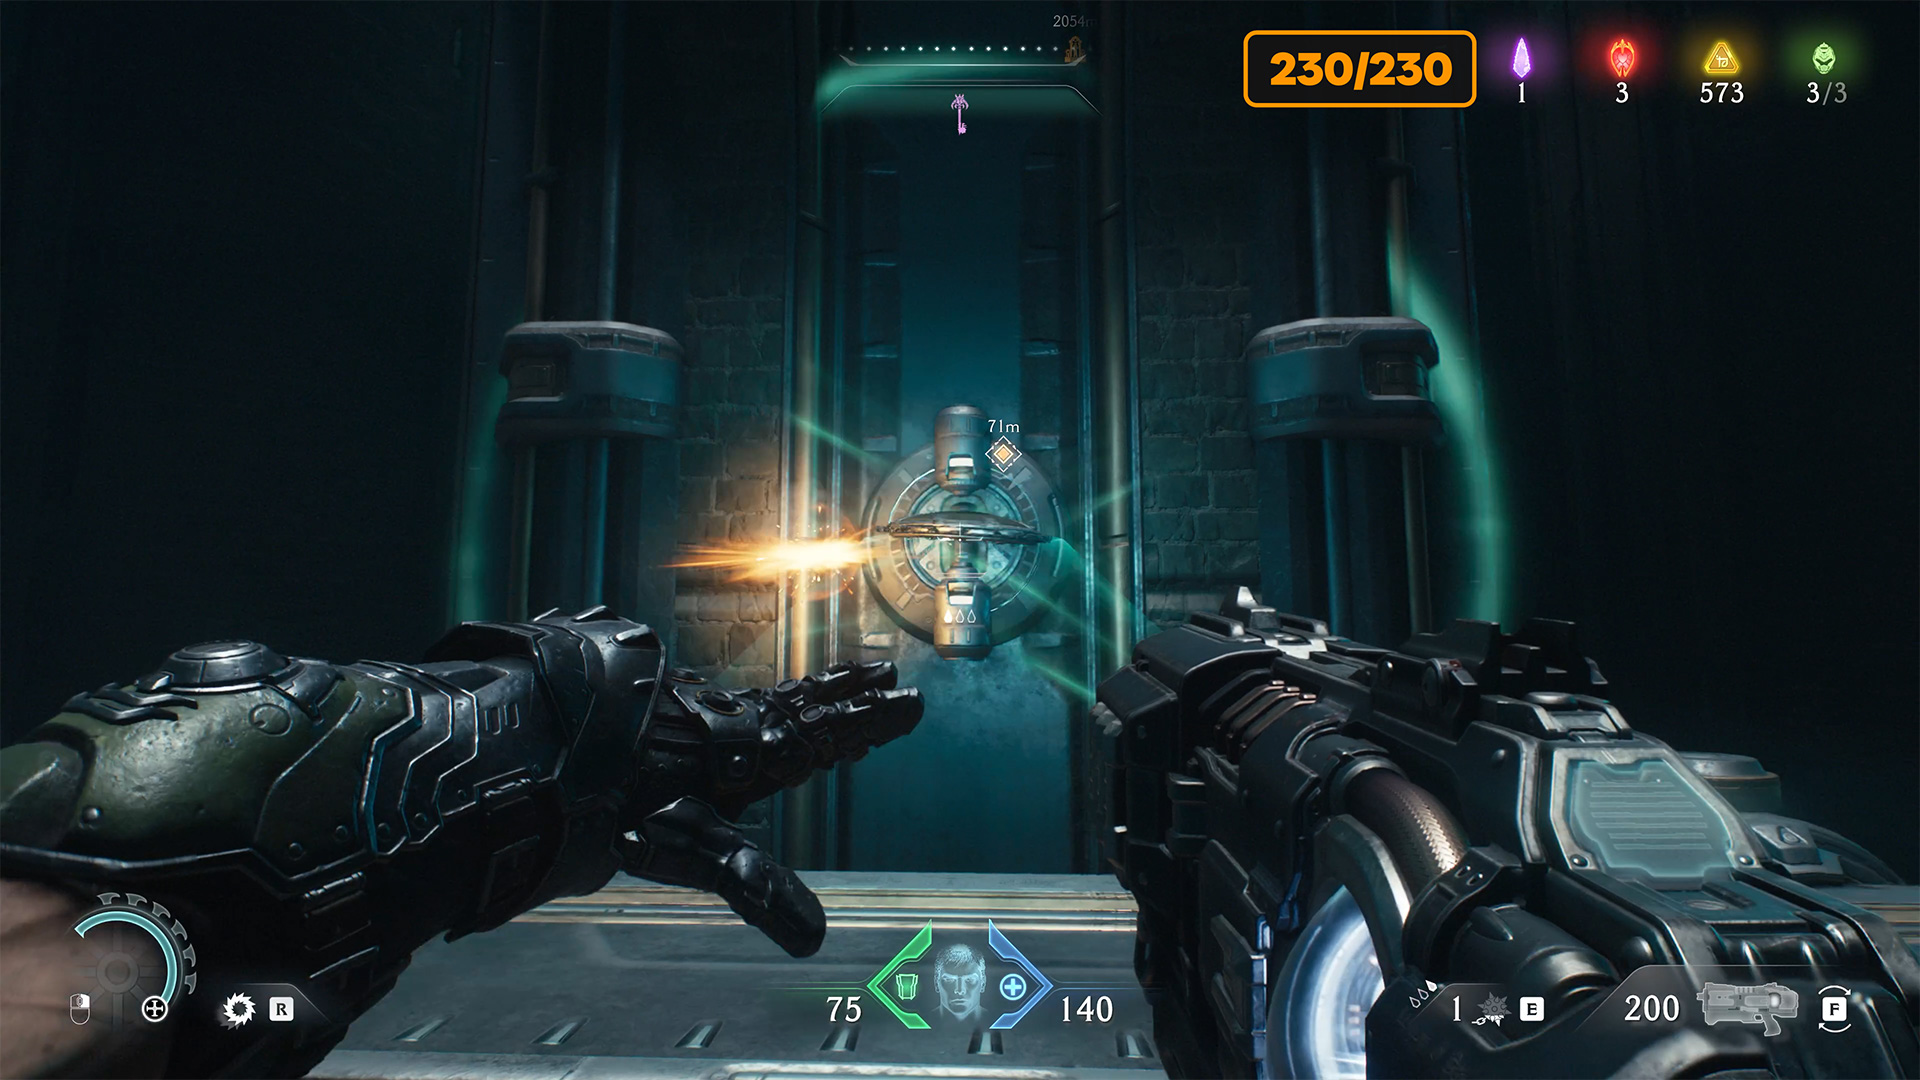
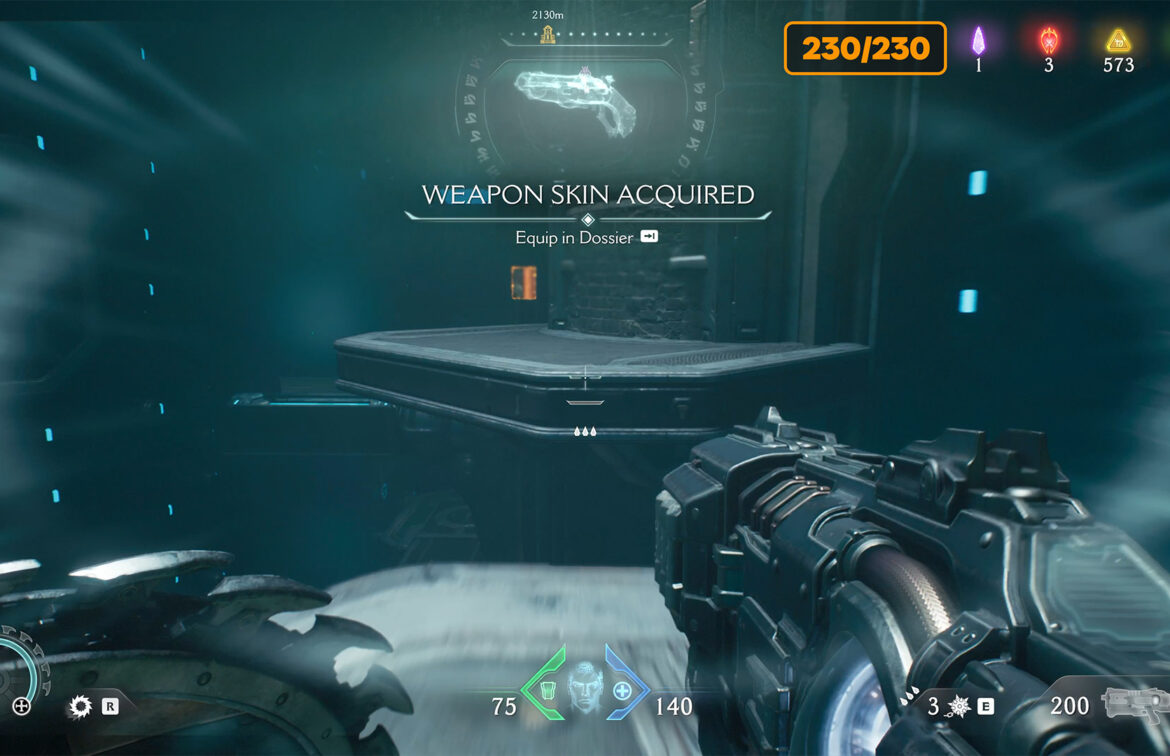
Weapon Skin + Codex Entries + Life Sigil
Next, you will encounter a rather difficult puzzle. At the location I am showing you on the map, you need to throw your shield to break the connection. This action will lower the platform in front of you. Jump forward under this platform. Here you will see a mechanism on the wall. Throw the shield at it, and while the shield is spinning in the mechanism, the platform will rise.
Now turn to the left, and you will see a green statue in front of you. Throw the shield at it and jump after it. You will see another platform where the Life Sigil will be. Jump there. Now turn around and you will see another green statue. You know the procedure: throw the shield at the statue and jump after it to reach that platform.
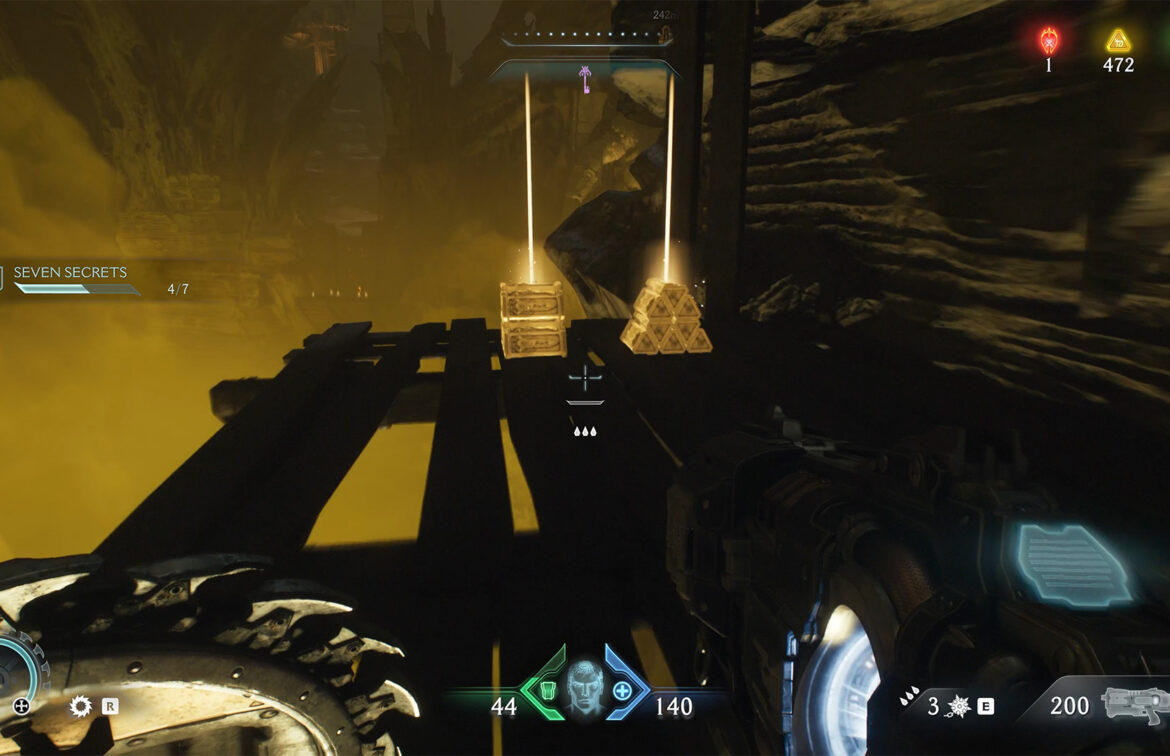
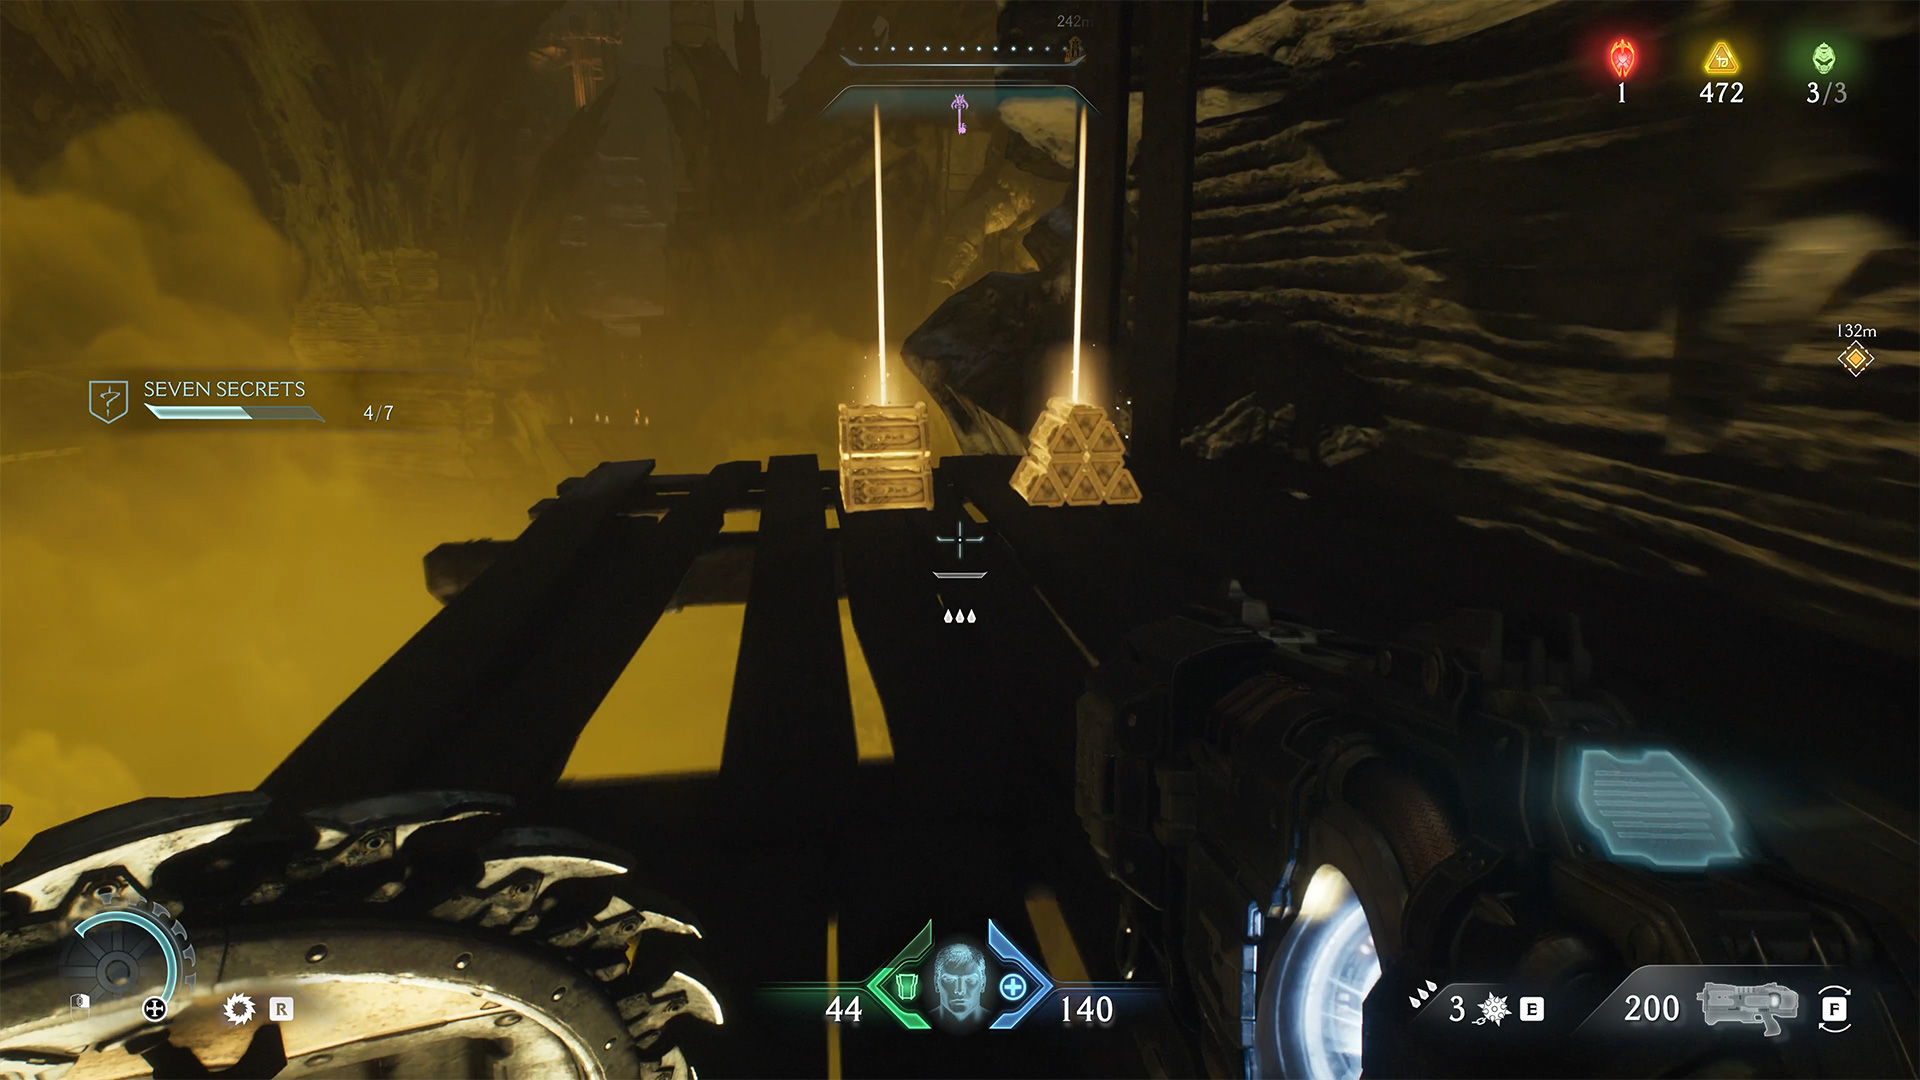
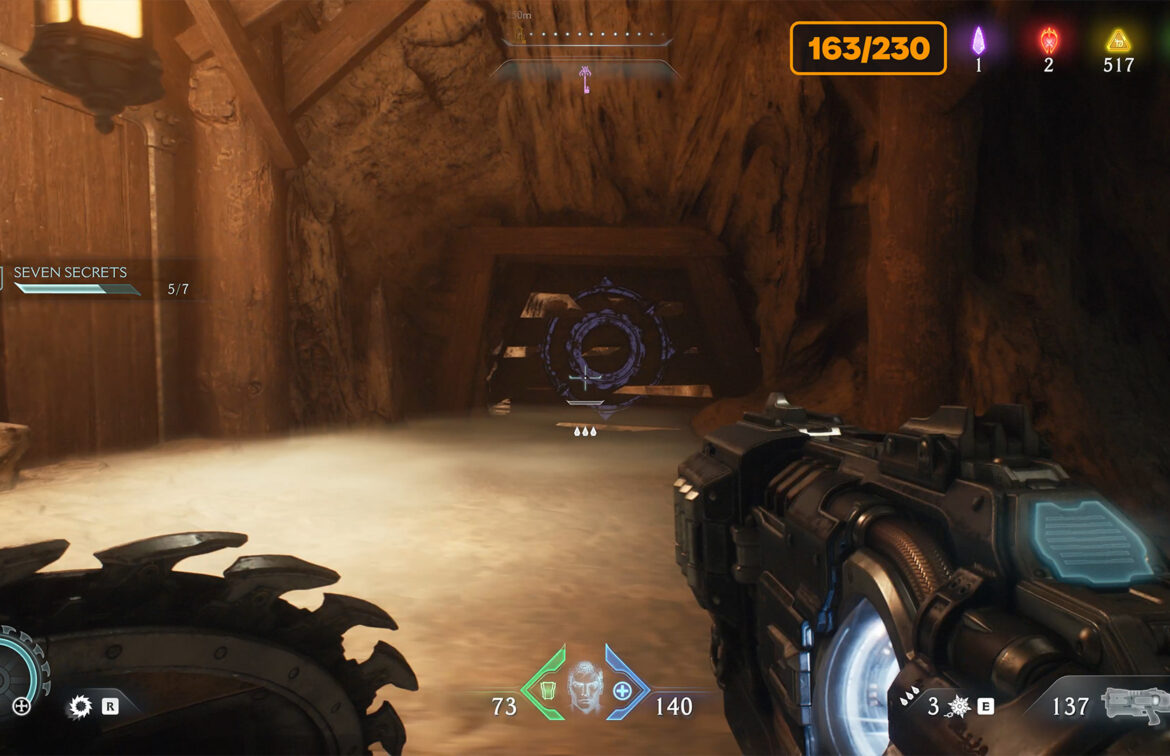
This is the last ninth secret in this chapter, and here you will find the Weapon Skin. There is another platform nearby. Jump there and you will get the second page of the codex.
-
- The last difficult puzzle in Chapter 9
-

- Throw the shield to lower the platform
-
- Lock the mechanism to raise the platform
-
- Throw the shield at the green statue to jump there
-
- Throw the shield to lower the platform
-
- Here is the weapon skin and the last page of the codex

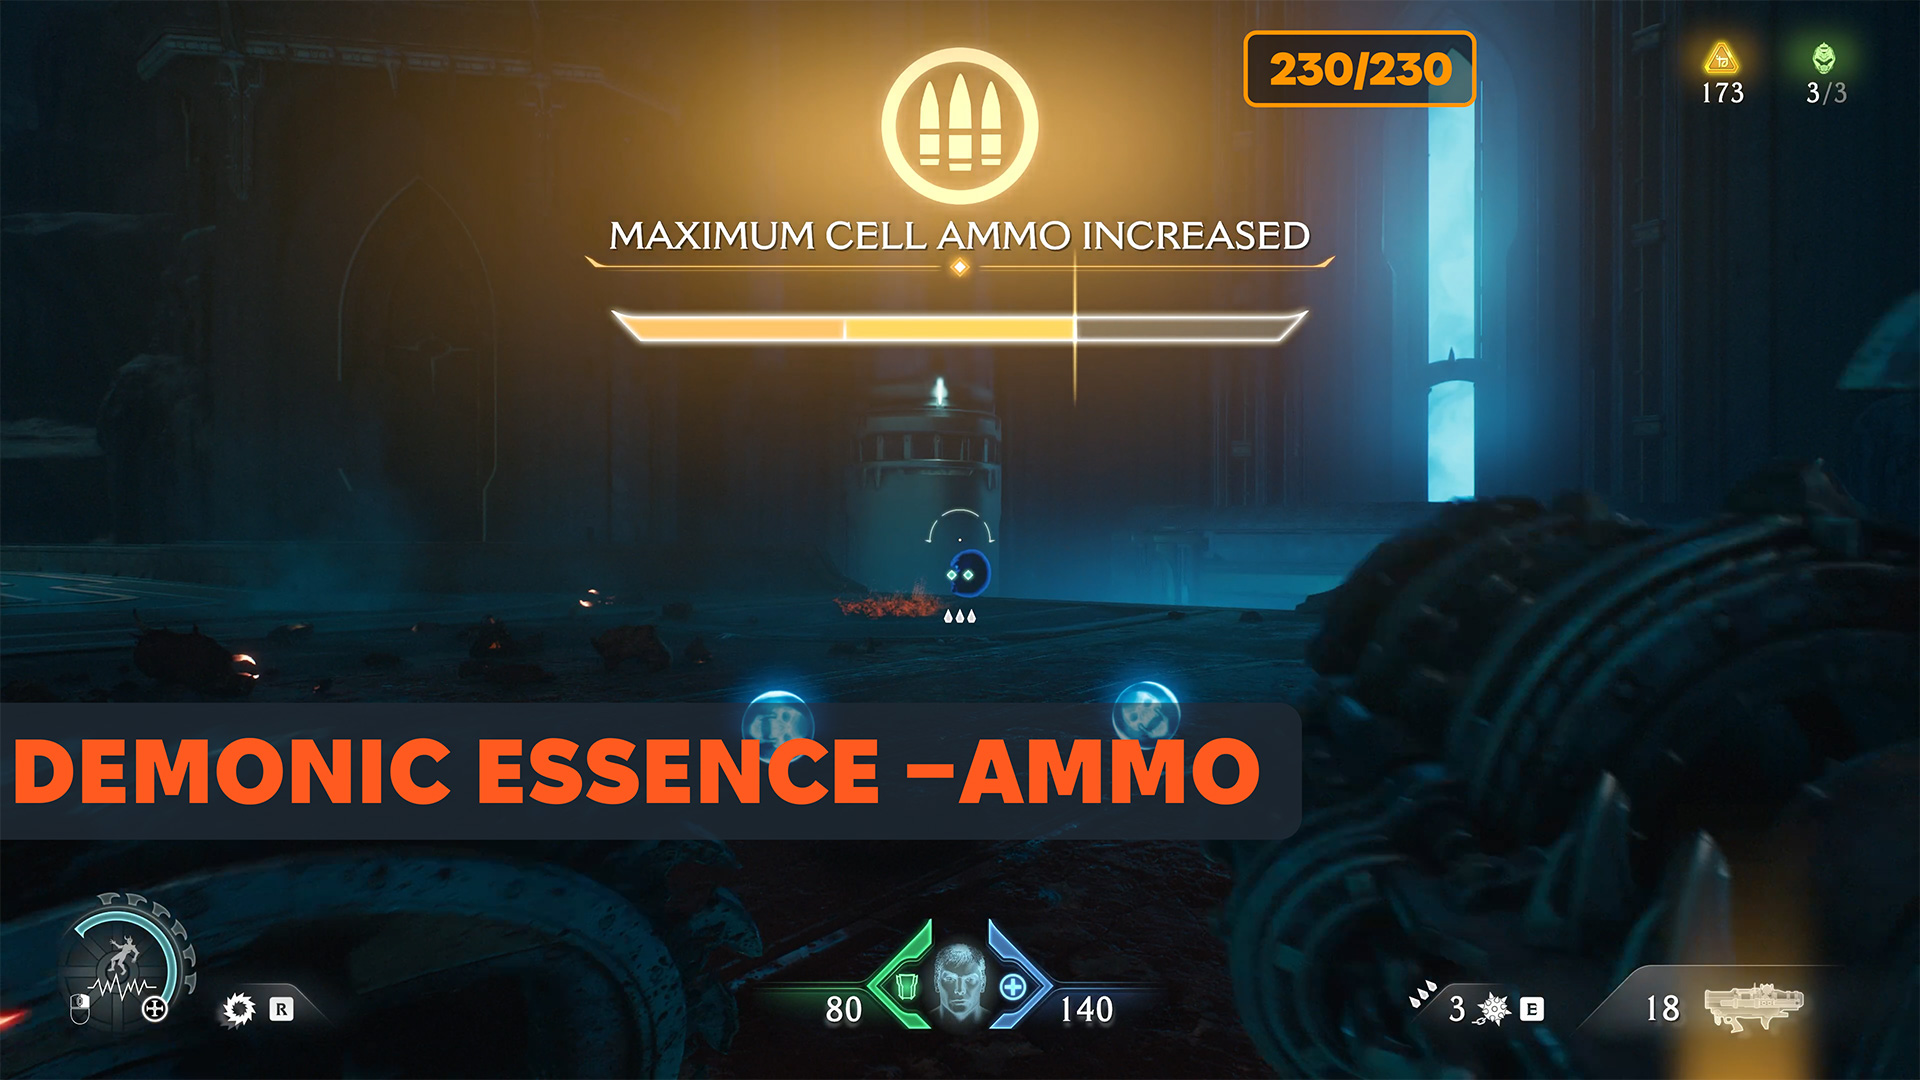
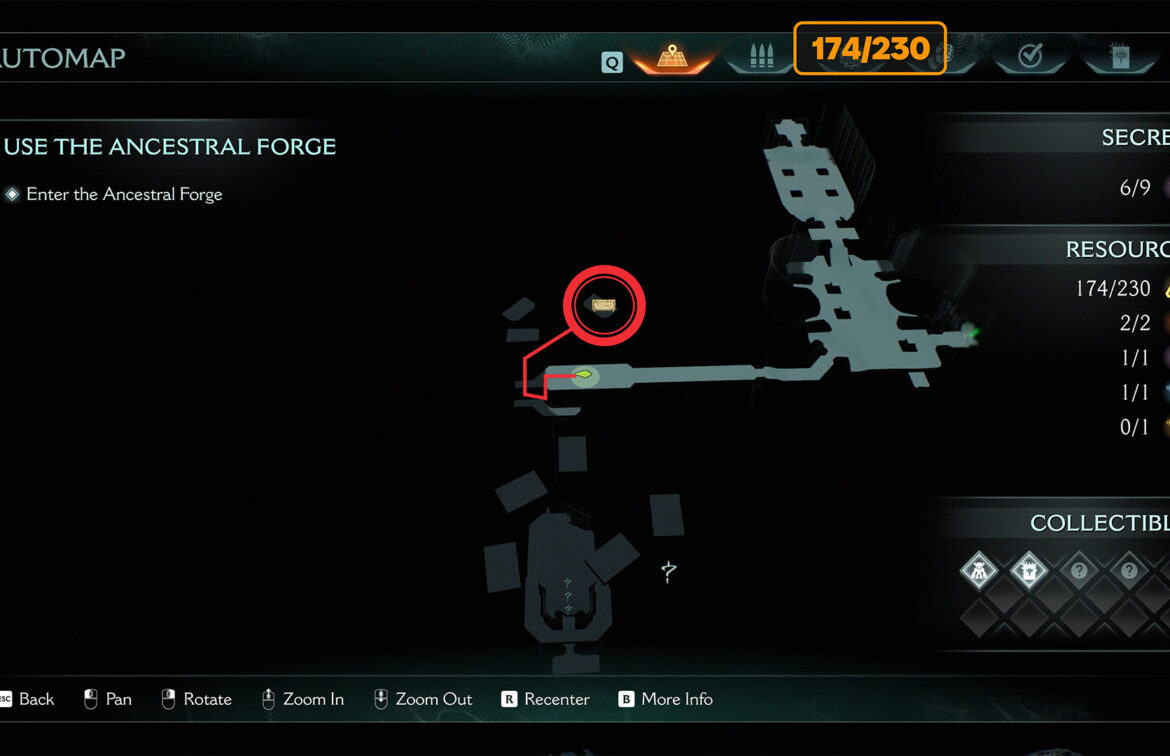
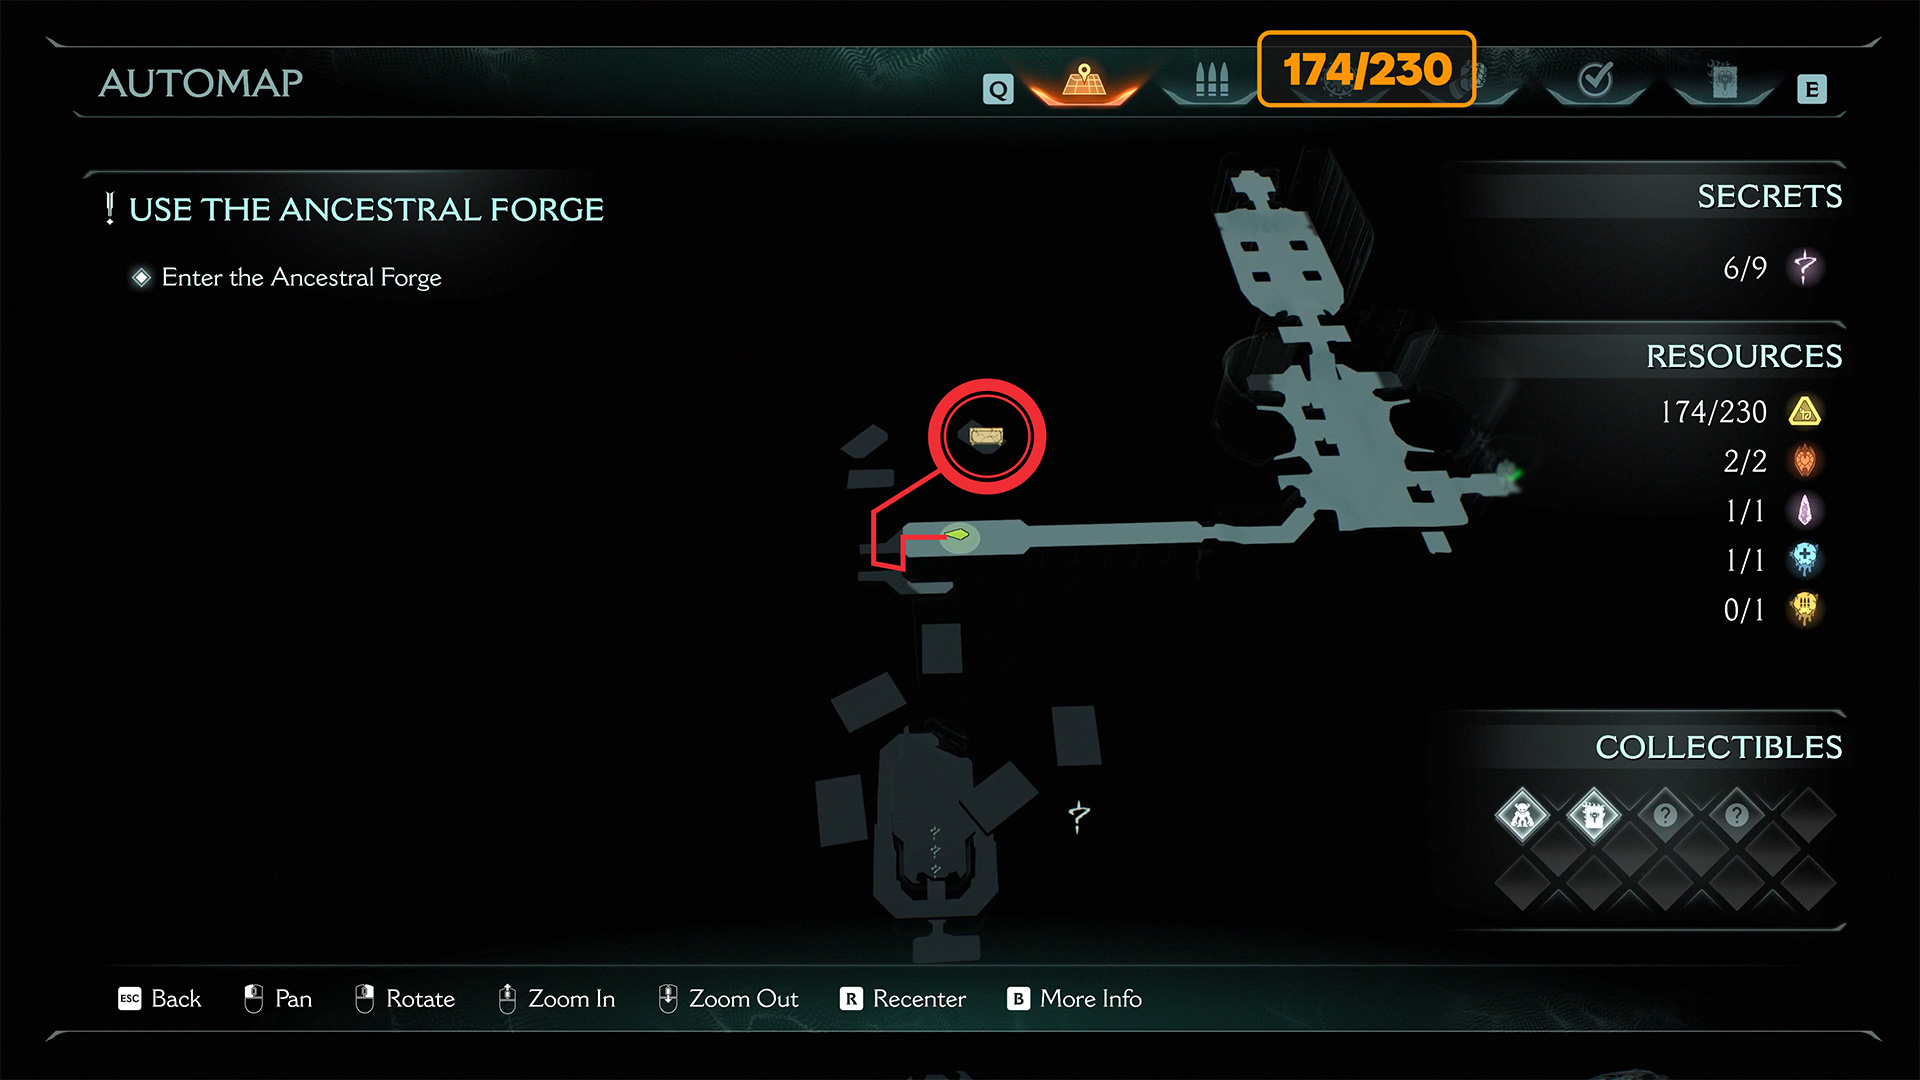
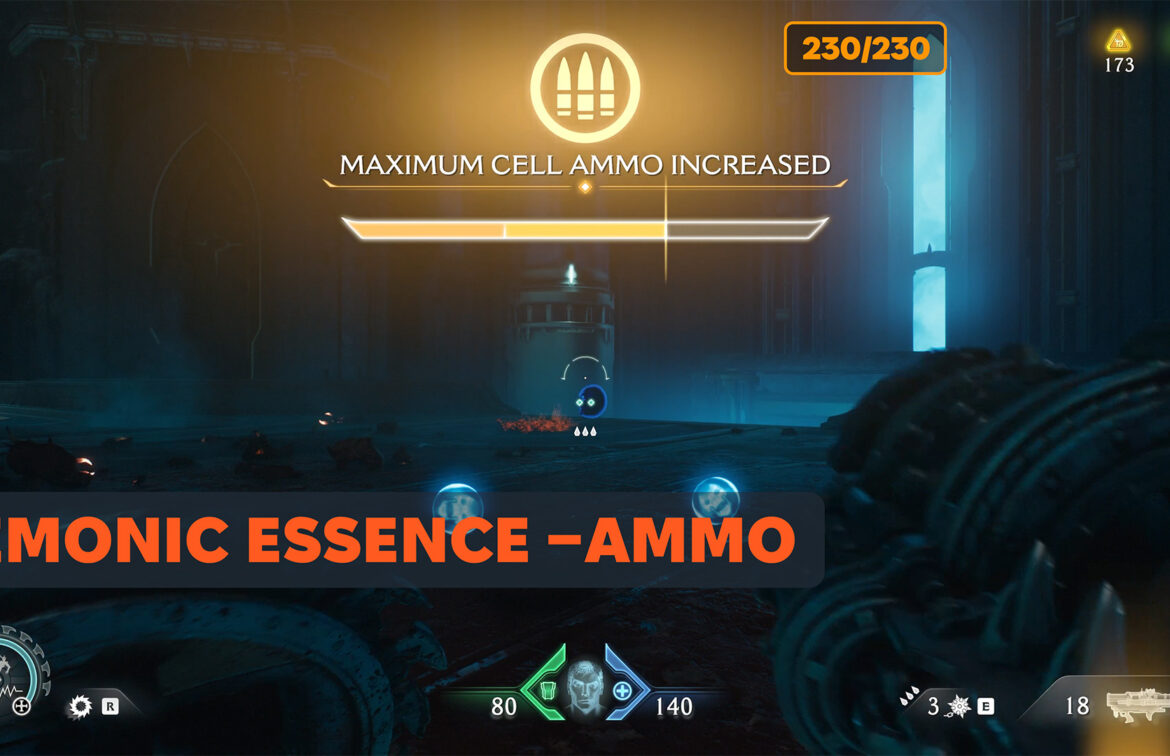
Ancestral Forge Demonic Essence Ammo
Now proceed to the final boss of this chapter. After defeating him, you will automatically receive Demonic Essence – Ammo. This concludes the collection of all collectibles and gold in this chapter. If you found this video helpful, please like and subscribe. I also recommend watching my videos about all the other chapters of Doom The Dark Ages, where I explain how to complete them 100%.
-
- Demonic Essence Ammo location
-
- Ancestral Forge Demonic Essence Ammo